Having a good studio setup is the key to any great product photograph — and no, I’m not talking about any fancy equipment!
The most expensive lights in the world won’t do you any good if you don’t know what you’re doing. So, rather than putting all your money towards camera equipment, spend a few minutes to read over these tips and you’ll be able to set up a simple but effective studio for jewelry photography.
1. Shoot against a white backdrop
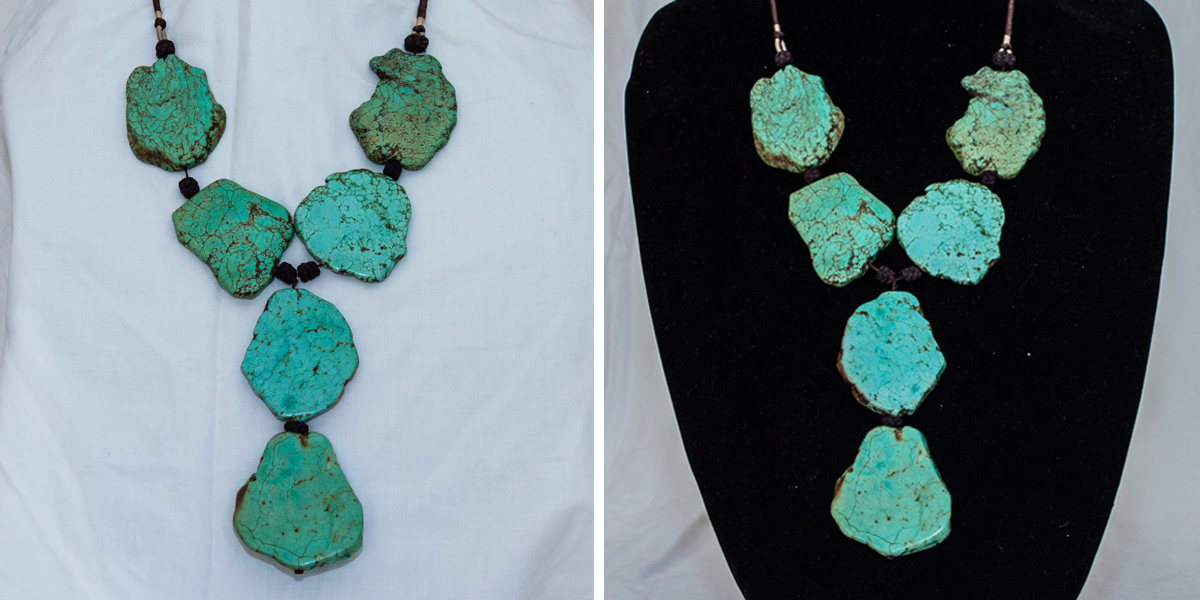
Taking a photo is all about understanding light and the ways in which it reflects off your product as well as the objects around it. White is the best choice for jewelry photography because it reflects light back onto the product, giving you a well-lit and perfectly contrasted image.
Black may sometimes seem like a good backdrop, but it actually is not. Black jewelry stands and busts generally look better in real life because they add an element of sophistication and make delicate pieces ‘pop’. However, when it comes to jewelry photography, a black backdrop will absorb all the light around your product. This tends to leave unflattering reflections and produce images that aren’t very sharp upon closer inspection. If you only have a black jewelry stand or bust, just cover it with a white cloth or sheet — you won’t be able to see it when you remove the background anyway.
2. Set up a sweep for your jewelry photography
Ideally, you want your white backdrop to transition seamlessly from the vertical plane to the horizontal surface. You can do this by sticking the top of your backdrop to a wall and just letting it fall down, but this will only work if your windows and walls are perfectly positioned in relation to each other — the window would need to be very close to the intersection of the two walls.
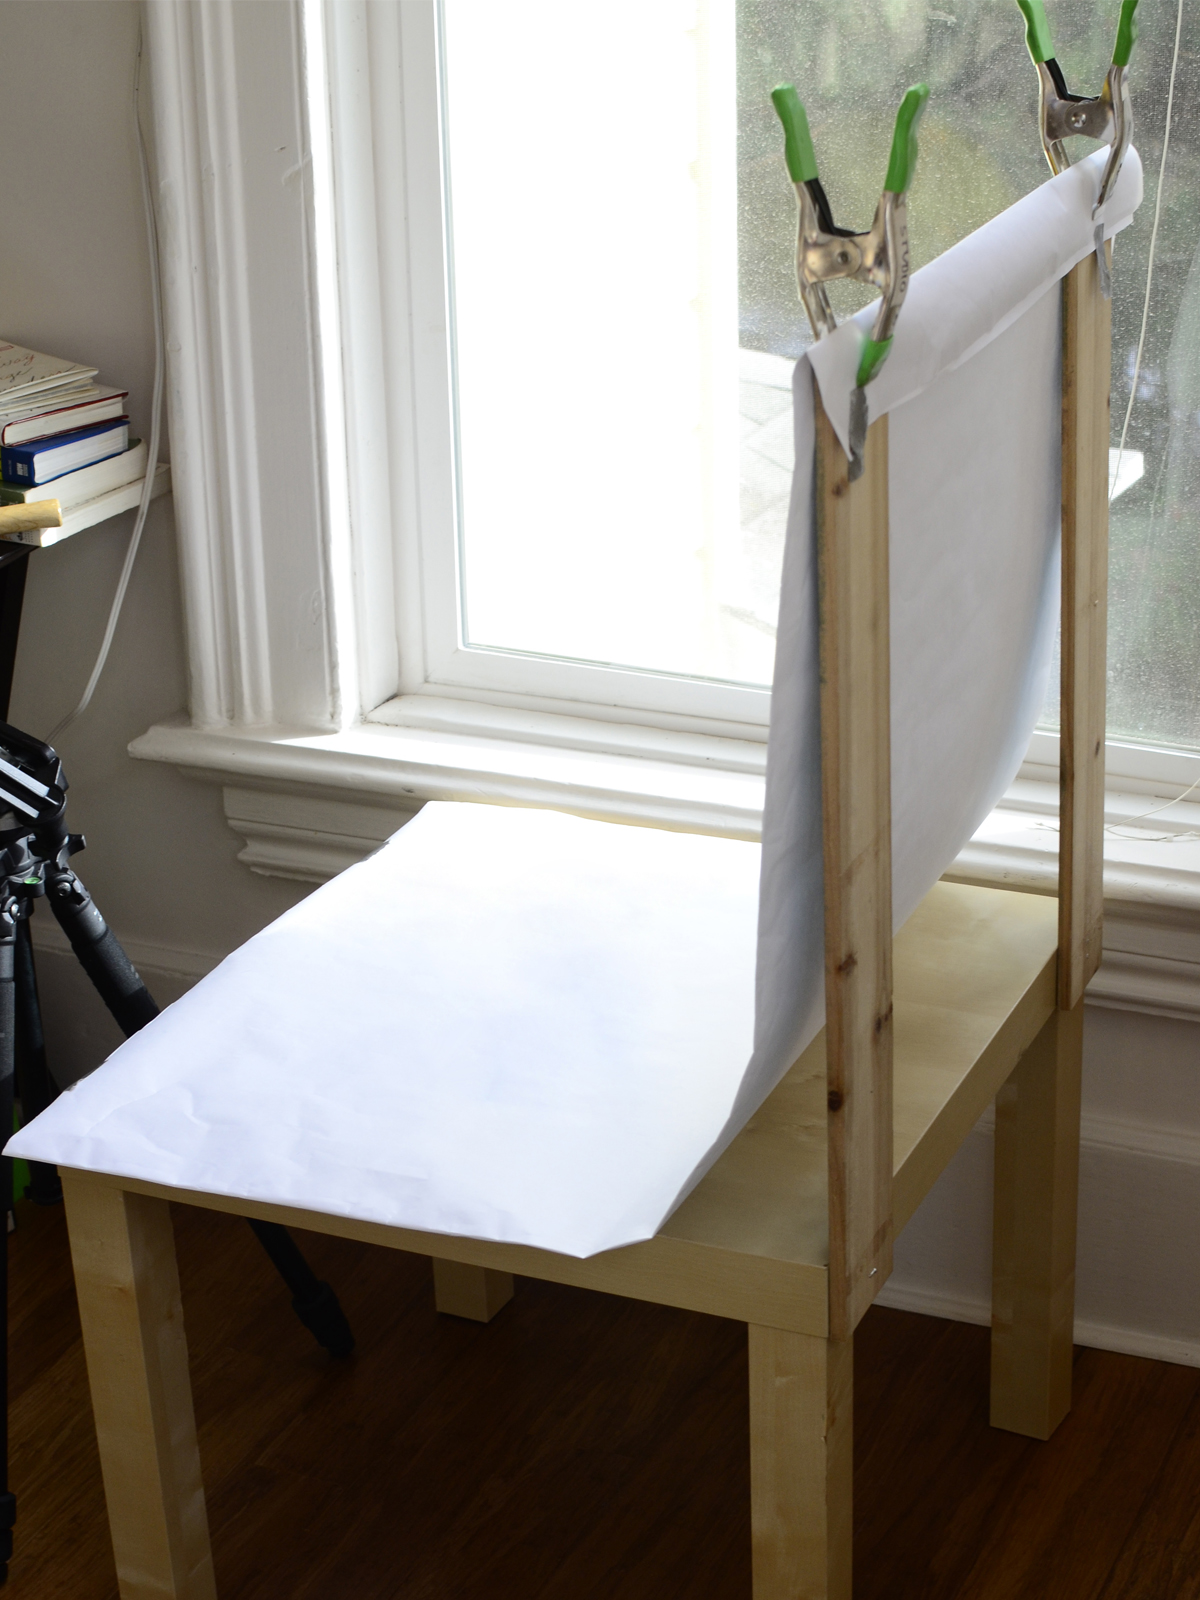
You’re going to need more flexibility and more control with your light sources when photographing jewelry. I highly recommend creating a sweep out of a table and some simple hardware tools as part of your studio setup.
All you need to do is find a simple square or rectangular table, two pieces of scrap wood (about two feet tall), spring clamps that you may already have handy in your toolbox, and some white paper. Nail your wood strips vertically to the table, clamp the roll of paper at the top of the wood and ta-da! You can now take clean and professional images!
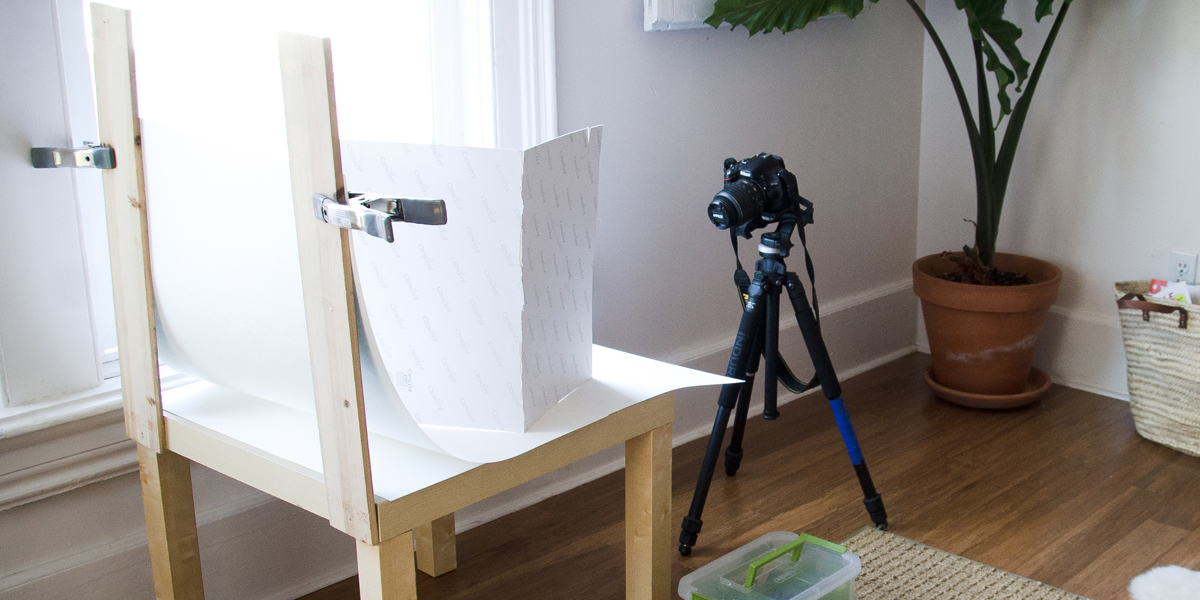
3. Shoot by a window
Using the natural light from a window or even placing your studio setup outside will likely provide you with the most flattering light source.

Mixing light sources, like using a lamp or an overhead light, will throw off the color in your product. For best results, shoot in the morning (if your window faces east) or late afternoon (if your window faces west). This way you’ll have ample light coming through the window. Remember, try to avoid shooting too early or too late in the day to avoid the ‘golden hour’ glow and harsh shadows.
If you want to know more about perfecting your natural lighting photography, our list of natural lighting DOs and DON’Ts might help you.
4. Use a reflector
With the sun coming in from the window in one direction, use a reflector as a fill light on the opposite side of your product to even out the shadows on the other side. Using a reflector creates more light without mixing any light sources because you’re still using the sun! You’ll need to play around with the angles to see what works for you.
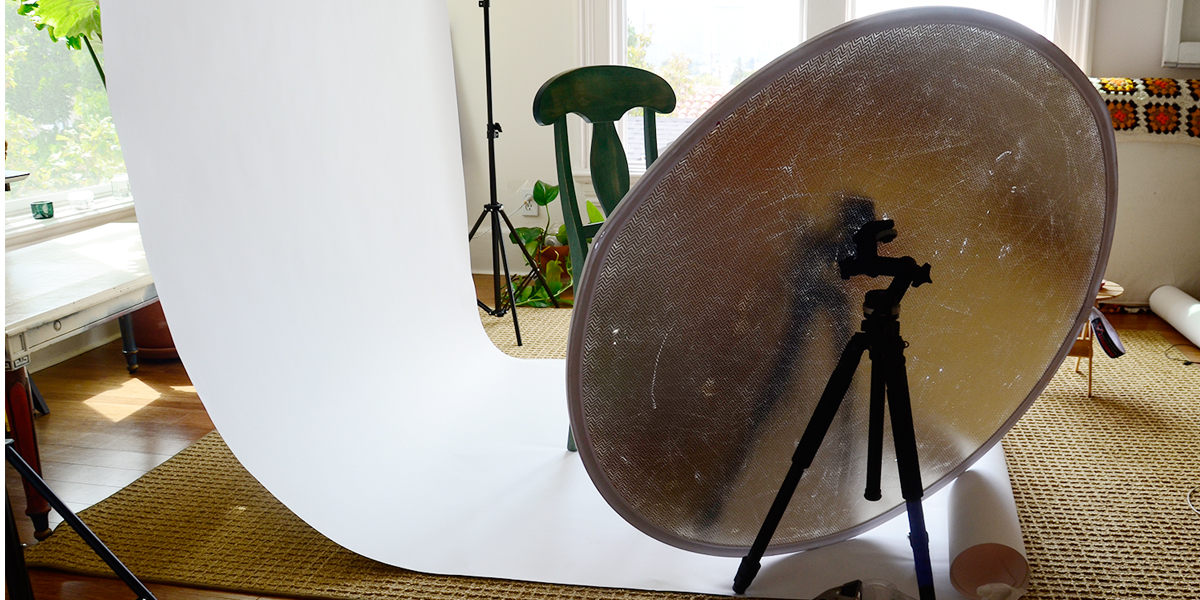
You can also create your own DIY reflector. Try using something flat and white (paper, cardboard, foam board, etc.). If you have spare hands, you can use multiple reflectors on the top, sides or wherever you see unwanted shadows. Harnessing the power of the sun is one of the best ways to improve your jewelry photography.
5. Use a tripod
Jewelry photography is all about showing off the details, and you’ll need sharp and crisp photos to do so. You need to steady your camera and avoid camera-shake; the best way to do this is to get a tripod.
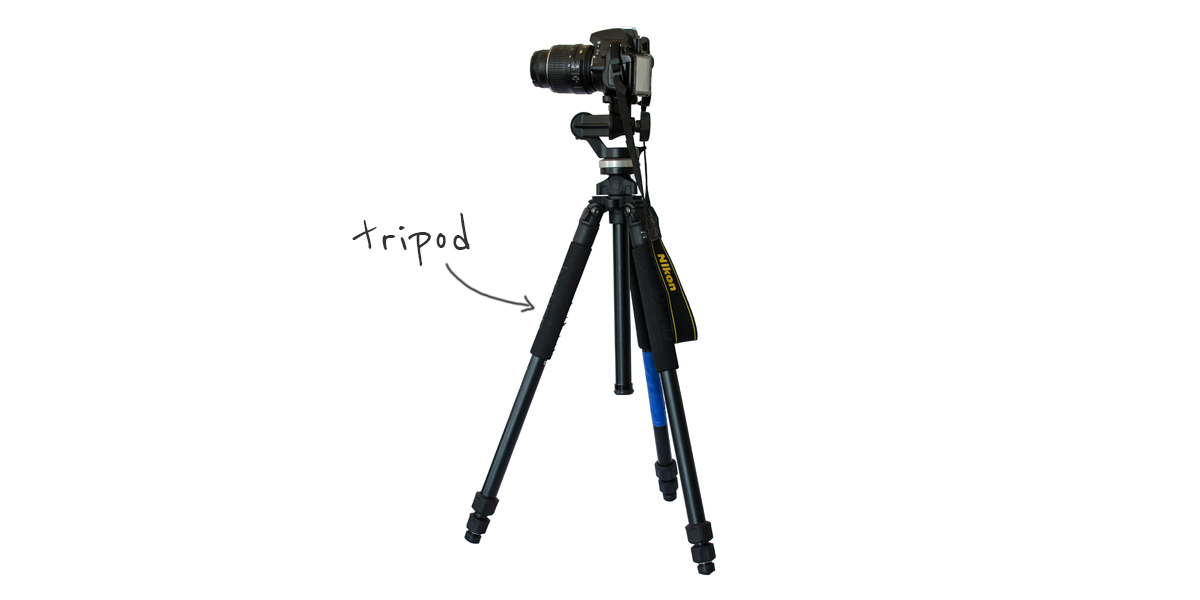
You can use any hard, stable and even surface, but a tripod is easier to adjust. When purchasing a tripod you get what you pay for, but you don’t need the best of the best for product images — a cheap tripod will suffice.
If you’re shooting manual, you’ll definitely need a tripod. For jewelry photography, you want to ensure the photography is well-lit and the entire product is in focus. To do this, you need to pair a small aperture with a slow shutter speed, and for slow shutter speeds, you need a tripod.
6. Get creative
Sometimes you may not have everything you need for the perfect photo shoot. That’s okay! Be flexible and make the most of what is around you. Review our ‘photographer’s toolbox’ blog post in case you have trouble positioning your products the way you want them.
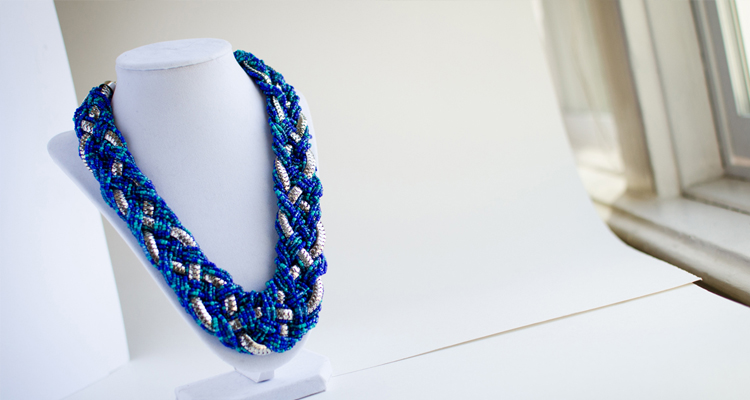
Below, I’ve used a white box to bring the product closer to the light source. Although I didn’t have the proper tools I needed to create a good backdrop, I was able to edit out the background in the photo editing process so it looks as if it was shot on a white backdrop.

The best thing about these tips is there are plenty of ways to execute them. Set your products on white, in a bright space, and you’re already halfway to amazing jewelry photography.
Photographing your jewelry products doesn’t have to be expensive or difficult!
Just follow the tips above and you’ll be well on your way to having tons of fun shooting great photos of your jewelry. If you have any questions, let us know by leaving a comment below!
Share on social: