There are over three billion products listed on Amazon. That means, no matter if you are a small ecommerce retailer or a larger brand, there is going to be big competition for customers.
So how can you stand out in such a crowded market? The answer is simple: product photography.
But the ecommerce retail giant is notoriously strict about product photos. It has a list of clearly defined rules for both the main product image (also known as the hero shot) and additional images that must be followed by anyone who wants to sell on the site.
This helps Amazon provide their customers – and by proxy your customers – with a great buying experience because they know what to expect at each stage of the purchase MAP/FLOW.
Here is how you can create dynamic product photos that will capture shoppers’ attention while following Amazon’s product photography rules.
Amazon image guidelines
Before we look at how to photograph your products for Amazon, we need to understand the different types of images.
There are two kinds of images on Amazon. The main product photo, also known as the ‘hero image’, is the image that you see when you scroll through the main feed or collections. It is the photo that drives most sales. There are also ‘additional images’ which can be added inside the listing.
All of these images must follow a long set of rules, including:
- The image must be in focus, professionally lit and photographed or scanned, with realistic color, and smooth edges.
- All products – except Books, Music, and Video/DVD – should fill 85% or more of the image frame.
- The full product must be in the frame.
- The background must be pure white (RGB 255,255,255).
It might seem impossible to stick to these rules while creating dynamic and engaging product photos, but it is easy. Here is a step-by-step guide on how to photograph products for Amazon.
Step 1 – Getting the right the equipment
You might think that you need expensive lighting or fancy photography gadgets for your Amazon product photos, but the truth is, you can take good product images with basic, inexpensive equipment. While you can invest in some great photography equipment, if you don’t know how to use it, it will be a waste of your time and budget!
All you need is:
A large white sheet – This is essential for taking a photo with a white background. It doesn’t need to be completely wrinkle-free as you will be removing the background afterward.
Two lights with tripods – It is important that you have two lights because this will help you light the object correctly.
A smartphone – Smartphones now have impressive cameras and can easily produce the same quality as a professional camera. Plus, you can easily edit a picture on your phone and upload it directly to Amazon from your camera roll.
A smartphone tripod – This will help you set up the shot at just the right angle and free up your hands to make any necessary adjustments to the framing of the photograph.
Step 2 – Preparation
Once you have your equipment sorted, you need to make sure that you are prepared for the photoshoot.
Before you photograph your products for Amazon, there are some basic things that you need to think about such as:
- Is your product clean of any dirt or smudges that might show up in a photo?
- Have you charged your phone and lights – or do you have access to a plug and charger?
- Is your phone on airplane mode so that you aren’t disturbed when you’re photographing your products?
It is a good idea to practice using the equipment before the planned shoot day so that you become familiar with how it all works and can make any necessary adjustments to ensure that the photoshoot goes smoothly.
Step 3 – Taking the right photographs
Once you have everything set up, it is time to start taking photos! Here is how:
1. Lay the white sheet on a flat surface with an elevated back so it creates a white backdrop.

2. Put your product on top of the sheet and light it from the left and the right: using two lights will reduce the shadows on the product.
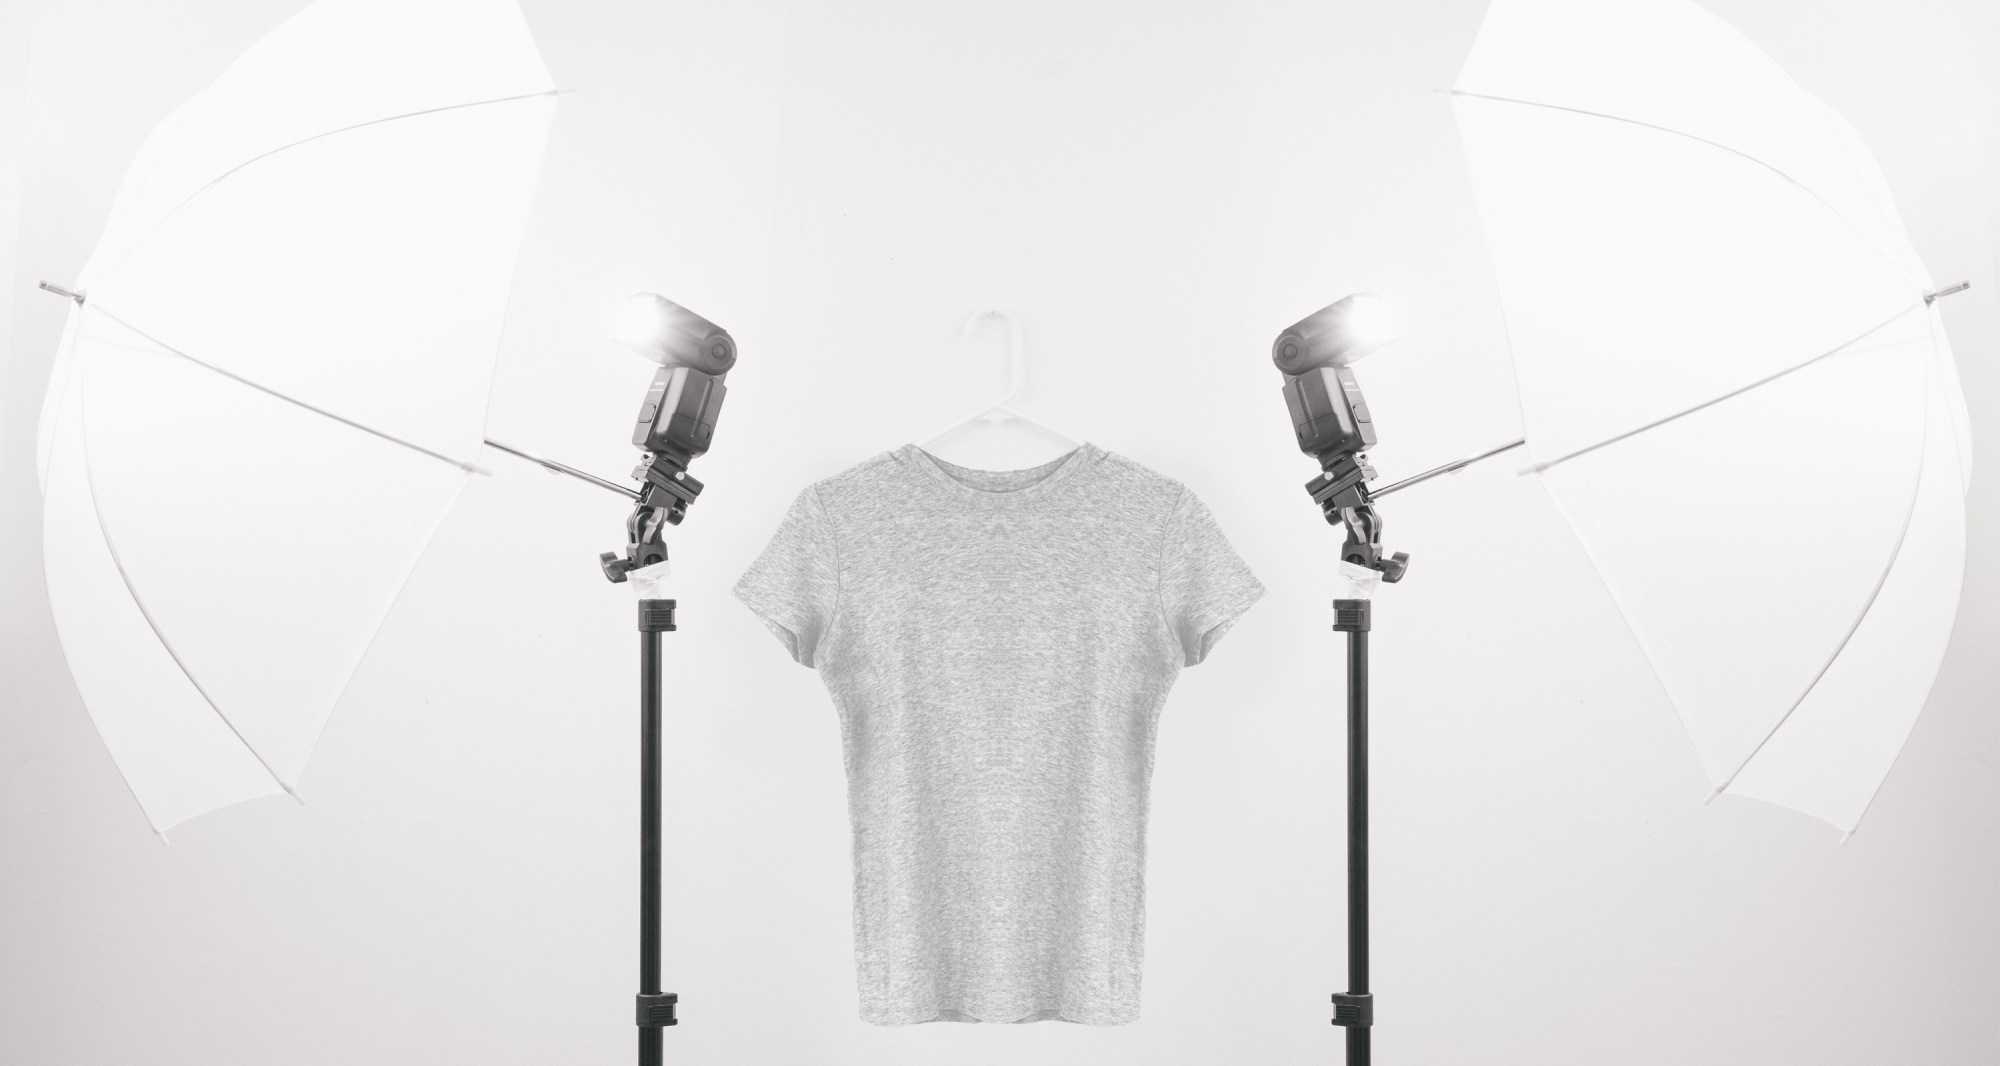
3. Set it up to make sure the entire product is in the frame. Try to ensure that there is not too much white space around the product – think of it as a thin photo frame.
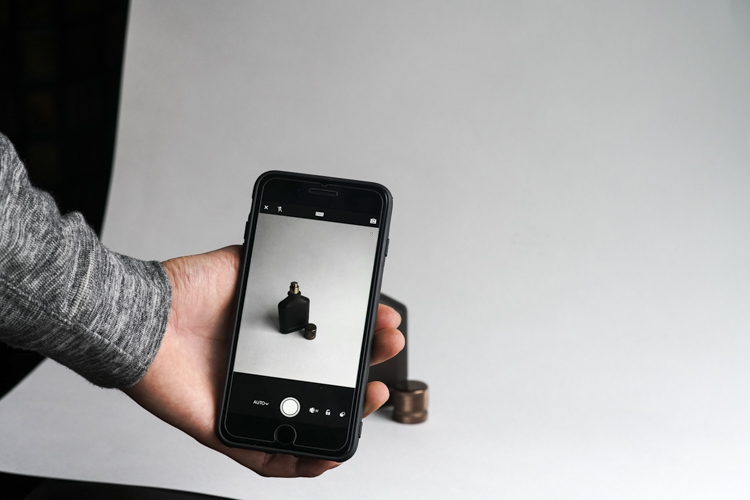
This is a simple task for most small objects, like vases or mugs.
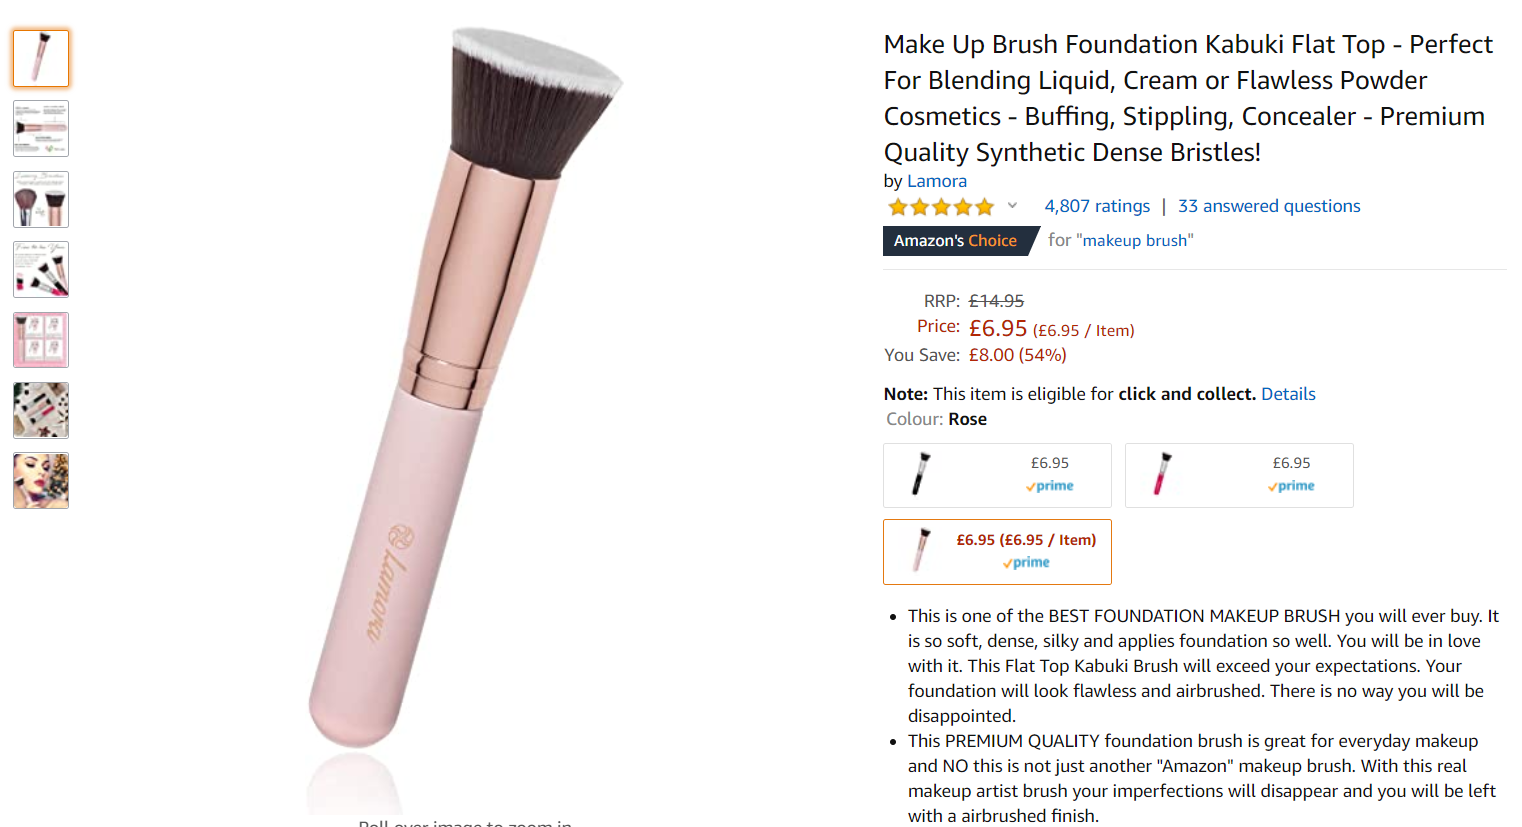
For larger products or products that have an obscure shape, this could be more difficult. Long and thin products, for example, makeup brushes, can be laid diagonally to ensure that they occupy 85% of the image. This Kabuki foundation brush is a good example.
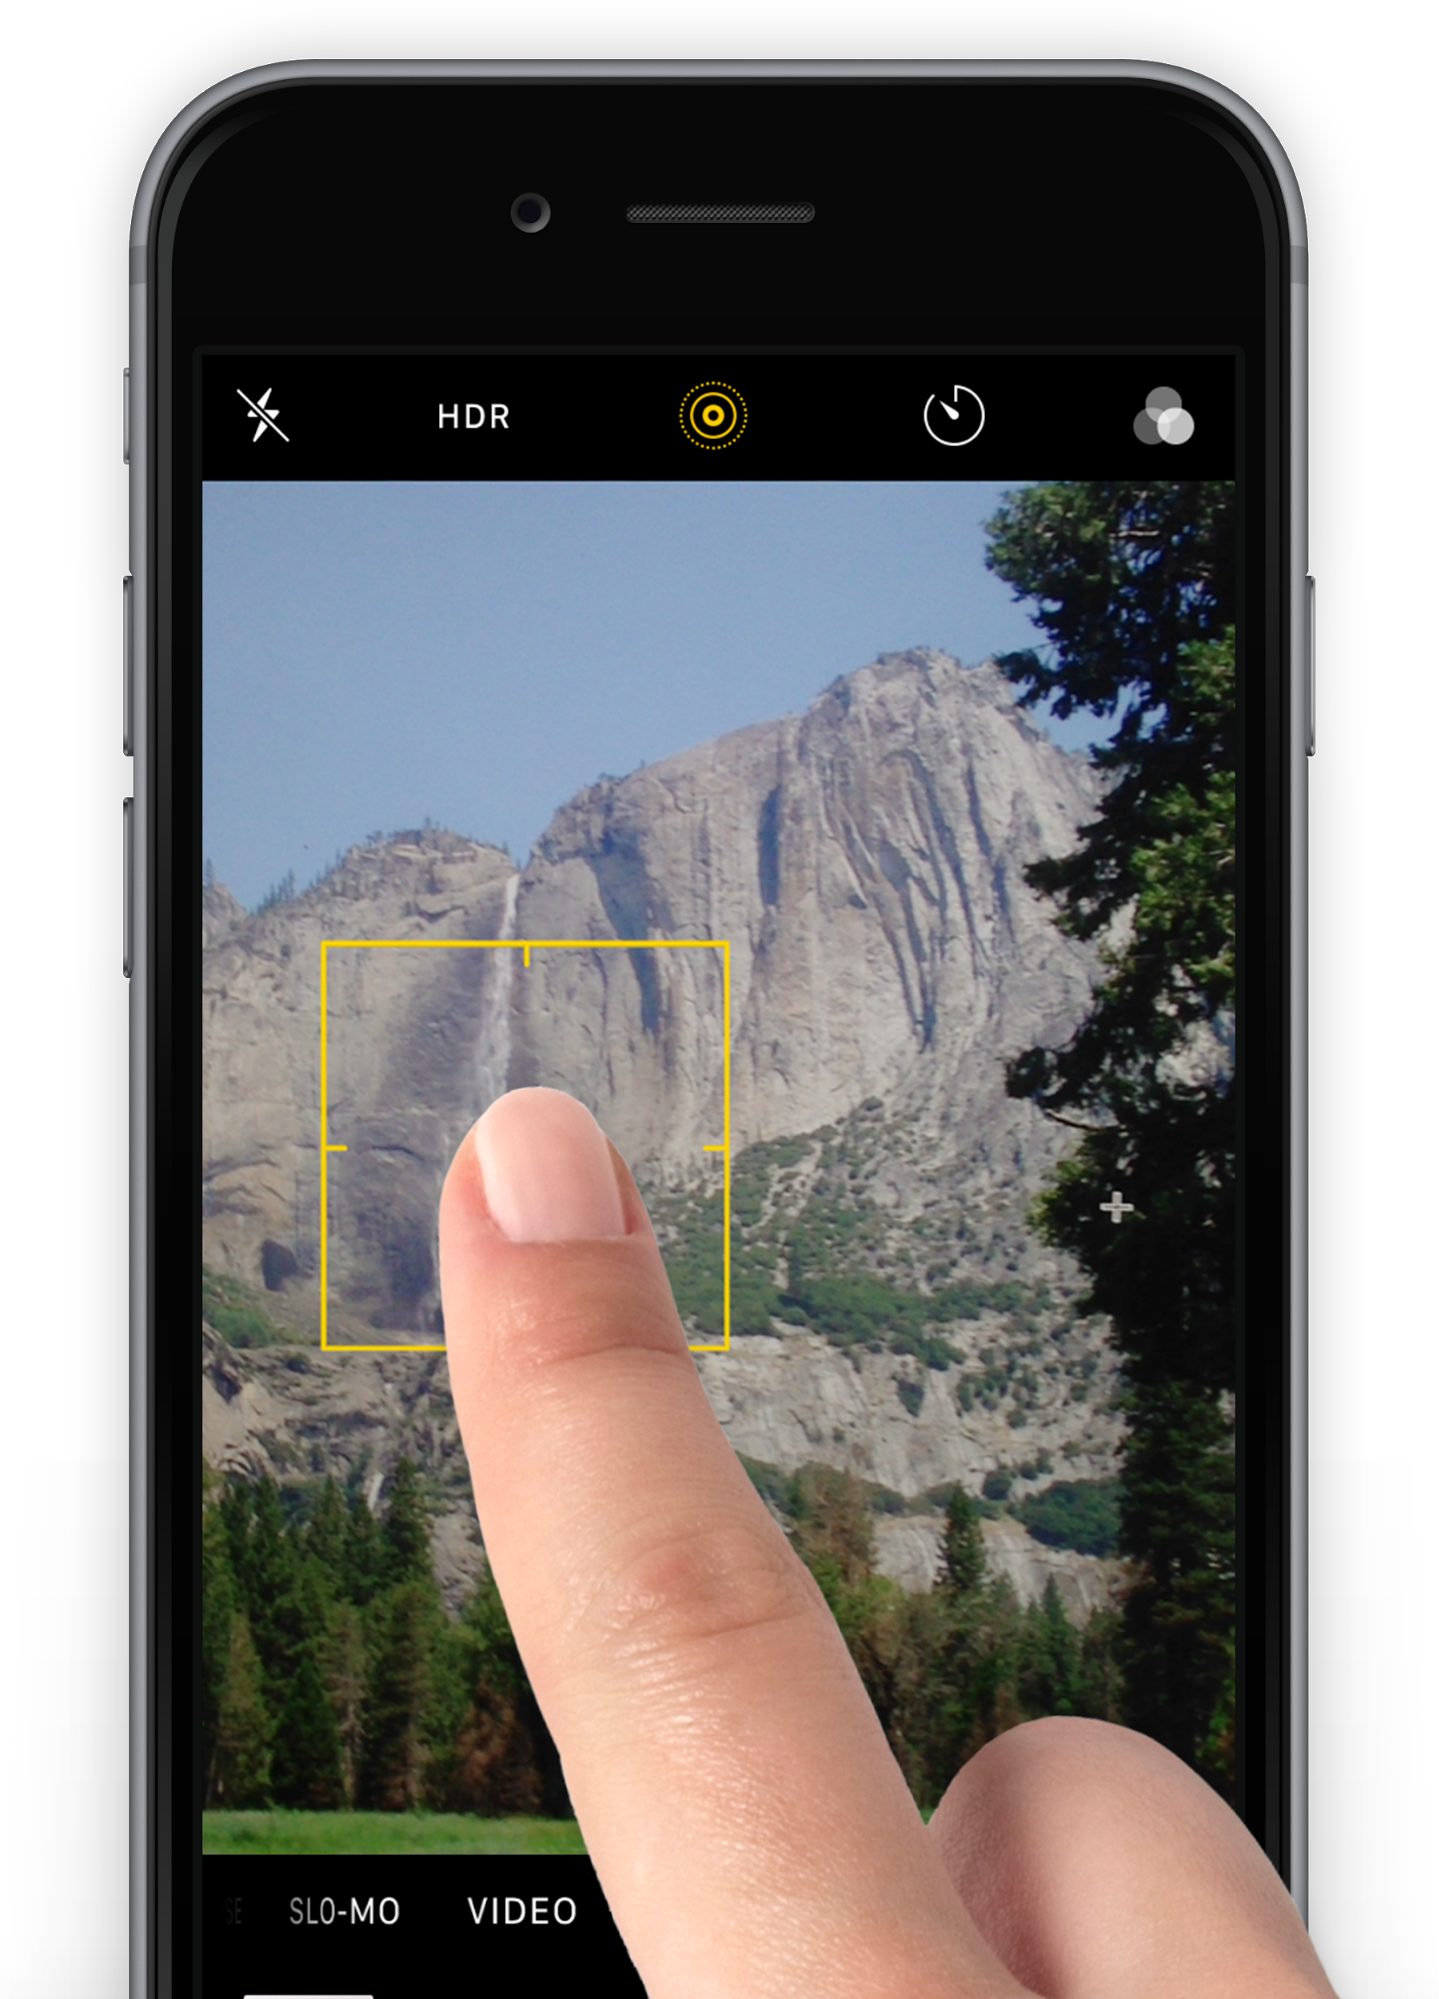
4. Make sure the product is in focus. On most smartphones, that can be done by tapping on the product on the screen of your phone.
5. Click the button and take the photo! You might want to take several shots so that you can choose which one is best for you.
After you have taken the photo, you need to do some editing to meet Amazon’s product image guidelines. Professional post-production tools like Adobe Lightroom and Photoshop can help you edit your product photos to make them just right.
You can use the software to do minor touch ups to the product, add in a realistic shadow and make the background pure white in line with Amazon’s guidelines.
But this can be a cumbersome task – especially if you have a lot of products and a lot of images. Programs like Pixc can make your product images for Amazon look like they were taken in a professional photo studio easily and automatically.
You simply take an image of the product – this can be in your living room or office space – and upload it to the Pixc website. Within 24 hours, you will get back a professionally edited photo that meets all of Amazon’s guidelines, cropped and enhanced, ready to start selling online.
Step 4 – Take a variety of photographs
When you photograph products for Amazon, you will need to conform to Amazon’s product image requirements however you can still be a little creative.
Take these gloves as an example. Instead of just filling the picture with a standard flat lay, they have added a little flare, showing they are number one.
![]()
Amazon’s photography rules are more flexible for the secondary images on your listing. This gives you an opportunity to be a little more dynamic with your product photography.
You should use these images to do three things: provide more detail, inspire and tell a story, and explain how a product works.
Go into detail: Take a closer look
A single image is not enough to tell your customer about the product. Because they can’t physically see it or touch it, when you photograph your products for Amazon, you should show as many relevant angles as possible.
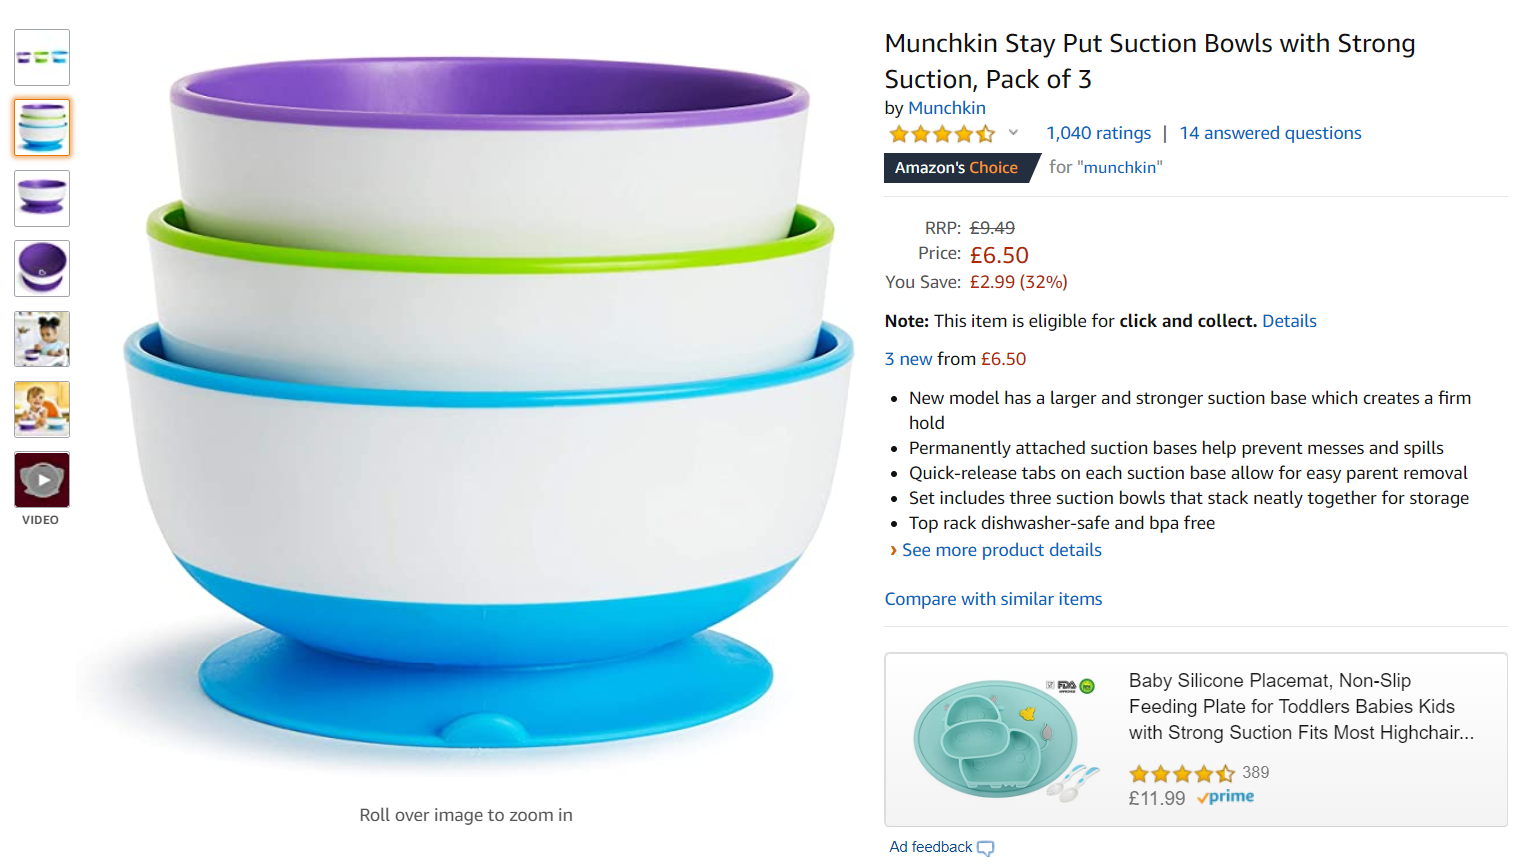
Can your product stack, like these children’s bowls? Does it have a special opening? Include a contextual product photo of this to show it off to your customers.
You should also take a photo to show the scale of the product so that people can understand how it will fit in their home or office – especially if it is a larger item.

Inspire your customers and tell a story
When you photograph your products for Amazon, use the opportunity to show your customers what makes your product special: why should they buy your product over another one?
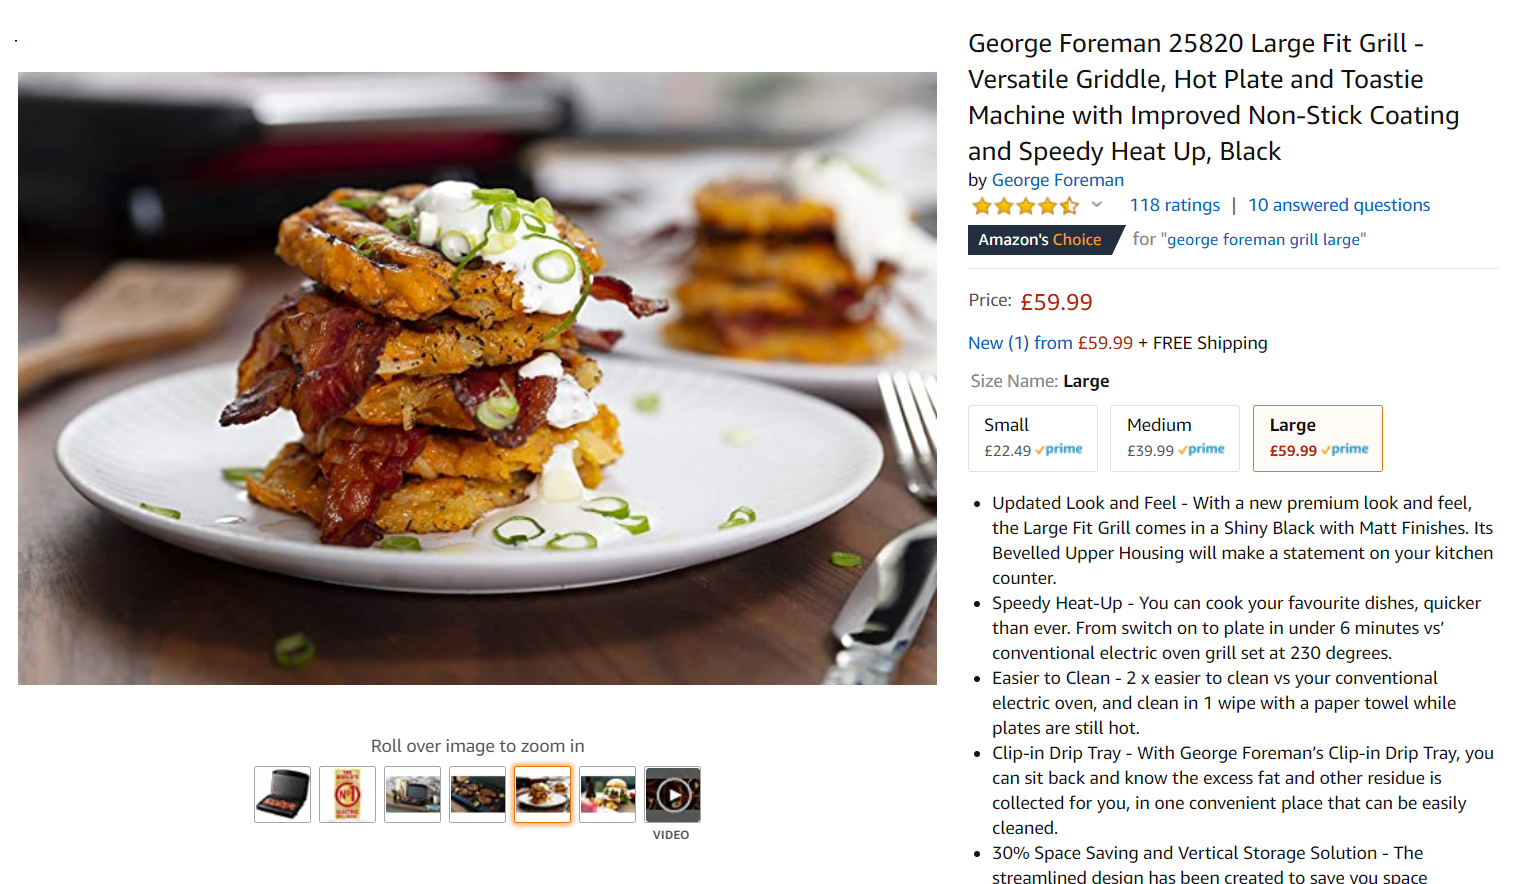
This George Foreman ‘Fit Grill’ Amazon listing includes a lot of inspirational images showing what customers can cook on their new grill – many of which don’t even show the grill itself! It gives the customer a chance to visualize what they can do with the product. It is aspirational.
Using real pictures instead of stock images can increase lead signups by 45%. They are more trustworthy and can give the customer a good idea of how the product fits into their lives.
People respond to product images that they can imagine using the product in their everyday life. It lets the customer connect with the product.
Top tip: Studies show that customers find product images more important than a long description (67% vs 54%). If you say that your product is “easy to clean”, what does that look like?
Infographic: maximize product photography to boost sales
One thing to think about before you photograph products for Amazon is infographics. These are images or charts with a little bit of text to give an easy-to-understand overview of a topic – or in this case, your product.
An infographic can boost sales by 108%. They are eye-catching and show important information in a quick and easy to understand way.
You should highlight features that make customers want to buy your product. What makes your product special?
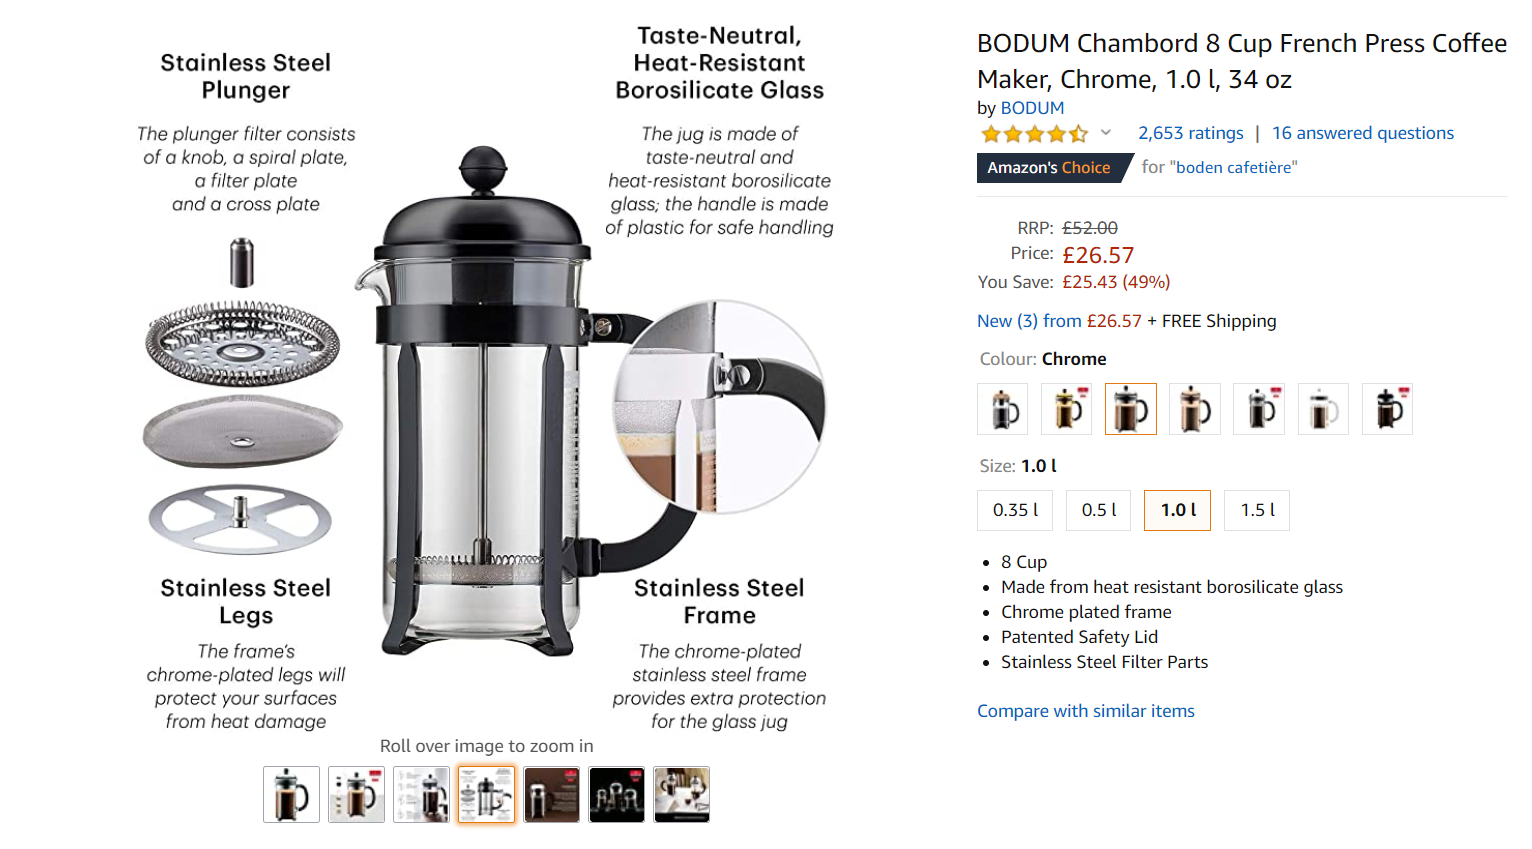
This Bodum French Press is a great example. It explains in four easy to understand ways why it is a great product – and why you as a customer should buy it.
It is really easy to create infographics with online tools like Canva. You just need a picture of the product, ideally on a white background, to help make the information stand out. This way you are maximizing photos that you have already taken for your Amazon listing.
Top Tip: When setting up the photo for an infographic, make sure that you leave some extra white space so you have space to add text.
What does good product photography on Amazon look like?
After all of this advice, what does a good Amazon product listing look like?
Because your customers can’t see or touch your product in person, you should show as many angles as possible. Make sure to arrange your photos in a logical way so that your customers can have a good experience.
For clothing, for example, you should first show the product in context. This should be followed by showing different angles such as the backside and interior, and some close-ups, especially of any special features. Finally, you should show images that highlight any cool technology or science features and perhaps include a size-guide.
This Abollria women’s waterproof jacket below, for example, is photographed on a woman front and back. You can see her with the hood on and without it.
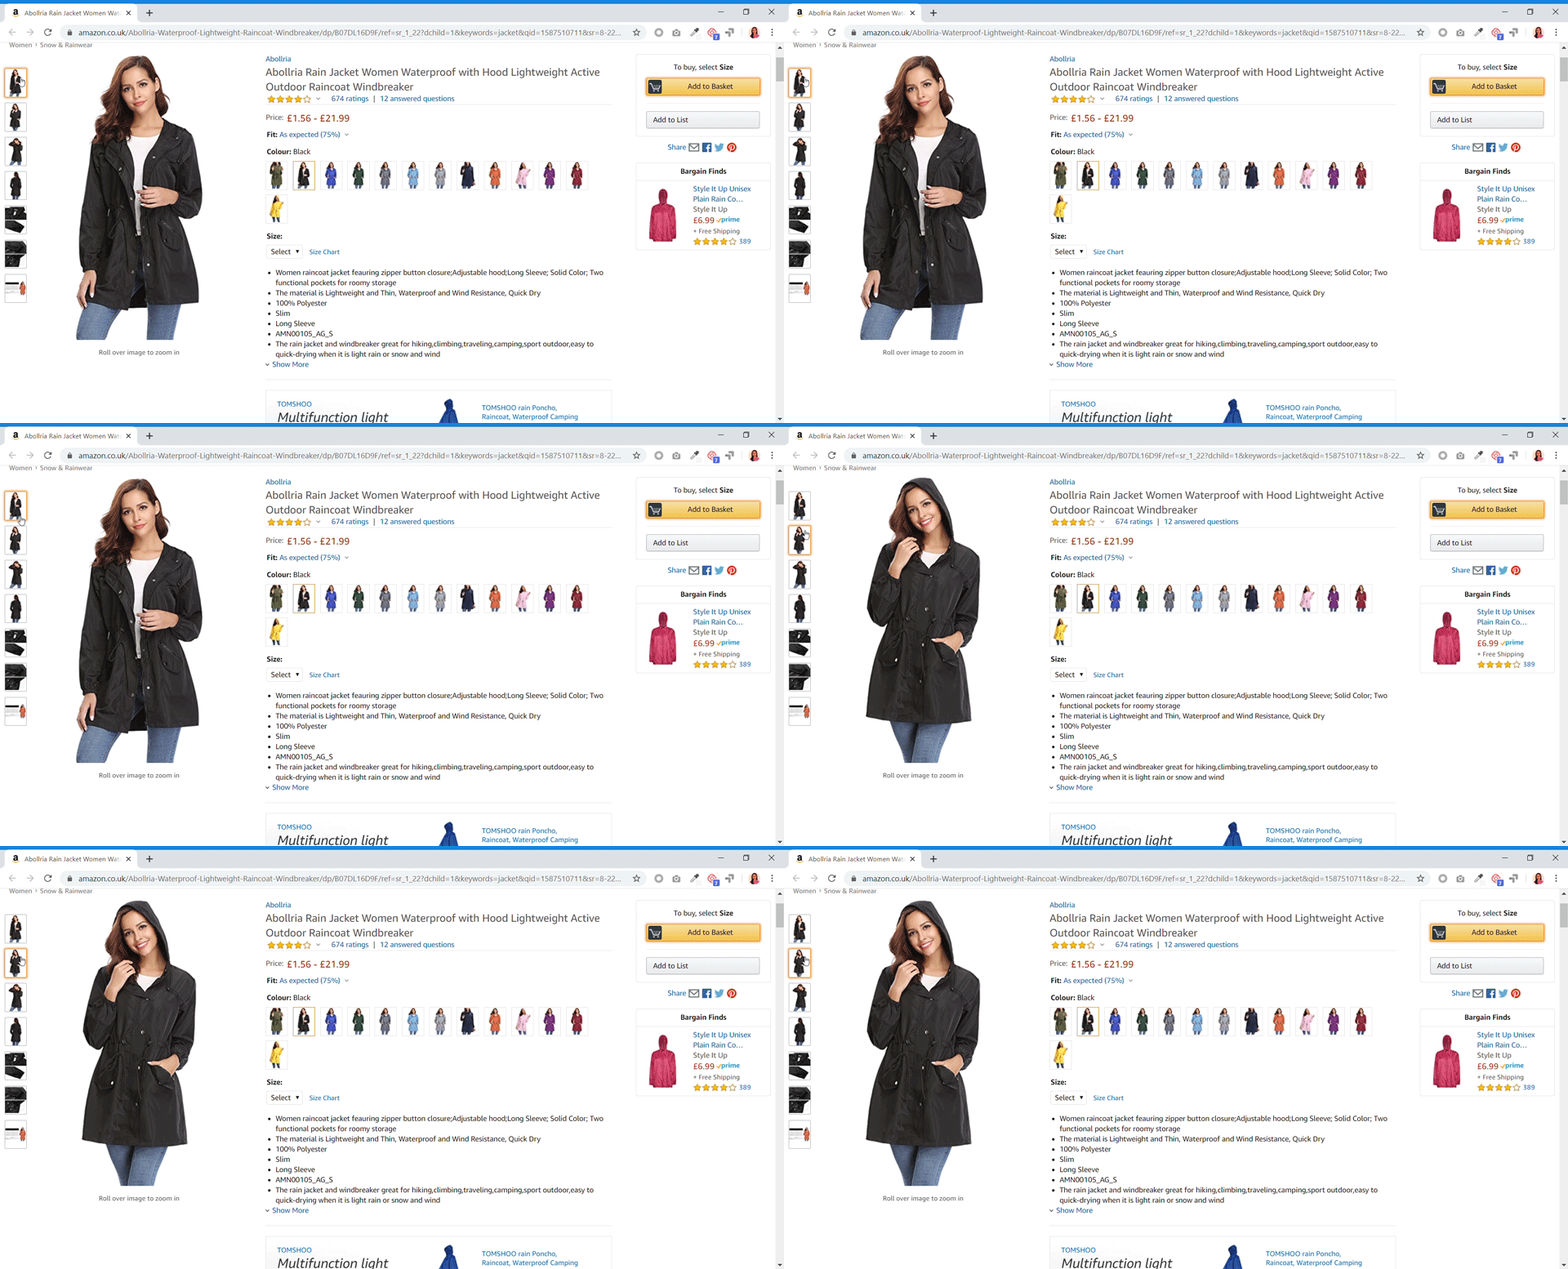
They also show some of the jacket’s key features close up: zipped pockets, the waterproof shell, and elasticated wrists. The product listing also shows a size guide to help customers choose which is the best fit for them.
The retailer could elevate their product photography by showing the inside of the jacket and the jacket from the back with the hood up as well.
This style and precision can be easily replicated for other products.
Use all of these tips and tricks highlighted in the article when you photograph your products for Amazon, and soon you will be on your way to great product photography that meets Amazon’s product image requirements and looks good, too!
Do you have any tips that you would like to share? Let us know in the comments below!
The impact of Coronavirus
Amazon has seen a massive spike in business as people are turning to online shopping due to the Coronavirus.
Early during the pandemic, Amazon temporarily suspended shipping non-essential products to its warehouses so that they could prioritize medical supplies and household goods due to increased demand.
Although Amazon has now lifted these restrictions, third-party merchants now face large order backlogs, strict unit quantity limits and unpredictable policy changes. France has imposed national restrictions on shipping non-essential items on Amazon.
Keep up to date on Amazon’s COVID-19 activities here.

