The latest iPhone 6 Plus and iPhone 6 come equipped with improved cameras, allowing you to capture pictures that would never have been possible in the past. In this article, I’m going to look at the utility of iPhone cameras from the perspective of a business owner who needs to take product photos for their eCommerce store.
Technical improvements
The latest iteration of the iSight camera on the iPhone 6 and 6 Plus is more powerful than ever. The camera uses larger pixels than most smartphone cameras, which means it creates higher-quality images with less noise. It also comes with an f/2.2 lens aperture, which means it can gather more light for better images in dark and difficult conditions.
The iSight camera maintains the same 8-megapixel resolution, but other innovative features include focus pixels (for faster and more accurate autofocus), face detection, manual exposure control and even — on the iPhone 6 Plus — optical image stabilization.

Implications for product photography
Product photography has traditionally been done using a digital SLR camera, or ‘DSLR’. This sophisticated device uses all the different types of lenses, making them versatile enough for portraits, jewelry, cars, architecture, sports, journalism and everything in between. DSLRs have large image sensors, giving you high-quality final images.
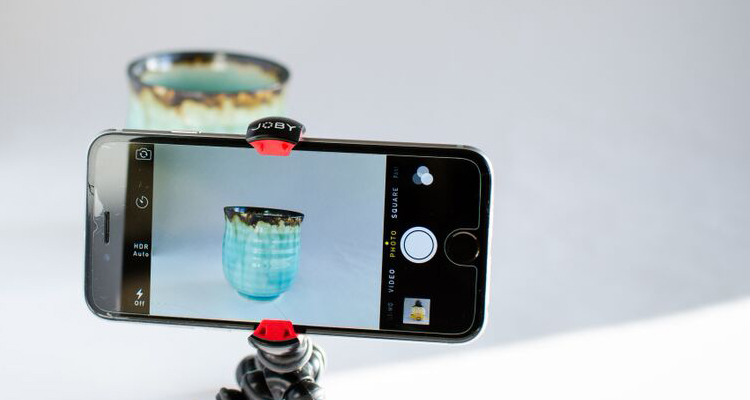
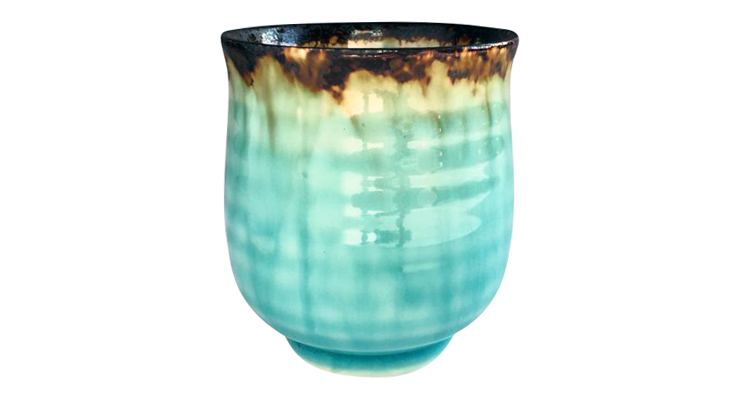
Just a few years ago, it would’ve been unthinkable to photograph your products with your phone. The first camera phones were laughably terrible. But those days are over. There have been some amazing advances, and the iPhones — if used correctly — can produce stunning results (like the image below). This means product photography is more open to anyone than ever before, and small businesses can save a great deal of money by photographing products themselves.

The setup
Now that you’ve got a basic idea of what your subject is and what your needs are, it’s time to set up your DIY product photography studio. We’ve written about setting up a product photography studio, but to recap, there are a few basic elements. You’ll need:
- A white backdrop
- The product itself
- Lights or light sources, such as windows
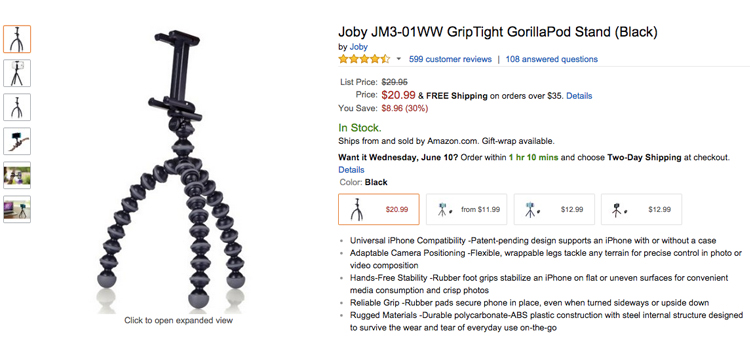
- Something to stabilize your camera, such as a tripod or iPhone mount
- Image editing software
Once you have all these elements, you’re ready to get started. Take your product and arrange your backdrop for the best aesthetics. You may need to use tape, clamps or other means of securing the backdrop to ensure you get a clean background.
For the iPhone tripod, something like this should do the trick!
The lighting
Product photography lighting is a huge subject, and there are loads of books on the subject. We’ll just cover the basics here. Essentially there are three elements you need to control with lighting: definition, color and distractions.
Definition simply refers to highlighting the features of your product appropriately. It won’t do to have one side of your product well-lit, but the other side in complete darkness (unless you have made that decision deliberately). Instead, arrange your light sources to show your product completely. Different lights can be pointed in different directions to achieve different ‘looks’. Experiment. One good tip is to use blank white sheets of paper held (upright by clamps) between the light source and the product to soften and diffuse the light, resulting in a less-harsh look.
Different light sources also give off different colors. We all know, for example, that light looks red at sunset, then turns more blue after the sun has gone down. Different artificial light sources also have different ‘color temperatures’.

Try to use light sources that all have consistent color temperatures. Some light bulbs are marked with their color temperatures, but most aren’t — you may have to use trial and error. This is a good reason to look at your photos closely at the beginning of the shoot before you spend hours and hours taking photographs. It’s a real shame to load the images into your editor and realize the color looks bad because of an issue you could’ve fixed at the beginning.
Check out this article on white balance for more on color.
The last issue to control with your lighting system is distractions. This includes things like reflections, which can be dealt with through diffusion or by placing an opaque object (like a hardcover book) between the light source and your subject to block the source of the reflection. Another distraction can be random bright or dark spots in the image that you did not anticipate. Keep a lookout for these type of things when you’re going about your product photography shoot, and consider modifying your iPhone camera with apps like Manual to get the best images.

Bringing it all together: iPhone product photography
With these tools and tips, you’re well on your way to taking great product photographs with your iPhone. It’s not rocket science. Anyone can learn how to do it; it just takes dedication, study and practice. Some mistakes can be fixed in image editing applications after you take your photos, but remember: The better-quality images you get in the camera, the better your final results will be.
Another way to make your product photographs better is to remove the backgrounds altogether (use Pixc if you need help with this!). This allows you to show your images directly against the background of your site and has been shown to improve sales in many cases.
Good luck with your photoshoot and let us know in the comments if you have any other iPhone product photography tips or questions!
Hungry for more iPhone 6 tips? Check out Alex Koloskov’s YouTube video that shows what can be accomplished with an iPhone, or Holly Marie Casto’s video on photographing a cup using only natural light and a phone.