Adding a reflection effect to your product images can be a great way to make them stand out in a crowd.
For certain products, reflections highlight the best features and give a clean, sleek look. For this reason, reflections often go best with products like technology or glasses — anything that benefits from a modern aesthetic.
There are two ways to get good product reflections in your photos: either shoot them that way, or add a reflection effect using photo-editing software. In this article, we’ll talk about how to add realistic-looking reflections to your product photos using Adobe Photoshop.
Step 1
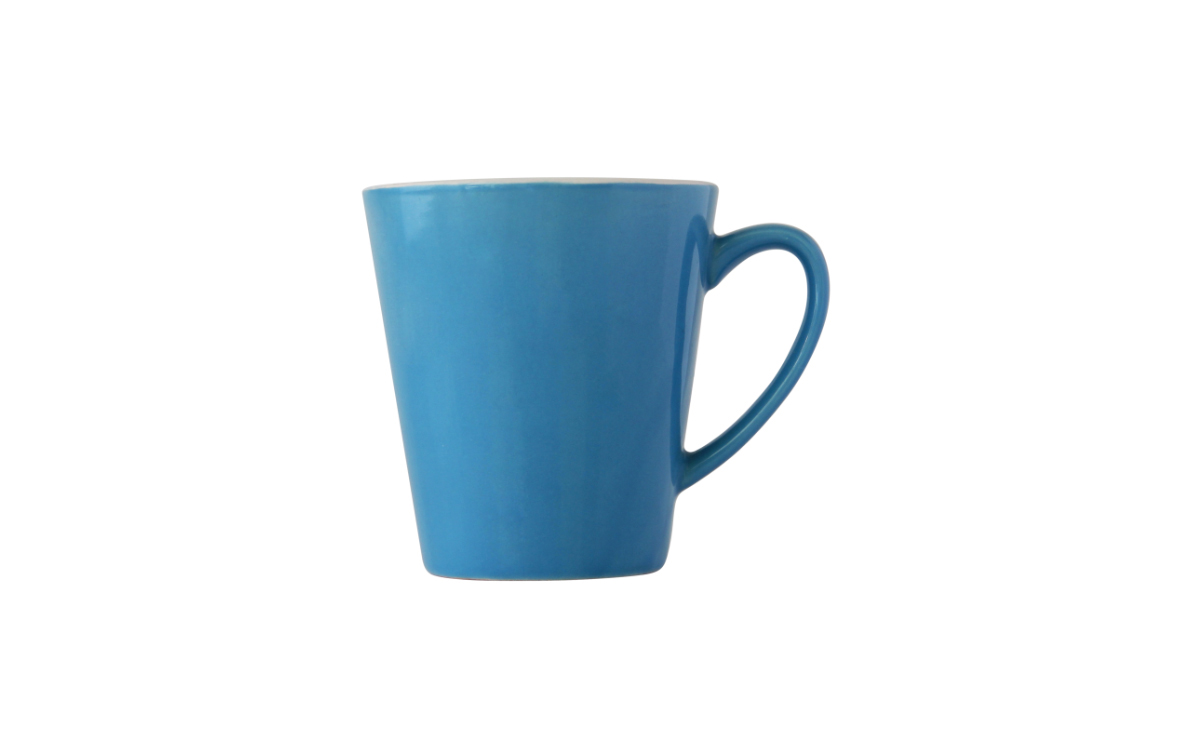
First, open your product image in Photoshop. (I’ll be demonstrating the process with a photo of a blue mug.)
Step 2
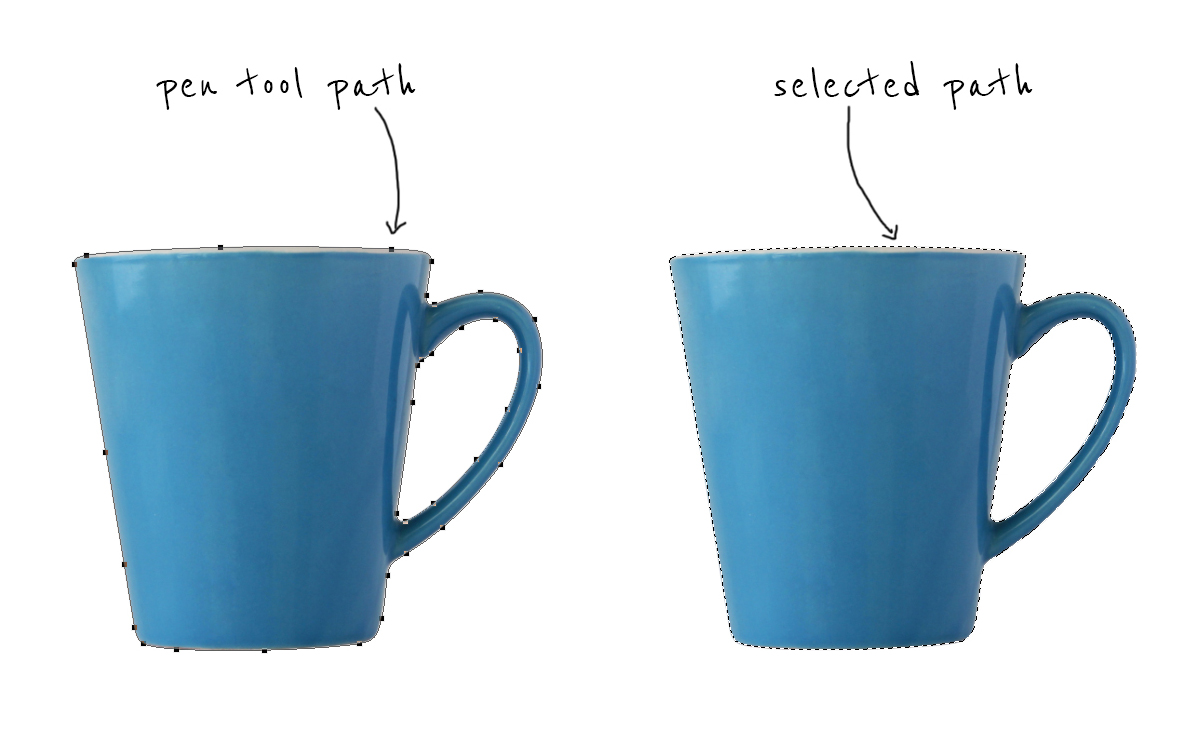
The reflection effect needs to be of the product and not everything in the photo, so you’ll need to create a path. Select that path and remove the background.
Step 3
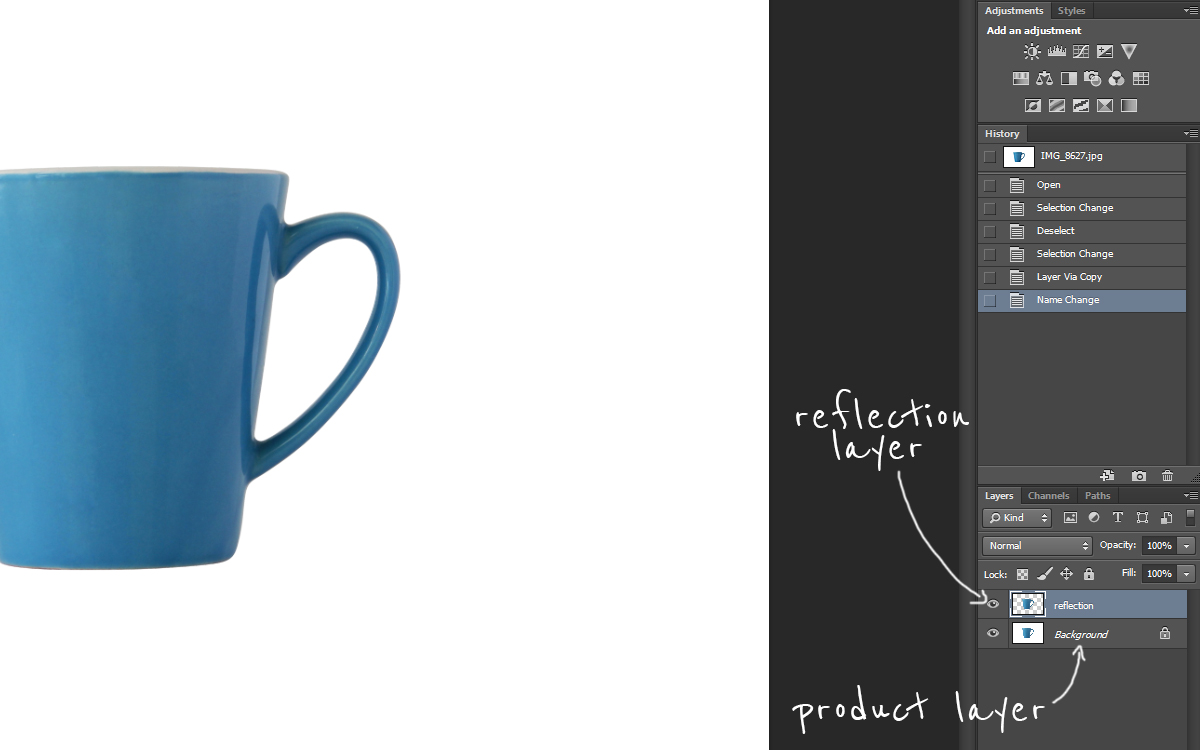
With any of the ‘Marquee’ tools selected, right-click the selected area and select ‘Layer Via Copy’. This will be the reflection. You can double-click the name of the layer to rename it. I choose ‘reflection’ as a descriptive name. (You can learn more about layers on the official Adobe help page.)
Step 4
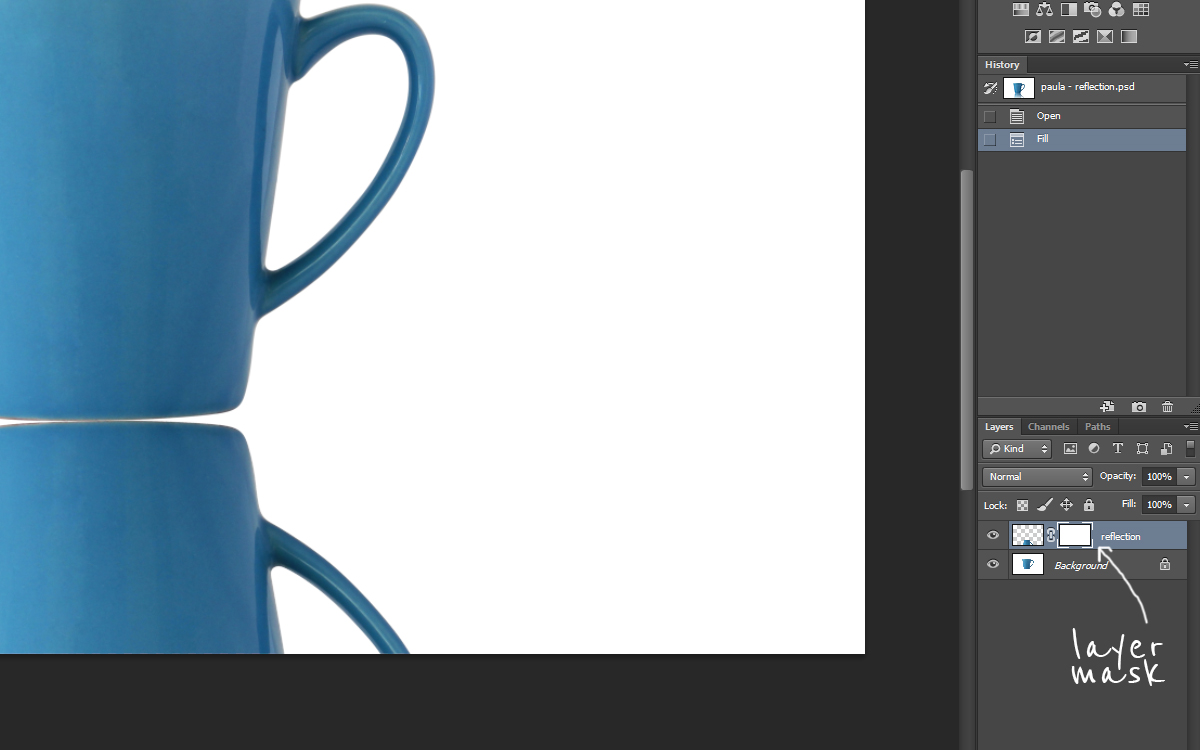
You now need to make the reflection layer mirror the product. At the top of your Photoshop window, select ‘Edit’ > ‘Transform’ > ‘Rotate 180º’. Next, select ‘Edit’ > ‘Transform’ > ‘Flip Horizontal’. Move the reflection layer down until the bottom edges of the two layers are touching.
Step 5
Now, let’s make that reflection look great. Select your reflection layer and on the bottom of the layer tab click ‘Add Selection Mask’. This will create a mask on your layer which you will use to make your reflection fade out.
Step 6
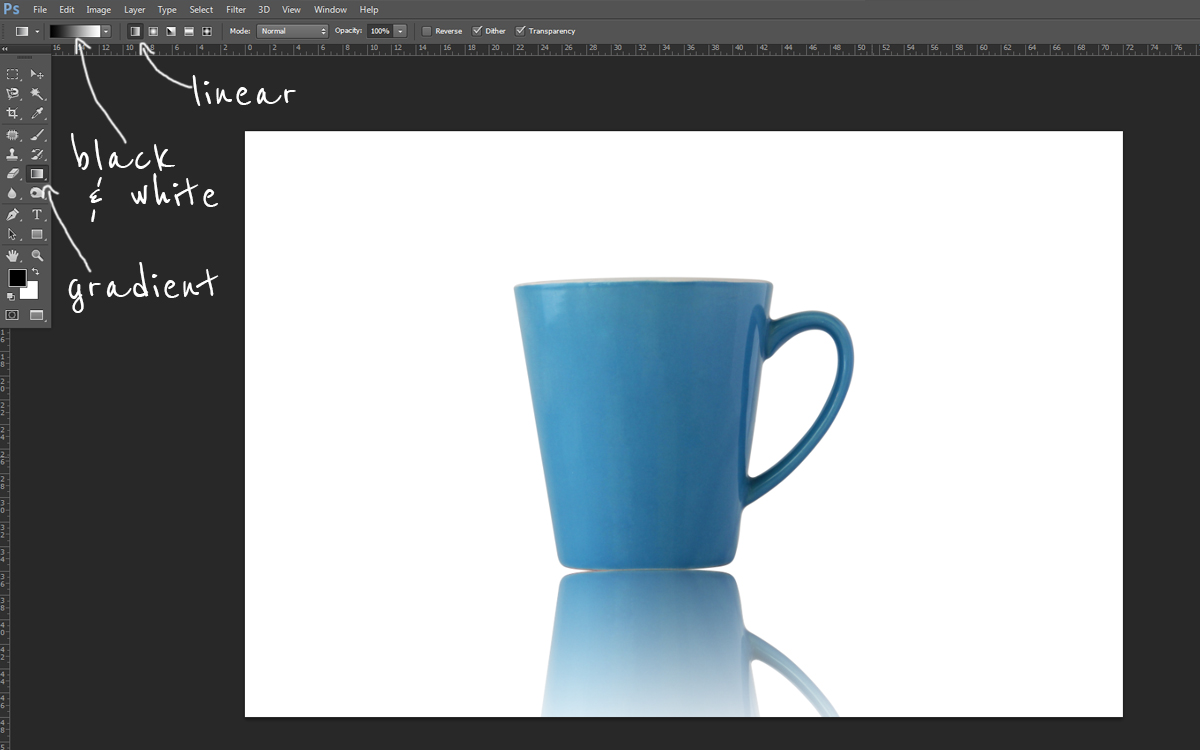
Making sure your mask is selected on your reflection layer, press ‘G’ on the keyboard or select the ‘Gradient’ tool in your toolbar palette. Select the black-and-white preset (it’s usually the third choice) and for the type of gradient choose ‘Linear’.
Move your mouse pointer over the reflection area, and starting from the bottom hold your left mouse button and move the mouse towards the very top of your reflection. You might want to hold ‘Shift’ on your keyboard to make the gradient go straight. Release the mouse button and there you go — you’ve got yourself a reflection that fades away. Pretty easy. If you haven’t made the gradient part look good, you can always press Ctrl + Z (Command + Z on Macs) to undo and try again.
Step 7
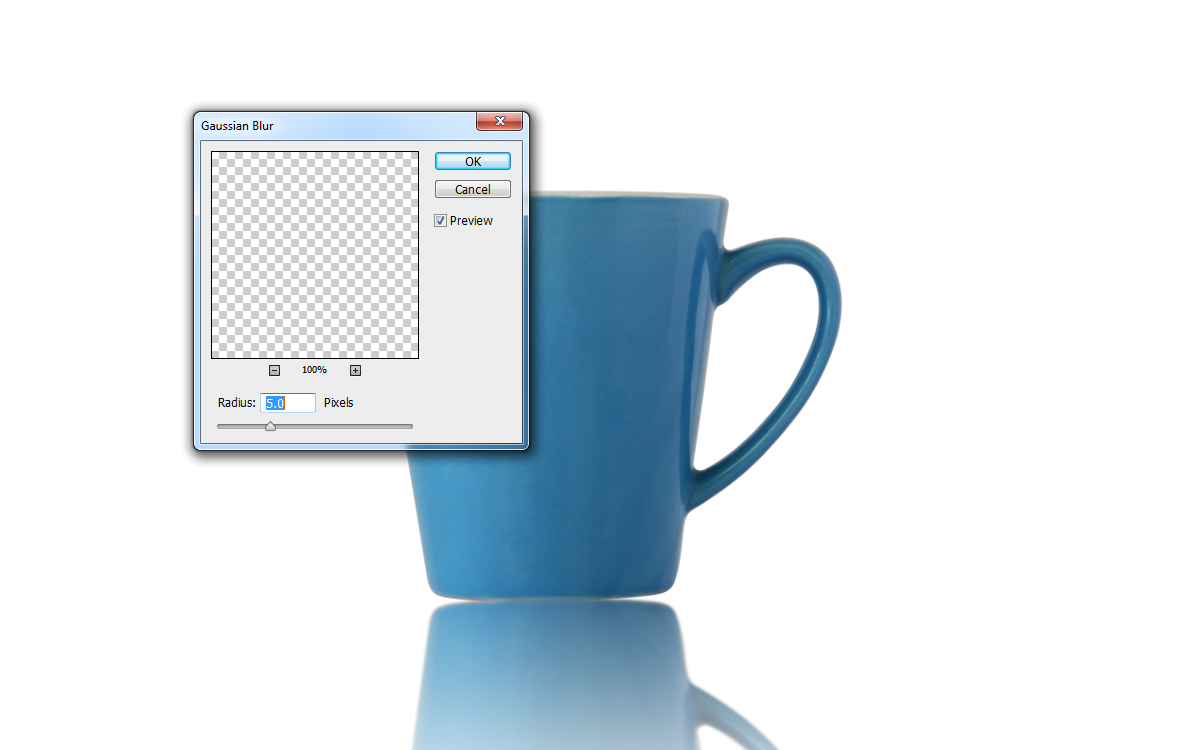
To make the reflection look a bit more realistic, let’s apply some blur. First, make sure you have selected the layer on your ‘reflection’ tab and not the mask we used in the previous step. In the top application menu, click ‘Filter’, then ‘Blur’ and finally ‘Gaussian Blur’. In the window that pops up, try moving the radius slider up and down to see what looks best. In my example, a radius of around five pixels made the most natural-looking reflection.
Step 8
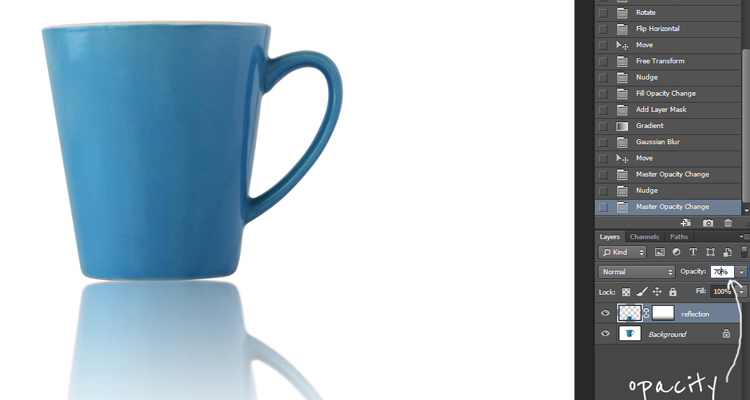
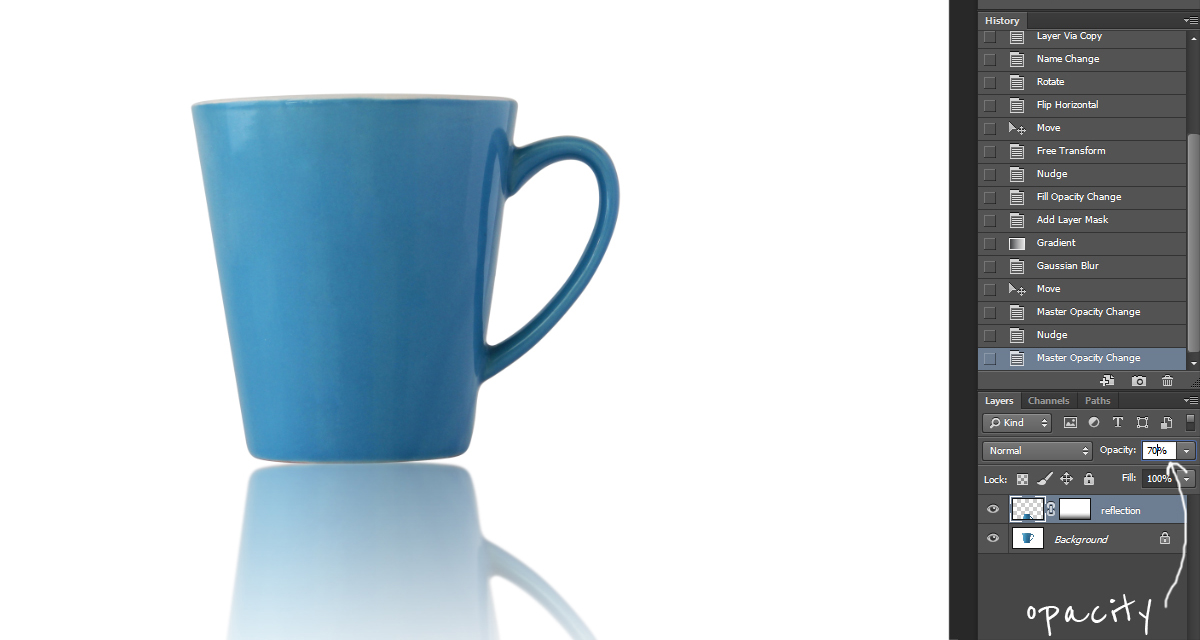
As a final touch, it may be sometimes worth adjusting the opacity of your reflection effect. With the same reflection layer selected, use the opacity slider in the Layers panel to find the best setting to achieve a natural reflection. Save your image, and you’re done!
I hope this helped you create a great reflection effect!
If you have any issues, just leave us a comment below and we’ll answer as soon as we can.

