Proper use of shadows can elevate your product images from amateur to professional. It helps make the product look more natural and realistic by adding a sense of shape and depth to your products.
The best part is it doesn’t take a big budget or massive team to create professional product images. You just need to spend some time on your product photography and the post-production process.
There are many types of shadows, but for this blog, we’re going to focus on the most versatile type of shadow applicable to all types of products – drop shadow.
If you’re taking your product photos in a studio, it can be hard to create the perfect shadow, especially if you’re not a professional photographer. Luckily, it’s pretty easy to add a drop shadow using Adobe Photoshop, during post-production. I’m going to explain exactly how to do it step-by-step.
Before we get started
When editing images in Photoshop, there are two principal rules to remember:
- Your shadows must look realistic.
- Consistency is key. Be sure to use the same type of shadow on all your product images within the same category.
While the steps I’ll be sharing here are easy to follow, you need to make sure that in the end, these two principal rules are being followed. Otherwise, you’ll just end up having non-professional product images to your online store.
Step 1 – Open Photoshop
To get started, open your image in Photoshop. Make sure you’re starting off with an image that has high resolution. I’m going to demonstrate the process on a white dinner plate that’s already on a white background. You can see it looks a little flat.

Step 2 – Create layers
In the ‘Layers’ panel on the right side of the Photoshop, window select your ‘Background’ layer and duplicate it. You can either right-click the layer and select ‘Duplicate Layer’ or hit Ctrl + J (Windows) or Command + J (Mac) on your keyboard. You’ll see ‘Background copy’ appear. This makes it such that you can modify the duplicate layer without worrying about accidentally damaging or distorting your original image.
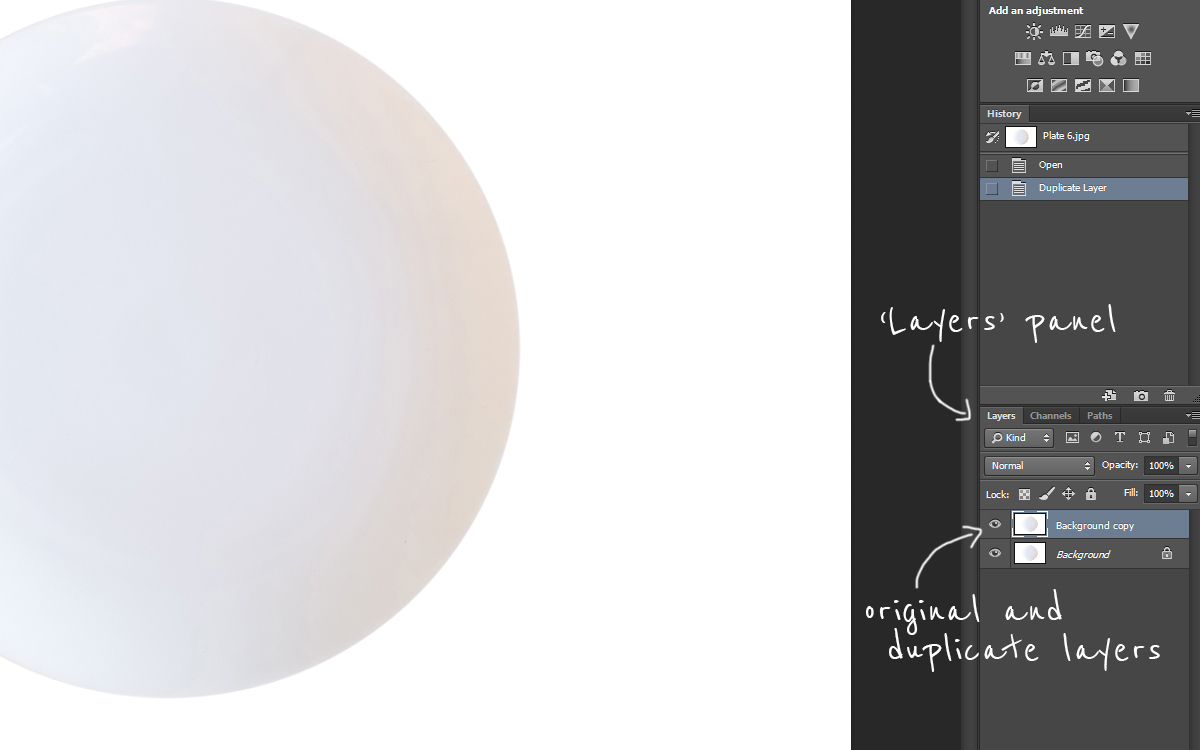
Step 3 – Create a path
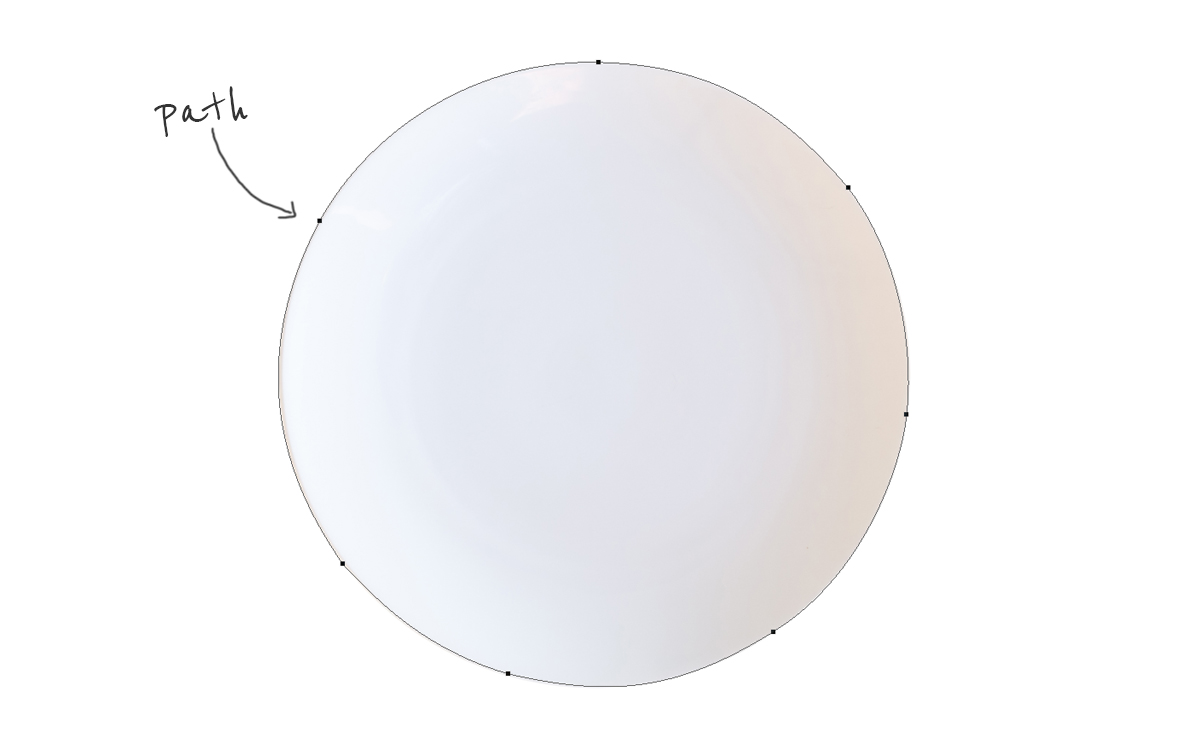
Create a path around your product in ‘Background copy’ and remove the background. You can see the background has been removed by looking closely at the ‘Layers’ panel; your product should have a grey and white checkered background (Photoshop’s way of showing transparency) in the top layer. Alternatively, you can hide the original background layers.
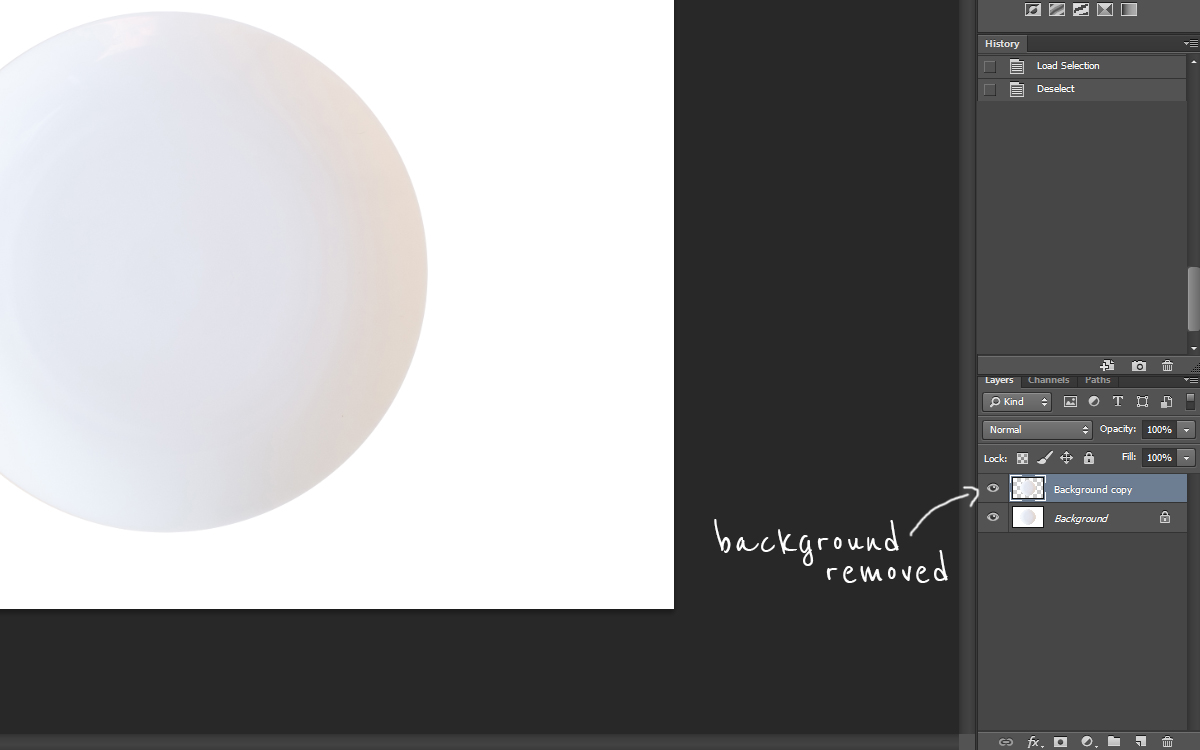
Step 4 – Duplicate the layer
You need to duplicate this layer too. A little organization goes a long way in Photoshop, so get into the habit of organizing layers. Name this layer something like ‘Product’. I’d also suggest renaming the ‘Background copy’ layer to something like ‘Shadow’.
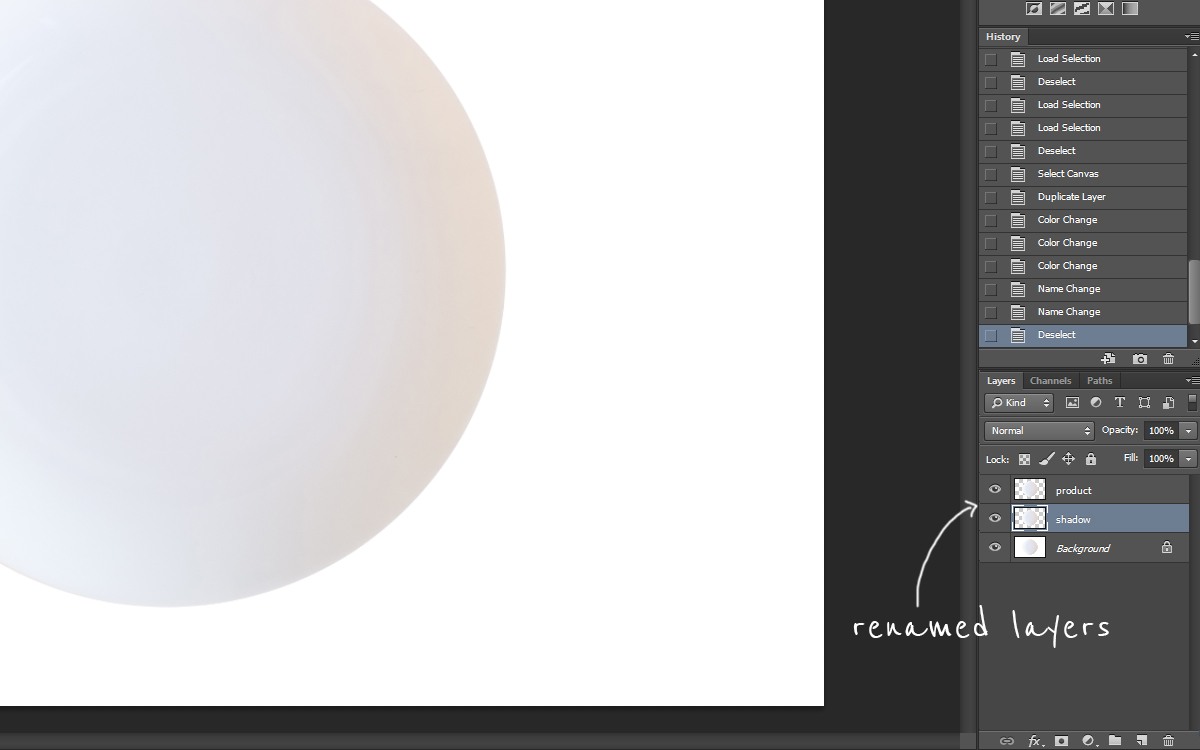
Step 5 – Select the shadow layer
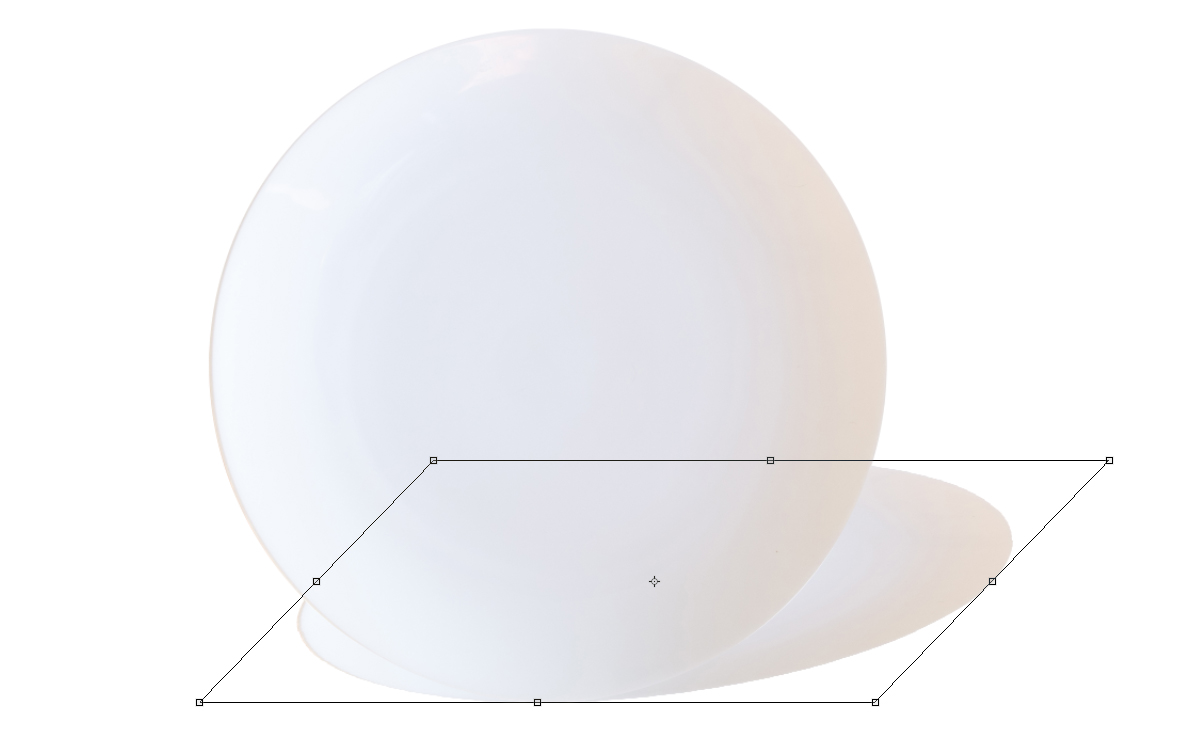
Select your ‘Shadow’ layer, then hit Ctrl + T or Command + T to select the transform tool. Hold down the Ctrl or Command key, then click the top-middle control point (the dot at the top of the image) and drag the mouse down to position the transform at the proper angle to match the incoming light source on your subject. If necessary, use the move tool to reposition the transformed image by clicking and dragging it into place. Don’t worry about it being perfect as you will have a chance to reposition it later.
Step 6 – Lock your layers
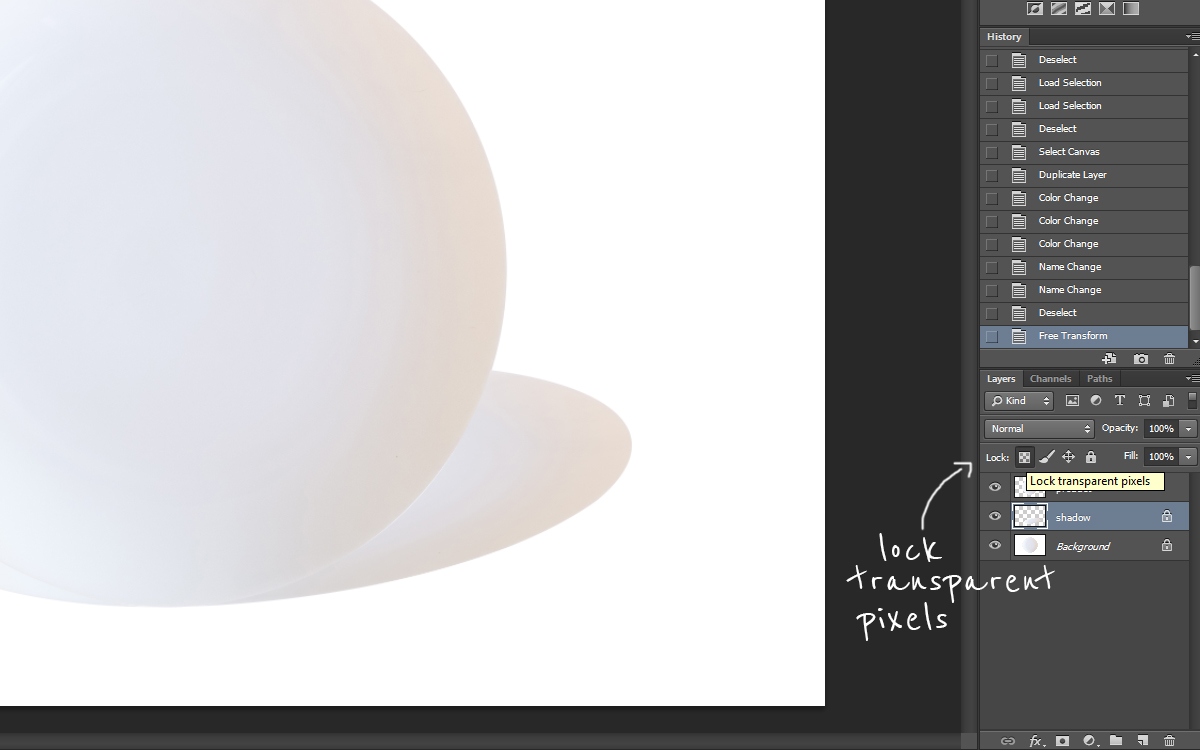
In your Layers panel, click the ‘Lock transparent pixels’ button next to the word ‘Lock’. This will ensure the next step only affects the transform you just made (which will become your shadow). For some background on the powerful ‘lock transparent pixels’ function, check out this short tutorial from SitePoint.
Step 7 – Create a gradient
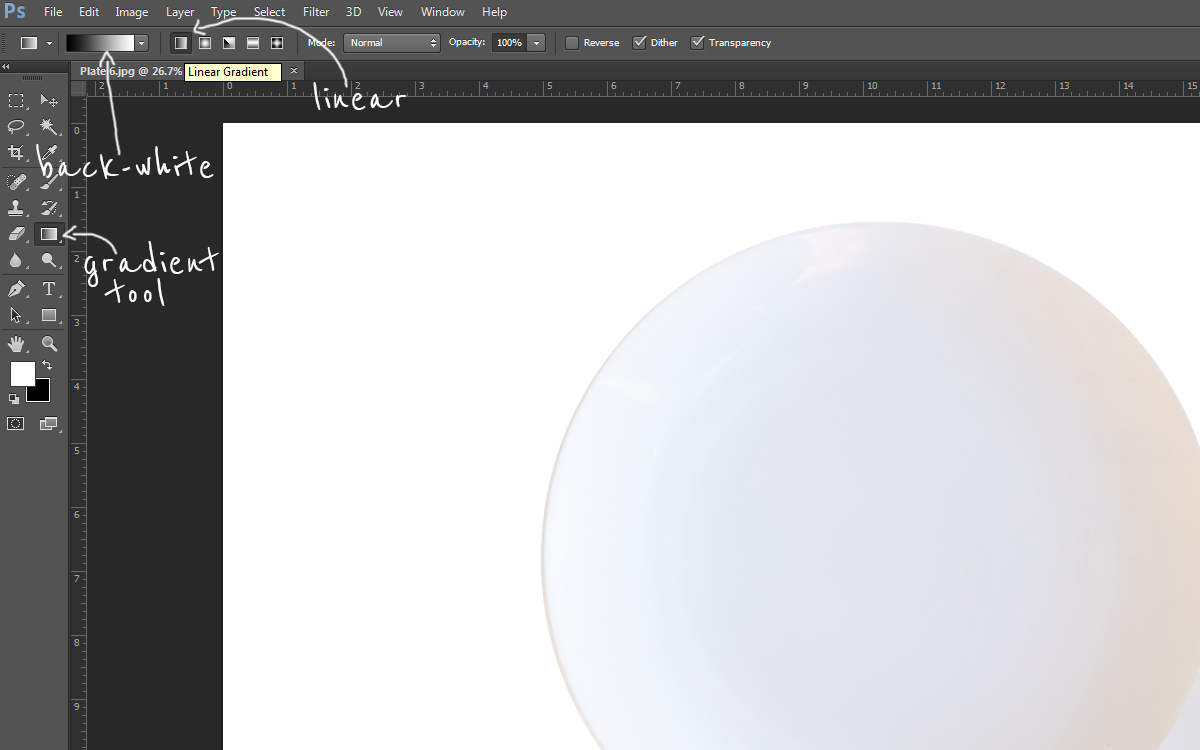
Select the ‘Gradient’ tool (keyboard shortcut ‘G’), then use the drop-down menu next to the gradient bar at the top of the Photoshop window to select the third option down for a black-white gradient. Select ‘Linear Gradient’ as well in the menu-bar icons to the right.
Step 8 – Apply the gradient
To apply the gradient, simply click at the base of the shadow closest to your object, then drag towards the far end of the shadow. This should convert your transformed image into a smooth gradient, but it still won’t look natural. Let’s clean it up now.

Step 9 – Unlock the layers
First, unlock transparent pixels by clicking the same button you did in Step 7.
Step 10 – Blend mode
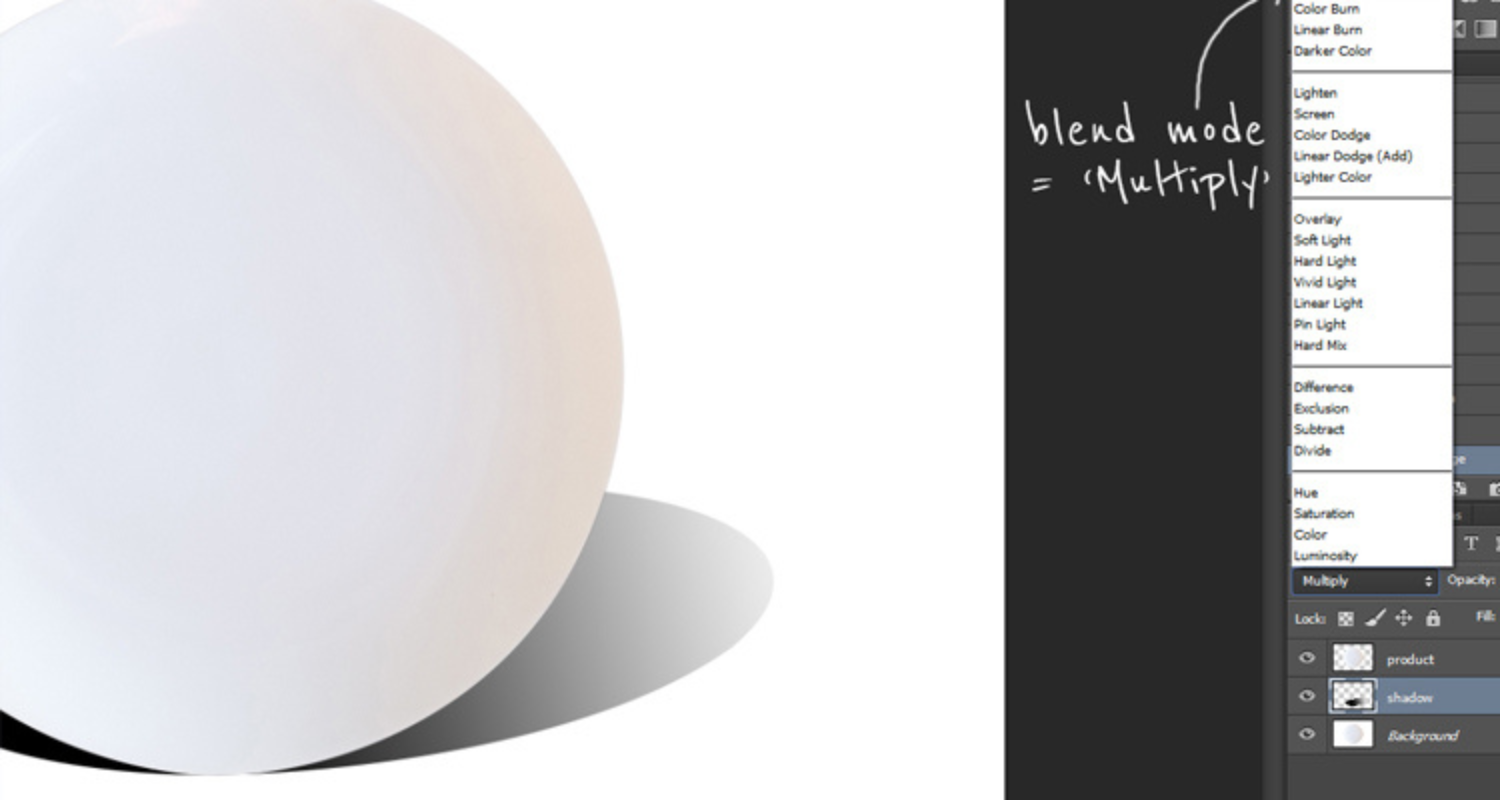
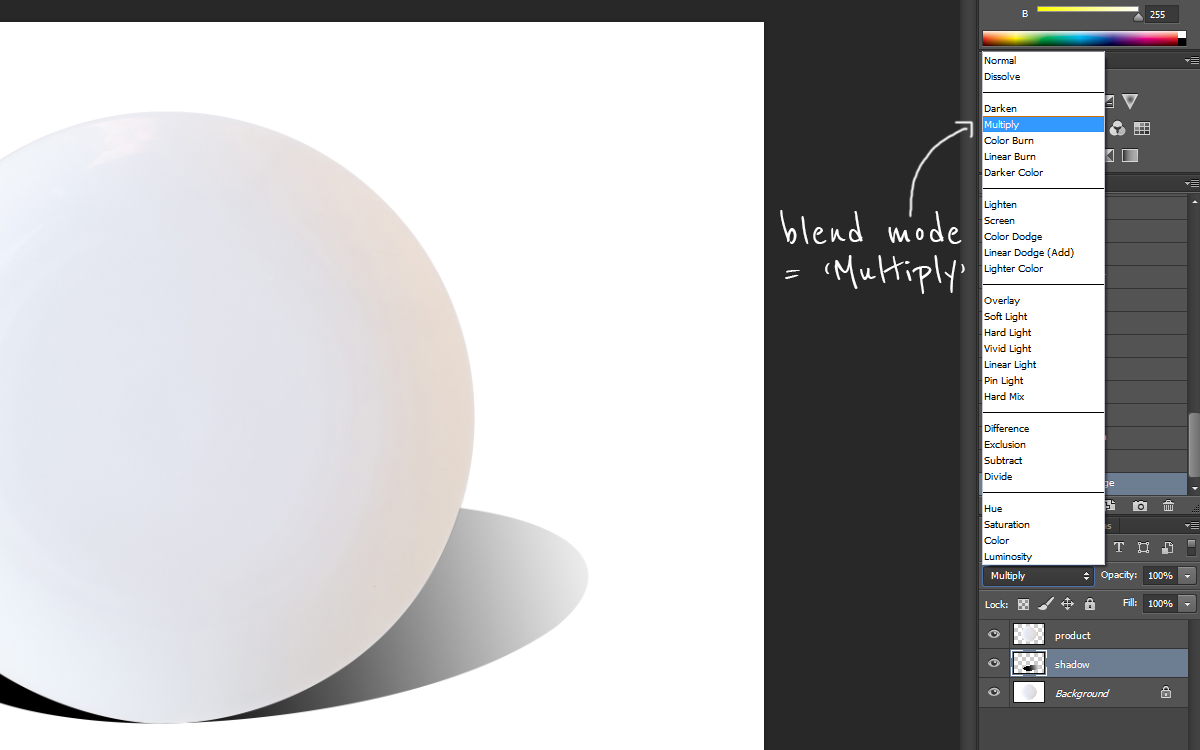
Right above this button, use the drop-down menu to choose ‘Multiply’ as the blend mode. For a lot of reading, click through to this tutorial on blend modes by Photo Blog Stop.
Step 11 – Click ‘Filter’
Click ‘Filter’ in the Photoshop main menu, then select ‘Blur’ and then ‘Gaussian Blur’. Select a pixel radius for the blur. You can experiment here since this effect will look different depending on the resolution of your image file and its specific shape. If you go overboard, use Ctrl + Z or Command + Z to undo one mistake, and Control + Shift + Z or Command + Shift + Z to go more than one step backwards.
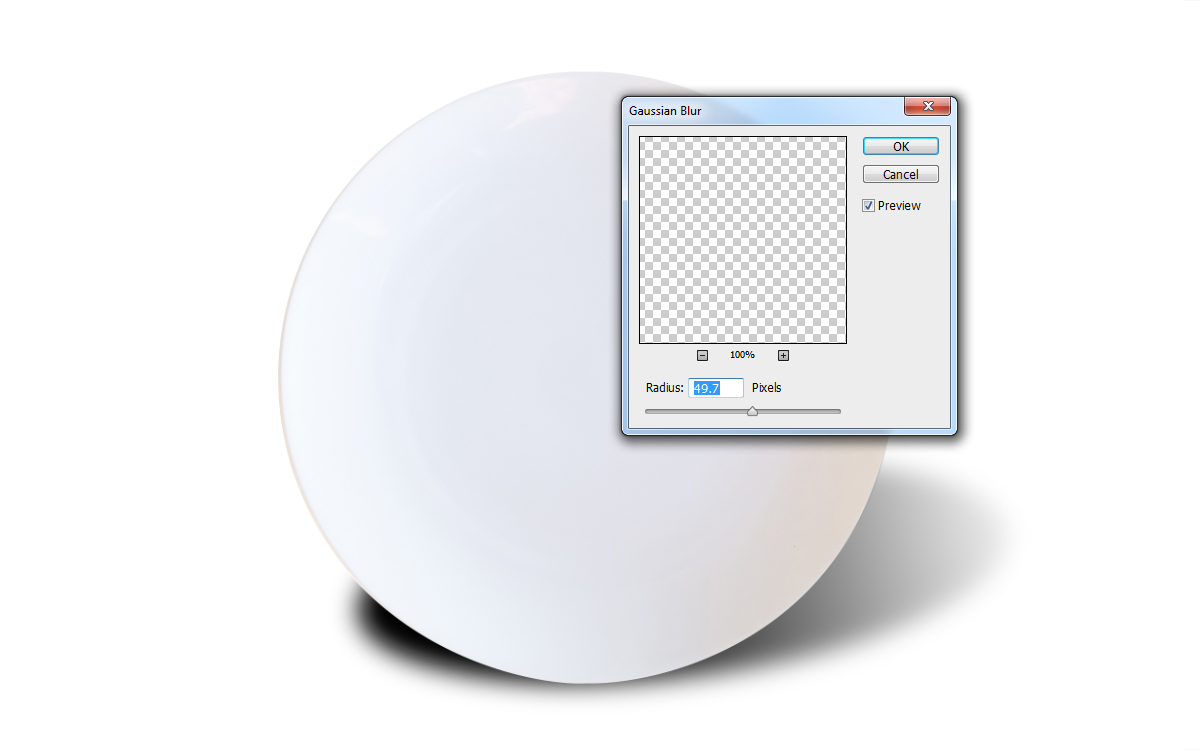
Step 12 – Transform
Now you can do some more transforming. Enable the ‘Free Transform’ tool again and transform your shadow. Try to follow the light source and move the shadow accordingly. This might take some trial and error. Also, you can use the ‘Opacity’ function in the ‘Layers’ panel to alter the opacity level of the shadow. This will make the shadow more subtle.
Step 13 – Final touches
For some final touches, take your eraser tool (E) and set its opacity to 20-25% and flow to 60%. Right-click on the canvas and set the size and hardness of your brush. The size of the brush will vary on the image resolution. Set Hardness to 0. Swiftly brush around your shadow layer to soften any hard shadow you have potentially made. You can use Ctrl + Z/Command + Z to undo your latest action. Just play around until you find something that you feel looks best.
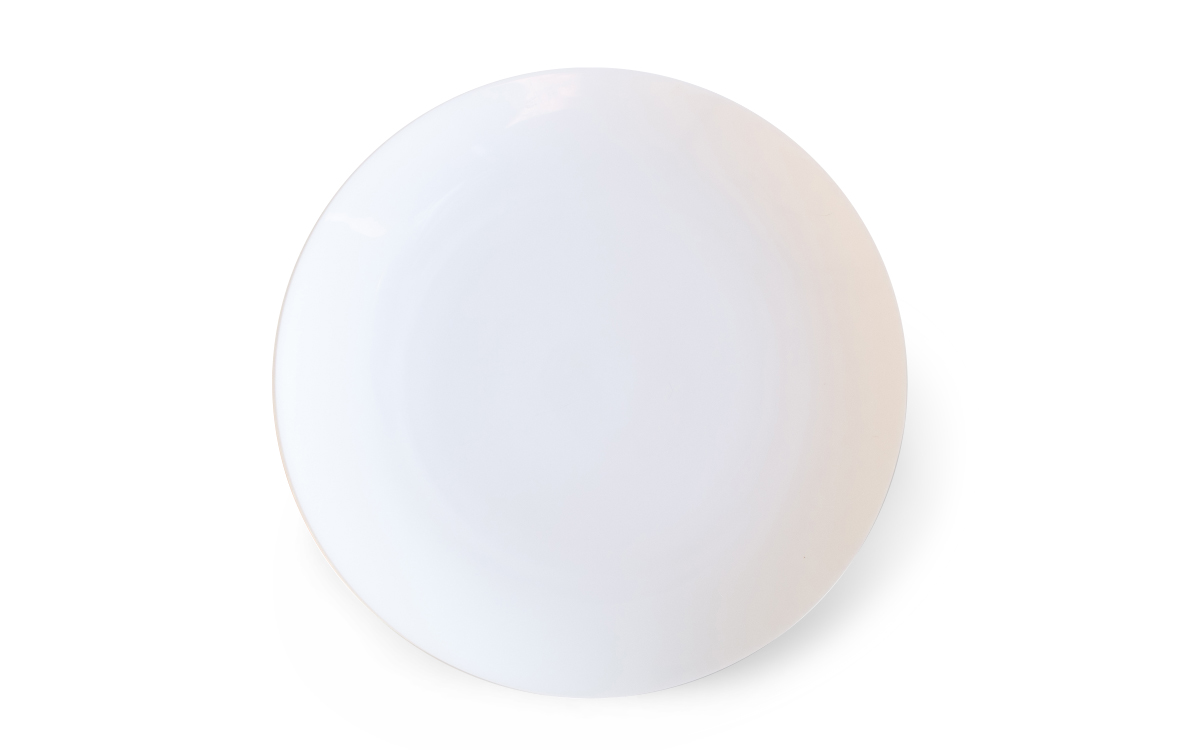
That’s it! You’ve now created a drop shadow from scratch! And if you want more Photoshop image editing tutorials, check out the Pixc blog.

