
Most people have one of two opinions on product photography: Either it’s a piece of cake for anyone with a smartphone, or it’s a highly sophisticated endeavor that takes a professional.
At Pixc, we think the truth is somewhere in the middle. With the right equipment and some basic instruction, anyone can create great product shots.
With five basic product photography tips, you can create great product shots like the ones below.

In this article, I’ll share five product photography tips that will help you become an expert product photographer. Grab your gear and take some notes — these tips are sure to make your images better!
1. Take formal product shots — then have some fun
When you’re doing product photography, you should make the most of your time. While you’ve got your camera, lighting and products ready, you should take a wide variety of pictures.
Make sure to get the clean, simple shots that show your product from all angles. Get the front, the back and the sides, and make sure to scoot in close for some detail shots. These images can be important for the customer when they are weighing a purchase.
Once you’ve covered these basics, try experimenting with odd angles and crazy perspectives. Most likely you’ll use the plain images for your website and catalog, but more creative perspectives can be very useful for backgrounds and creating the right ambiance in your marketing.
2. Use custom white balance
We’ve covered the basics of white balance in more detail before.
In any scene, the color of the light that is illuminating the area has a huge influence on how things look. Imagine the orange light of a sunset, and compare that with the blueish light of dawn or the flat white of a fluorescent lamp. This is color temperature, and it has a huge impact on the look of any image.
Have you ever taken a photo where the colors turned out very odd? Most likely, it was a white balance issue. On the flip side, when you get white balance just right, colors will look perfectly natural. Proper white balance is one of the best ways to get a great photo.
Just about every camera has the ability to use different white balance settings. Most cameras start on an ‘auto white balance’ mode, which (as the name implies) automatically analyzes the light in your scene and chooses a proper setting… most of the time.
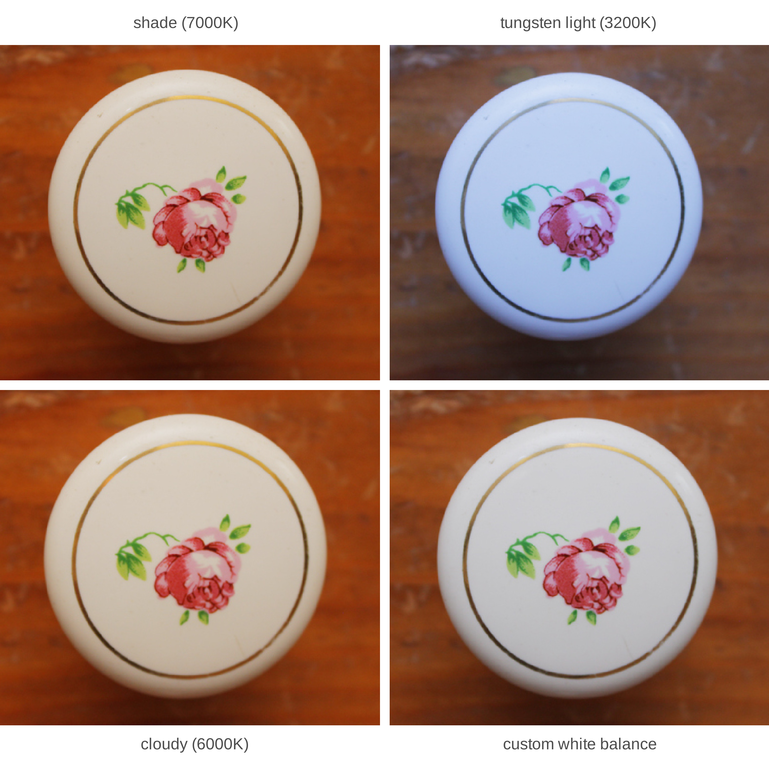
Auto white balance may be good enough for snapshots, but for top-quality product shots, you need to get manual. Dig into the settings of your camera and try to match the white balance to the scene with presets.
If those don’t work, you may be able to set a custom white balance using the Kelvin scale. Most cameras give options from around 3,000 K (very yellow) to 10,000 K (very blue). You can try to set this manually, but the best way is to put a white piece of paper next to your product and get up close. Then use custom white balance to set your camera off that piece of paper.
You’ll have perfect color every time.
3. Pay attention to details
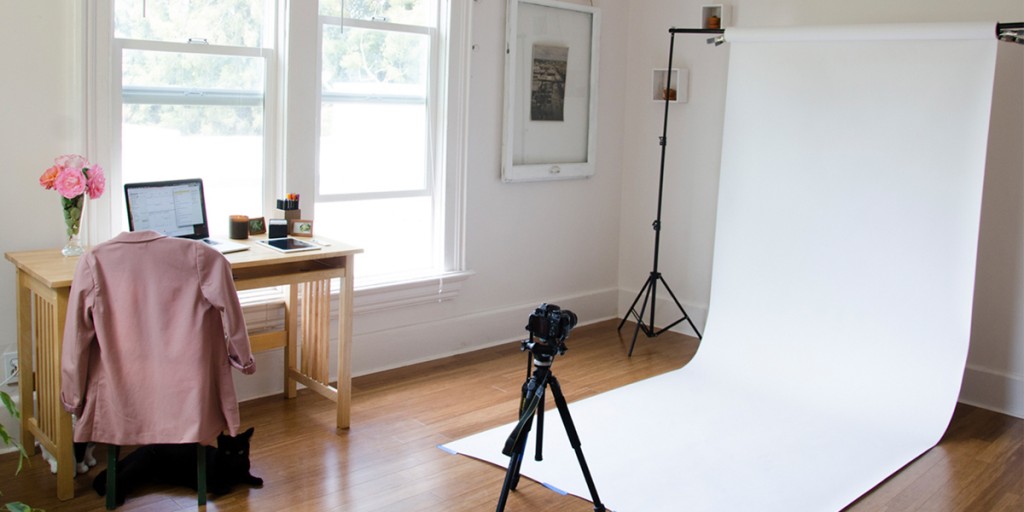
Getting high-quality product photographs is generally a somewhat time-consuming process, especially if you don’t have a dedicated studio setup. Whatever setup you have, take the time to do the job right.
This is a great time to invoke the classic carpentry metaphor ‘Measure twice, cut once’. For product photography, take the time to perfect the lighting, get the background exactly right, choose the ideal angle and find the optimum color settings to nail your image. It’ll take some time, but it’ll pay off when you don’t have to do much editing of your photos and when your customers start looking at those images.
Some things to watch out for:
-
Dust, fingerprints, or smudges on your products or backgrounds
-
Stray objects in the corner of the picture
-
Not focusing the lens properly on the subject
-
Camera shake and vibration
-
Low light levels (leading to high ISO, slow shutter speed and bad image quality)
-
Running out of batteries or memory cards in the middle of the shoot
4. Use reflections
One great way to create unique, beautiful product shots is to use reflections. Reflections create a feeling of depth and complexity in an image. There are a few ways to create reflections in a home studio.
The simplest way to create reflections is to use a mirror. Make sure it’s thoroughly cleaned (with non-streaking cleaner), then put your product on top for a clean reflection. Shoot from a low angle, nearly parallel with the mirror, for best effect.
Another way to create reflections is to use aluminum foil. Peel a large sheet off a roll of standard cooking foil, being careful to keep it as flat as possible, then position it the same as a mirror. Be careful to keep the ragged edges out of the photo.

The final DIY method for creating great reflections is to use water. Either place a thin layer of water in a tray and place your product there, or simply pour some water on a flat surface.
This method generally works best when you can use backdrops like construction paper or sheets to control the background — or when you have a pure white room — since you won’t want a reflection of your ceiling fan on your business page.
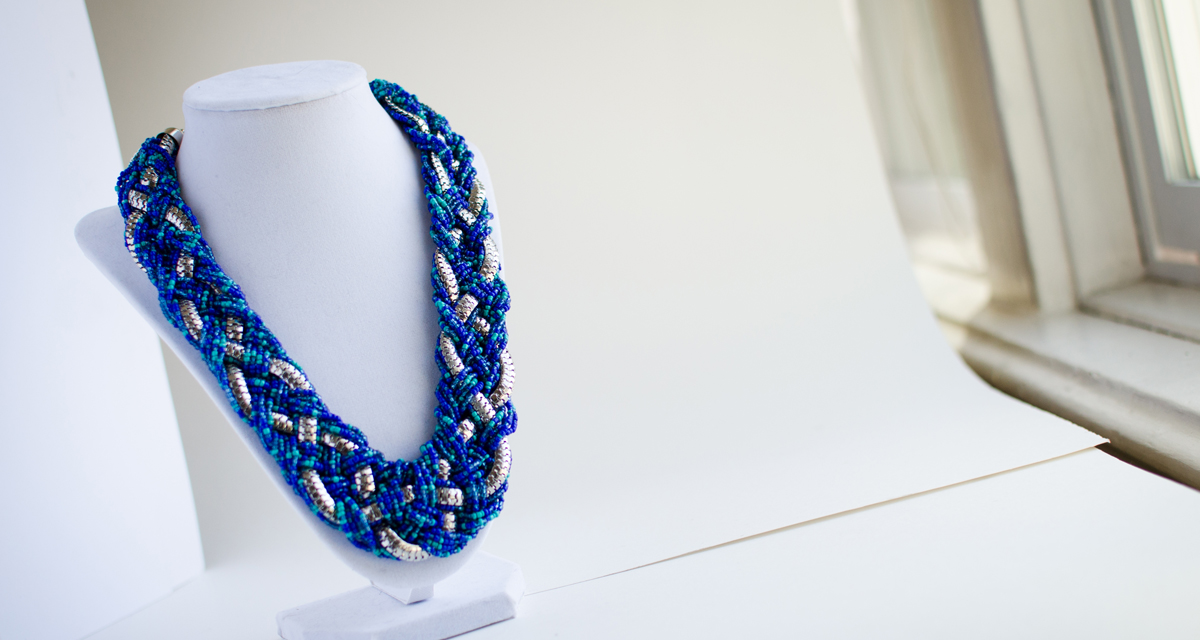
5. Light the background, not just the product
A simple Google Image search provides access to a wide variety of lighting diagrams for product photography.
Even a novice product photographer will figure out that a product needs to be lit properly for good photos. But lighting the background is not intuitive. Believe it or not, lighting your backgrounds can greatly increase the quality of your product shots.
Lighting the background has two positives. First, if you’re planning to remove the background from your photos (or planning to have Pixc do it for you with our affordable image background removal services), a bright, clean background makes this process easy and provides the best results.
If you want to keep your product background in place, bright lighting will give your photo a professional, clean look. No more dingy, dark product images!
And that’s just the beginning!
Product photography is a complicated process made up of a bunch of different parts. Not only are the tips above only scratching the surface, there is always innovation happening around us. But the fundamentals remain the same. Using these five tips, you should be able to produce some great images.
Do you have more tips to share? Let us know in the comments!