High-quality product photography is the key to increasing your eCommerce sales. Awesome product images will help your store make a great first impression on your potential customers and make the final purchasing decision much more straightforward. Here are five tips on how to shoot your products and optimize them for ecommerce.
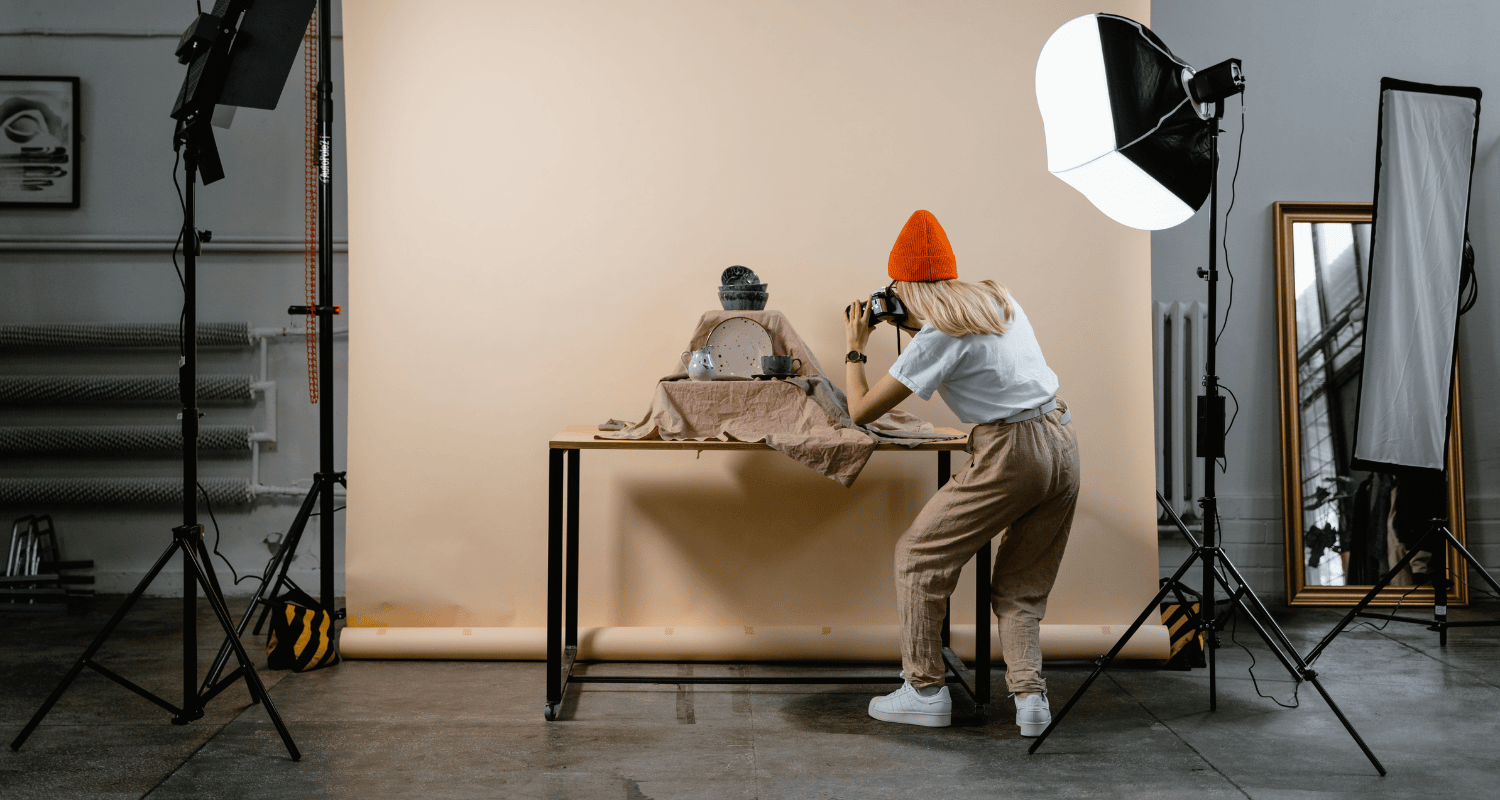
1. Nail your product photography setup
Getting the photo shoot right is half the challenge in product photography. For best results, set up a white photography sweep, just a white backdrop that transitions seamlessly from the vertical to the horizontal surface.
You can use any white material for this, from a sheet to paper, but the shinier, the better (plain white wrapping paper works great!) The shiny surface will reflect light onto your product and capture the product’s actual color. The sweep needs to be larger than the product; ideally, you want it to fill up the entire camera frame.
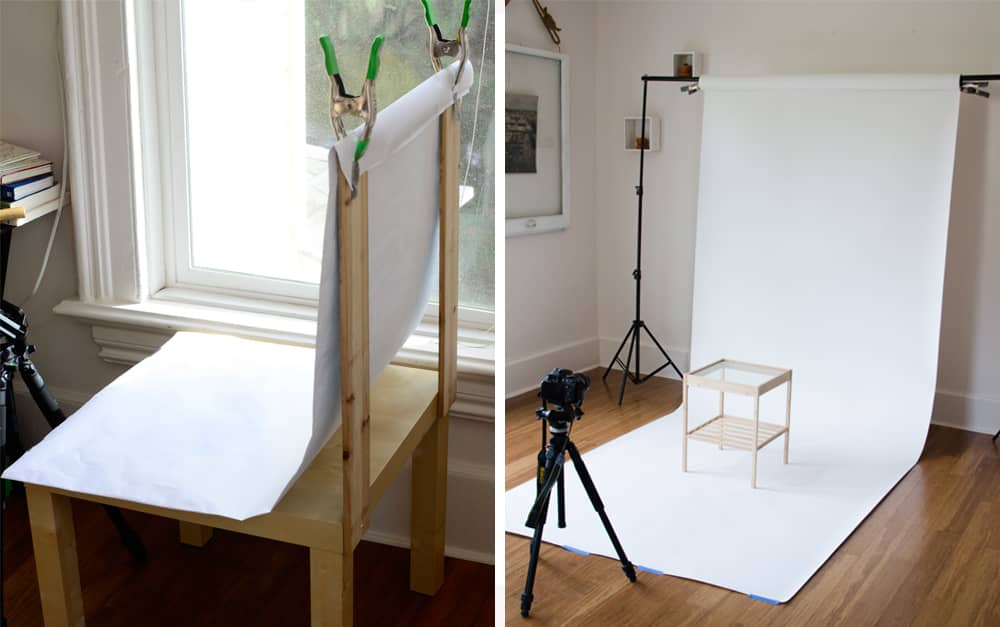
If you’re shooting smaller products, I suggest making your own DIY product photography table. Grab a small table, two scrap pieces of wood, some spring clamps, and your sweep material. Nail the wood to the back edge of the table, clamp the sweep to the top of the blanks, and let the sweep fall across the table.
If you shoot large products, setting up a sweep will be trickier as you’ll need to improvise with how you hold it up. You’ll need to attach it to a wall or improvise with the furniture you have on hand. If you shoot regularly, I’d suggest buying a professional photography sweep with a stand.
2. Stick to natural lighting
Natural lighting can help you take high-quality photos, but the trick is to use it as an indirect light source — a bright spot near a window will work wonders.
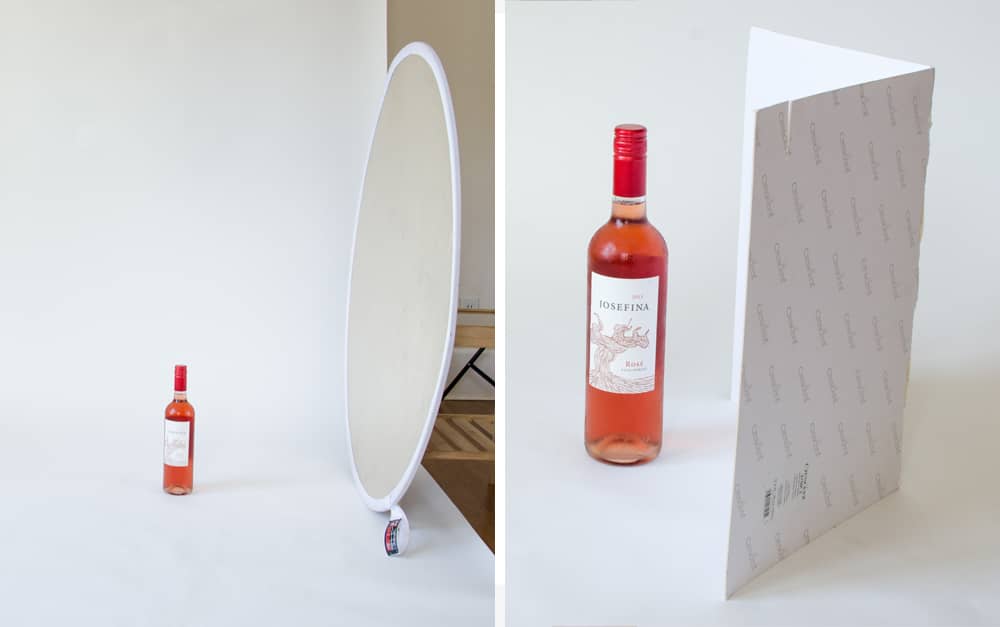
Ideally, the window should be to the left or right of your product. You will, however, need a fill light on the other side to balance the lighting and prevent harsh shadows. You can invest in a reflector or make a DIY fill light by standing up a piece of white card in half. Pro tip – cover it in aluminum foil to make it extra reflective!
3. Provide multiple product photos
As an ecommerce store owner, providing sufficient visual information about your products is crucial. Relying on just one product image per page won’t be sufficient.
To find the right hero image for your product, select a high-quality photo that clearly highlights the product. This image will be the first thing users see, so it must be compelling enough to entice them to click and learn more. Generally, a front-on shot works well, but the angle may vary depending on the product. For example, shoes are usually displayed from the side, plates from above, and chairs from a 45-degree angle.
Once a shopper clicks through to the product listing, they will likely buy your product. Aside from the product description, product images will have a huge say in the final purchasing decision.
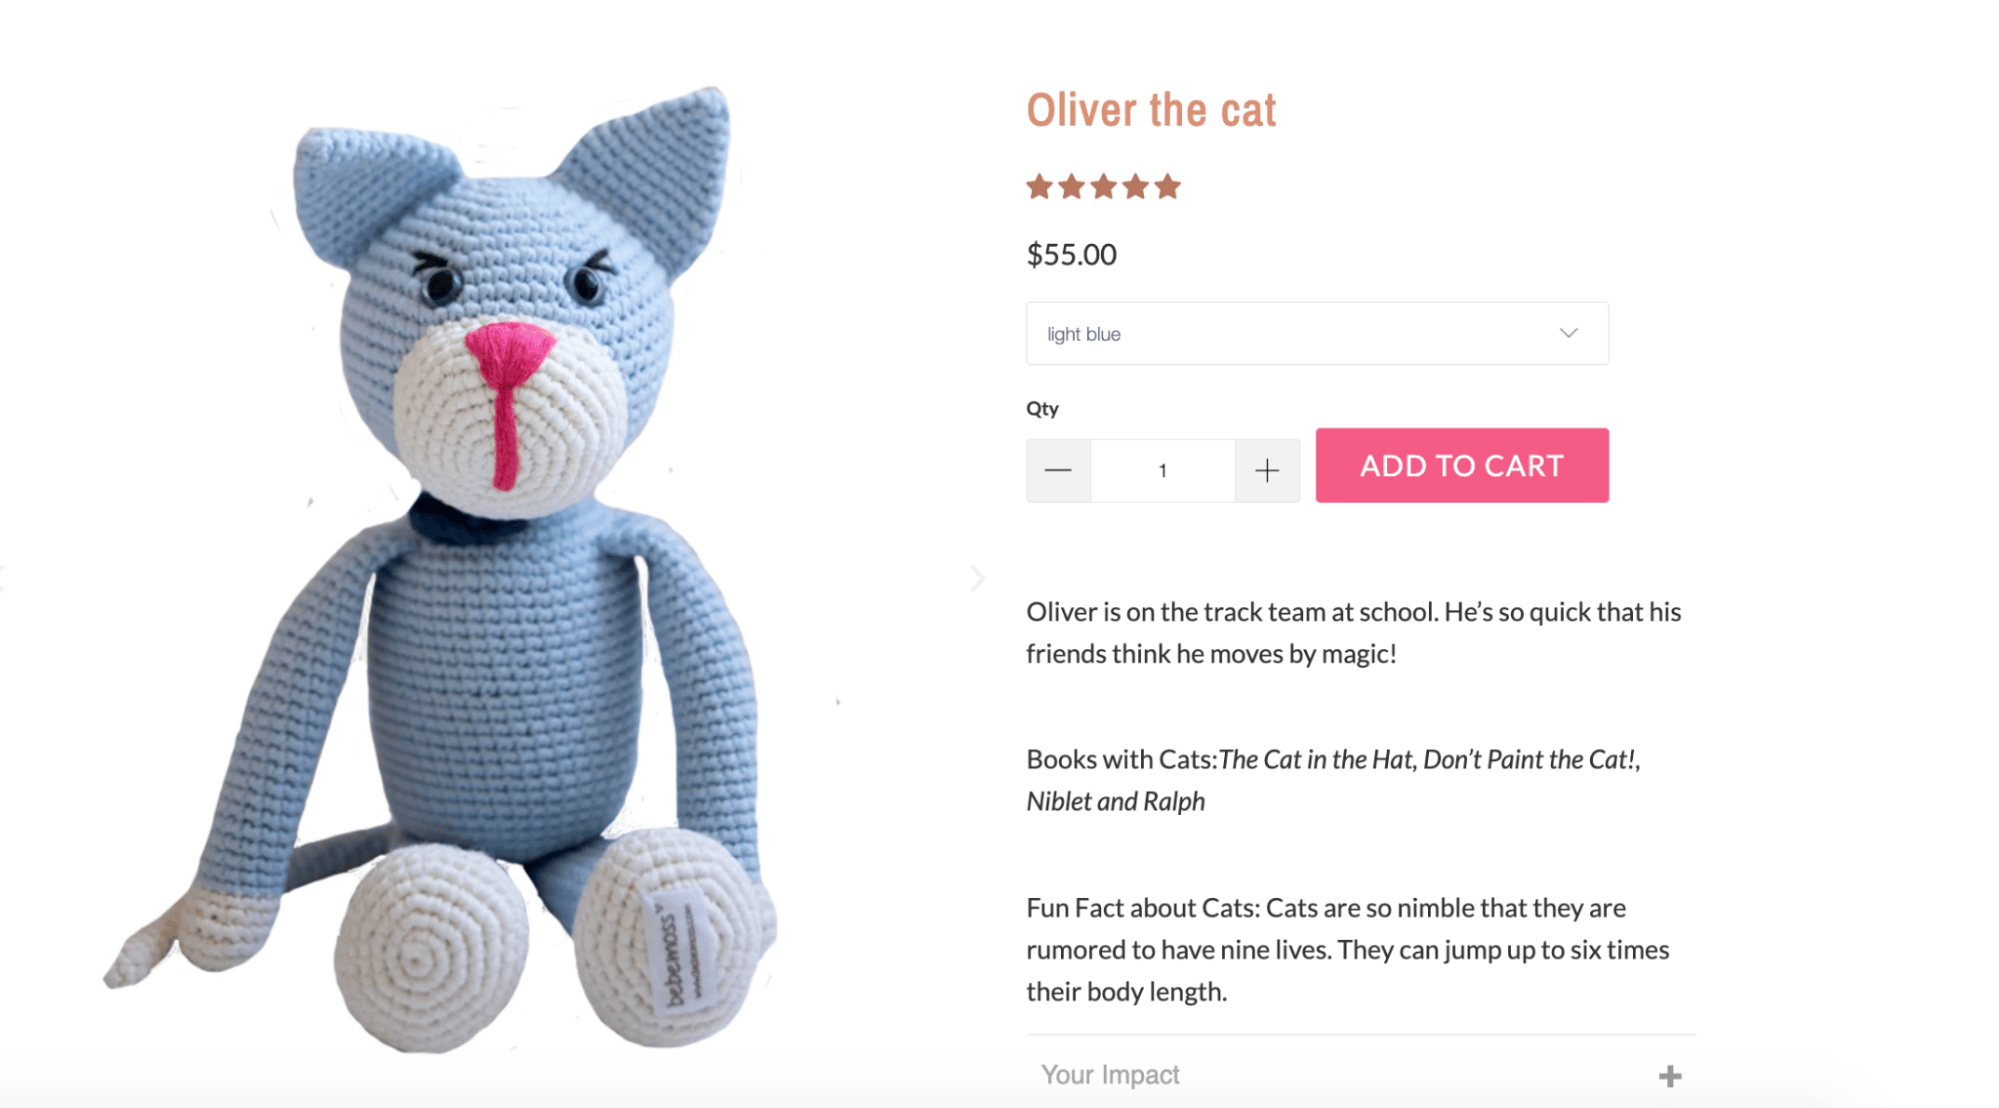
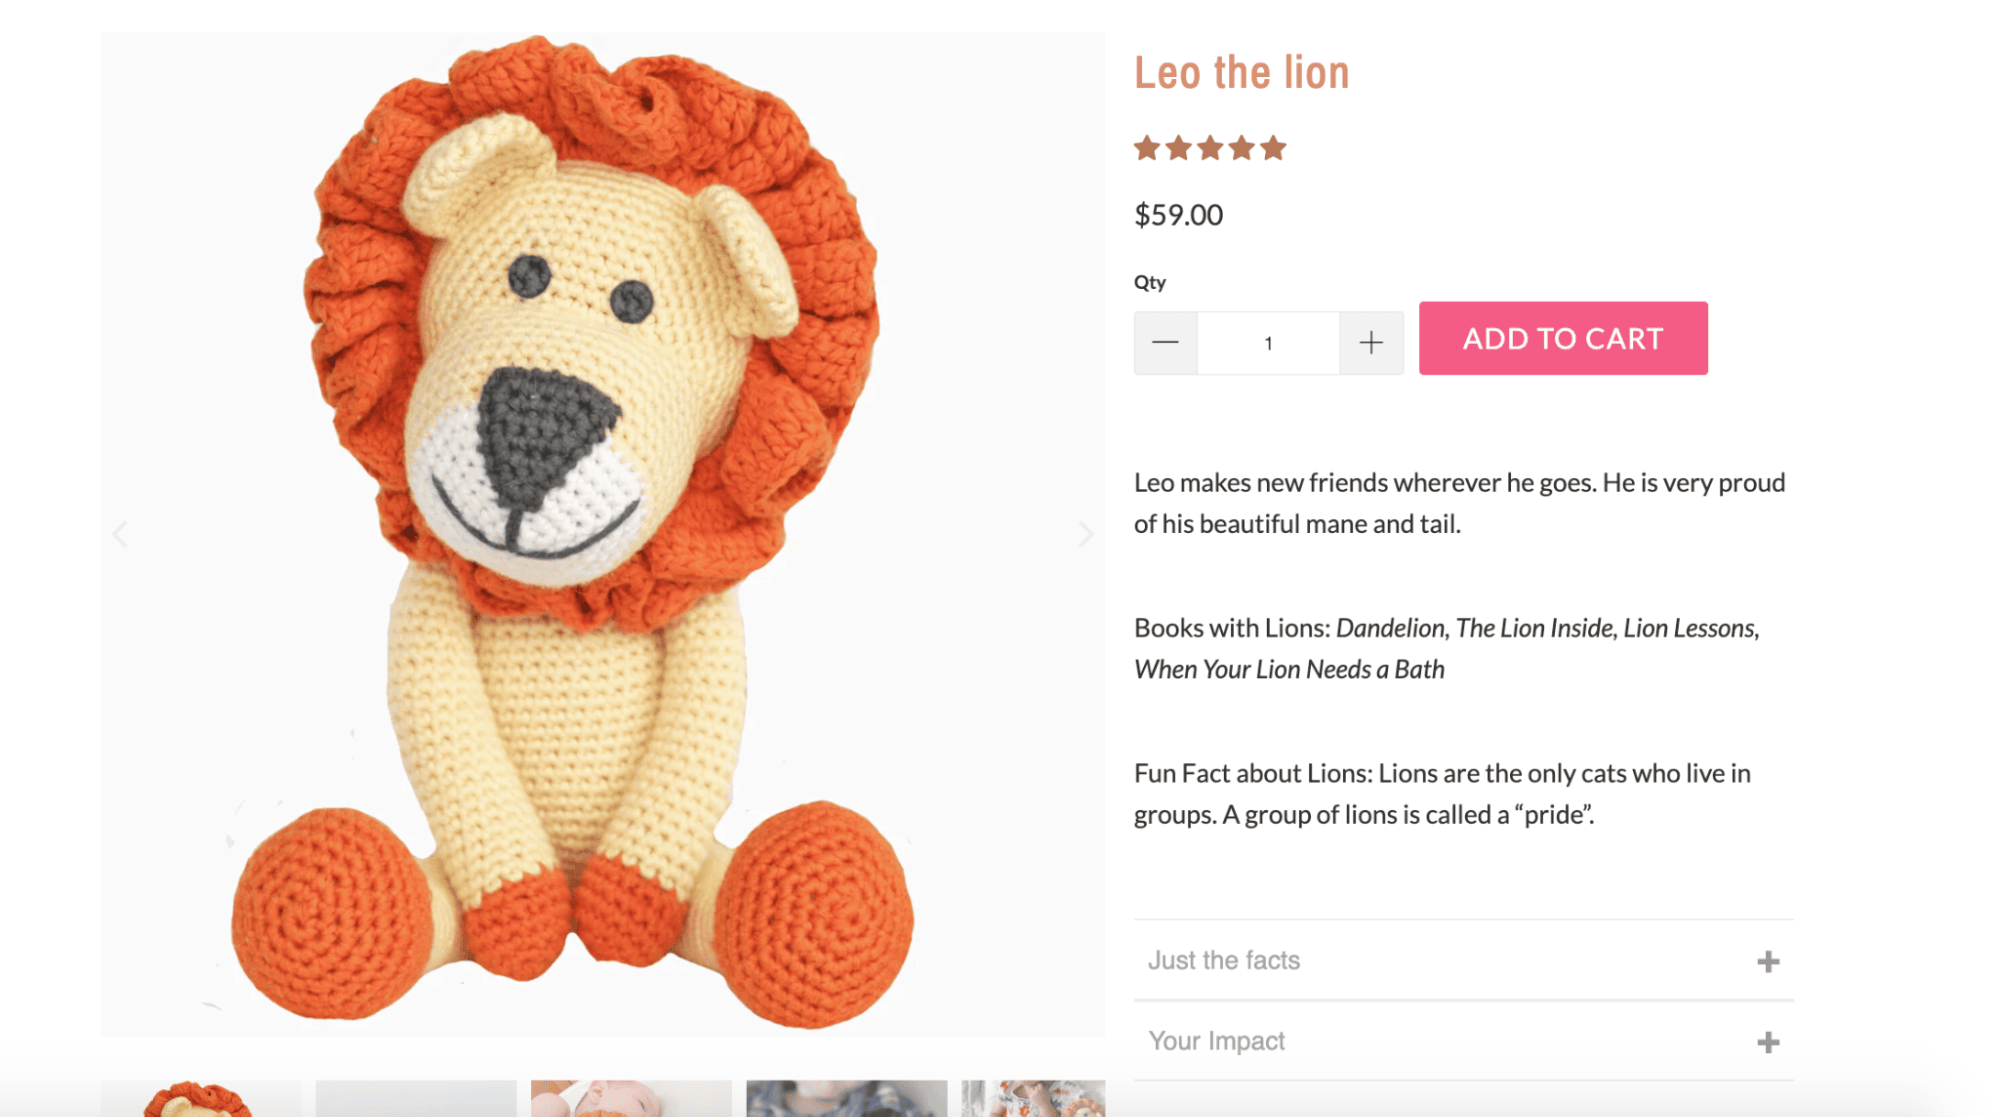
Take photos from different angles to show off your product from all sides. Multiple product images help online shoppers overcome the reluctance to buy without physically seeing or touching the product, providing a clear visualization.
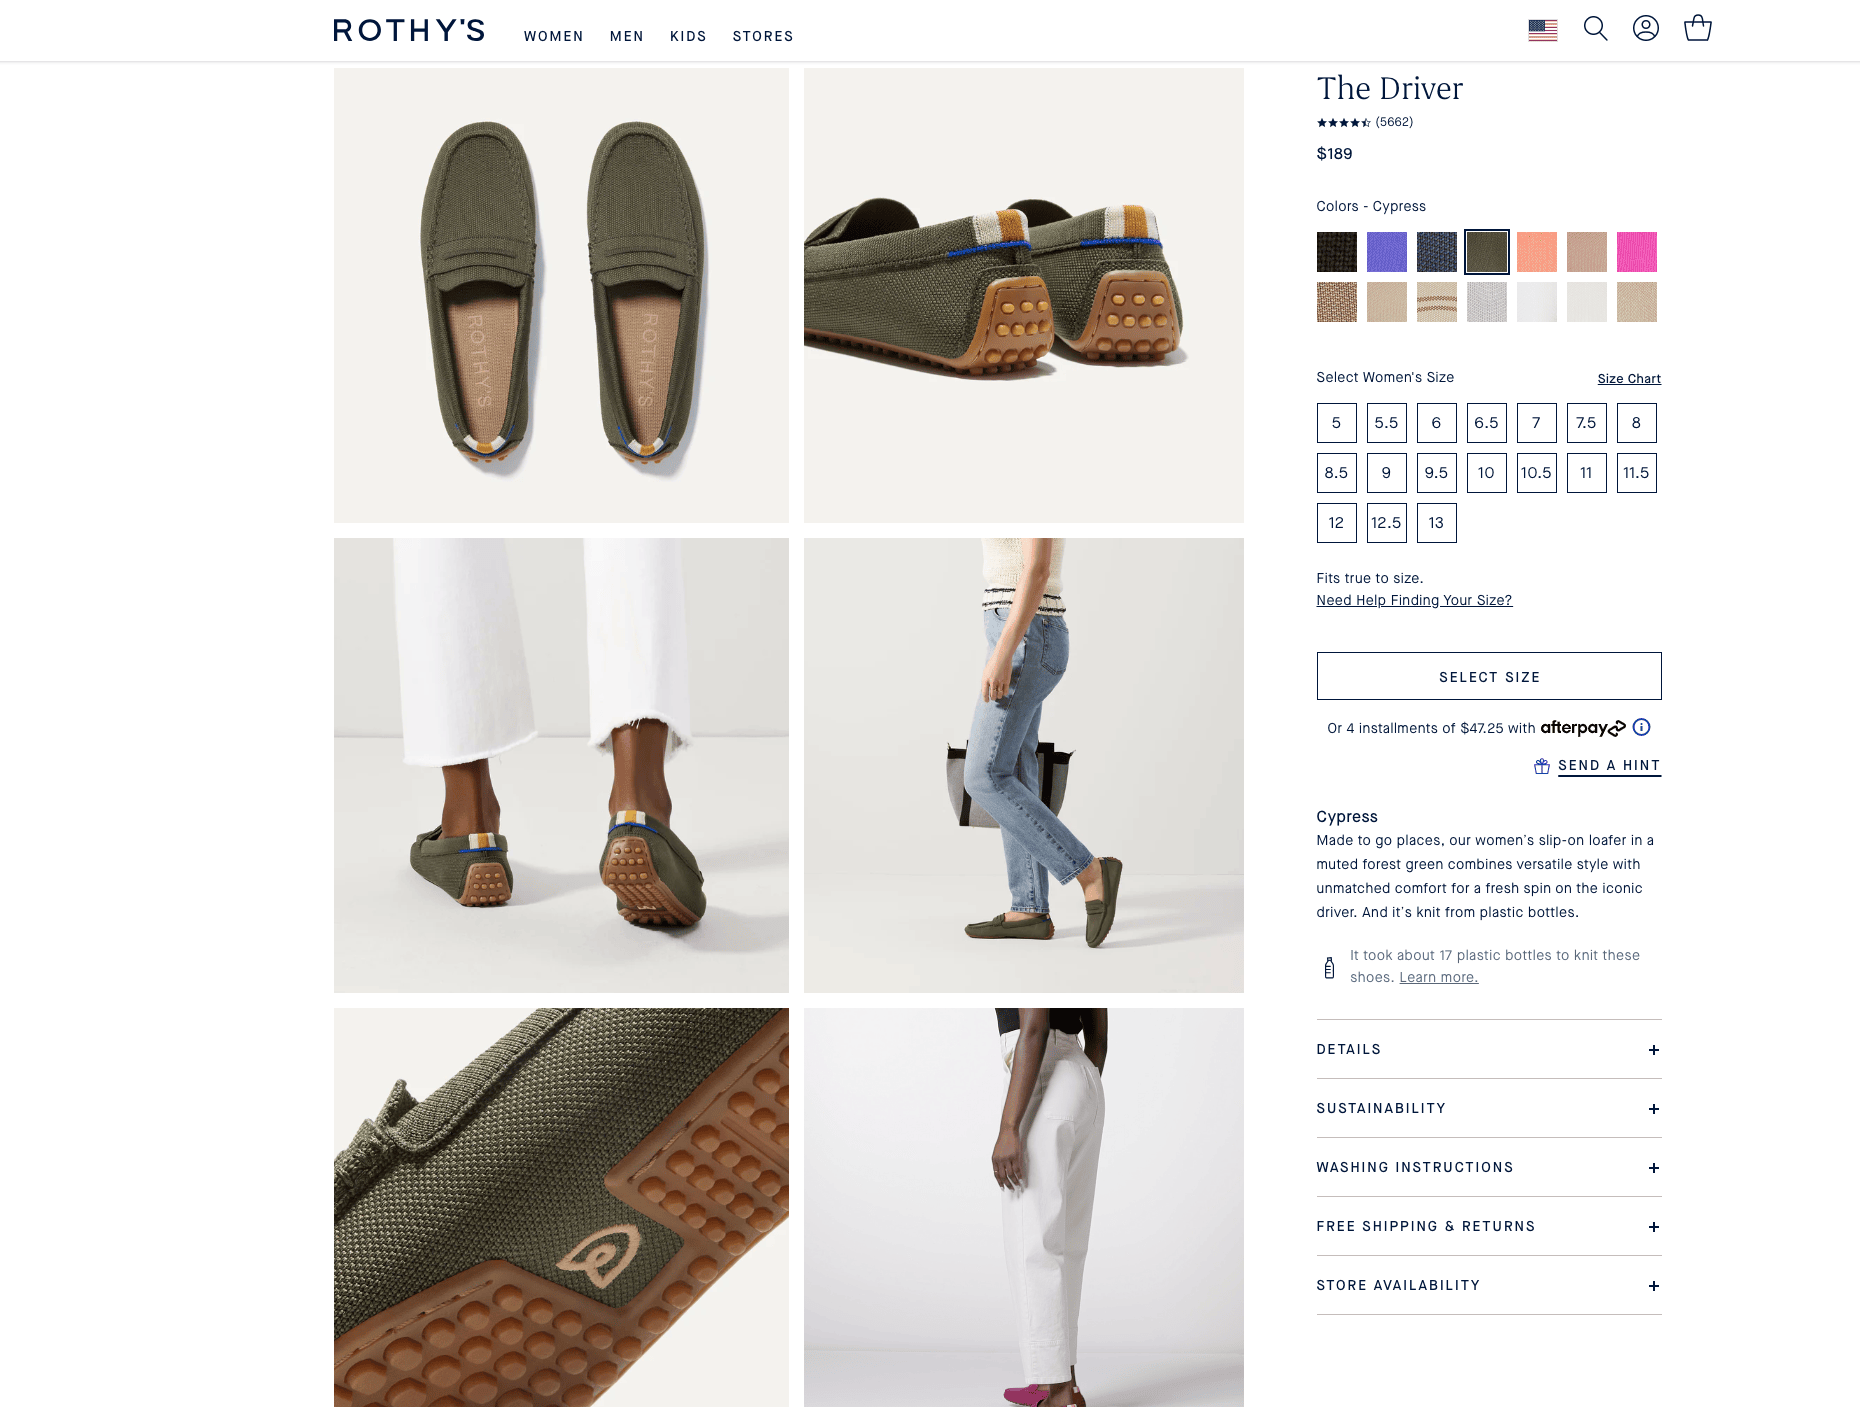
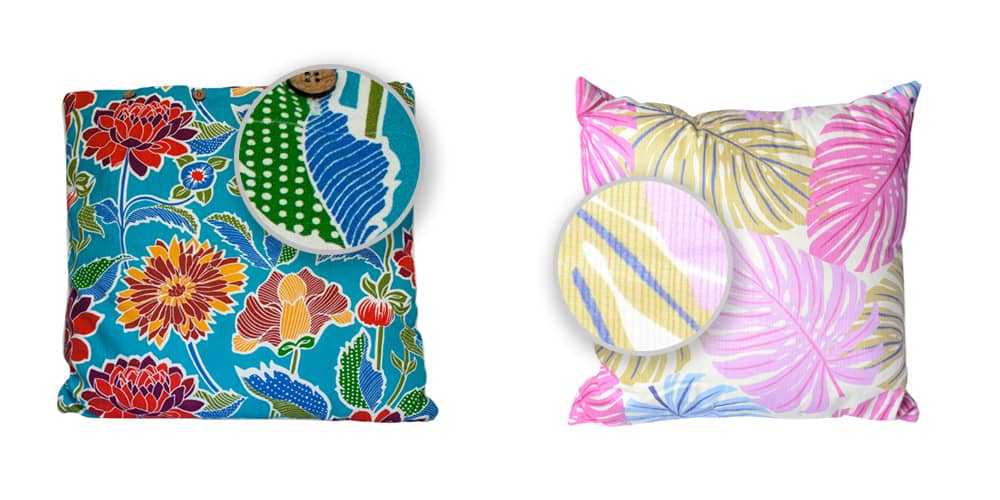
You should also provide close-ups of special features, patterns, or textures. Even if you have a zoom function enabled, close-ups are important because they show the shopper where to look.
If you sell your product in multiple colors, take a photo of the product in each color. It’s not easy to imagine what a product would look like in an alternative color when you’re only given a small icon of the color swatch, which could lead to purchase resistance. Most store builders allow you to assign a photo to a color variant, which means you can upload different photos for each color of the same product.
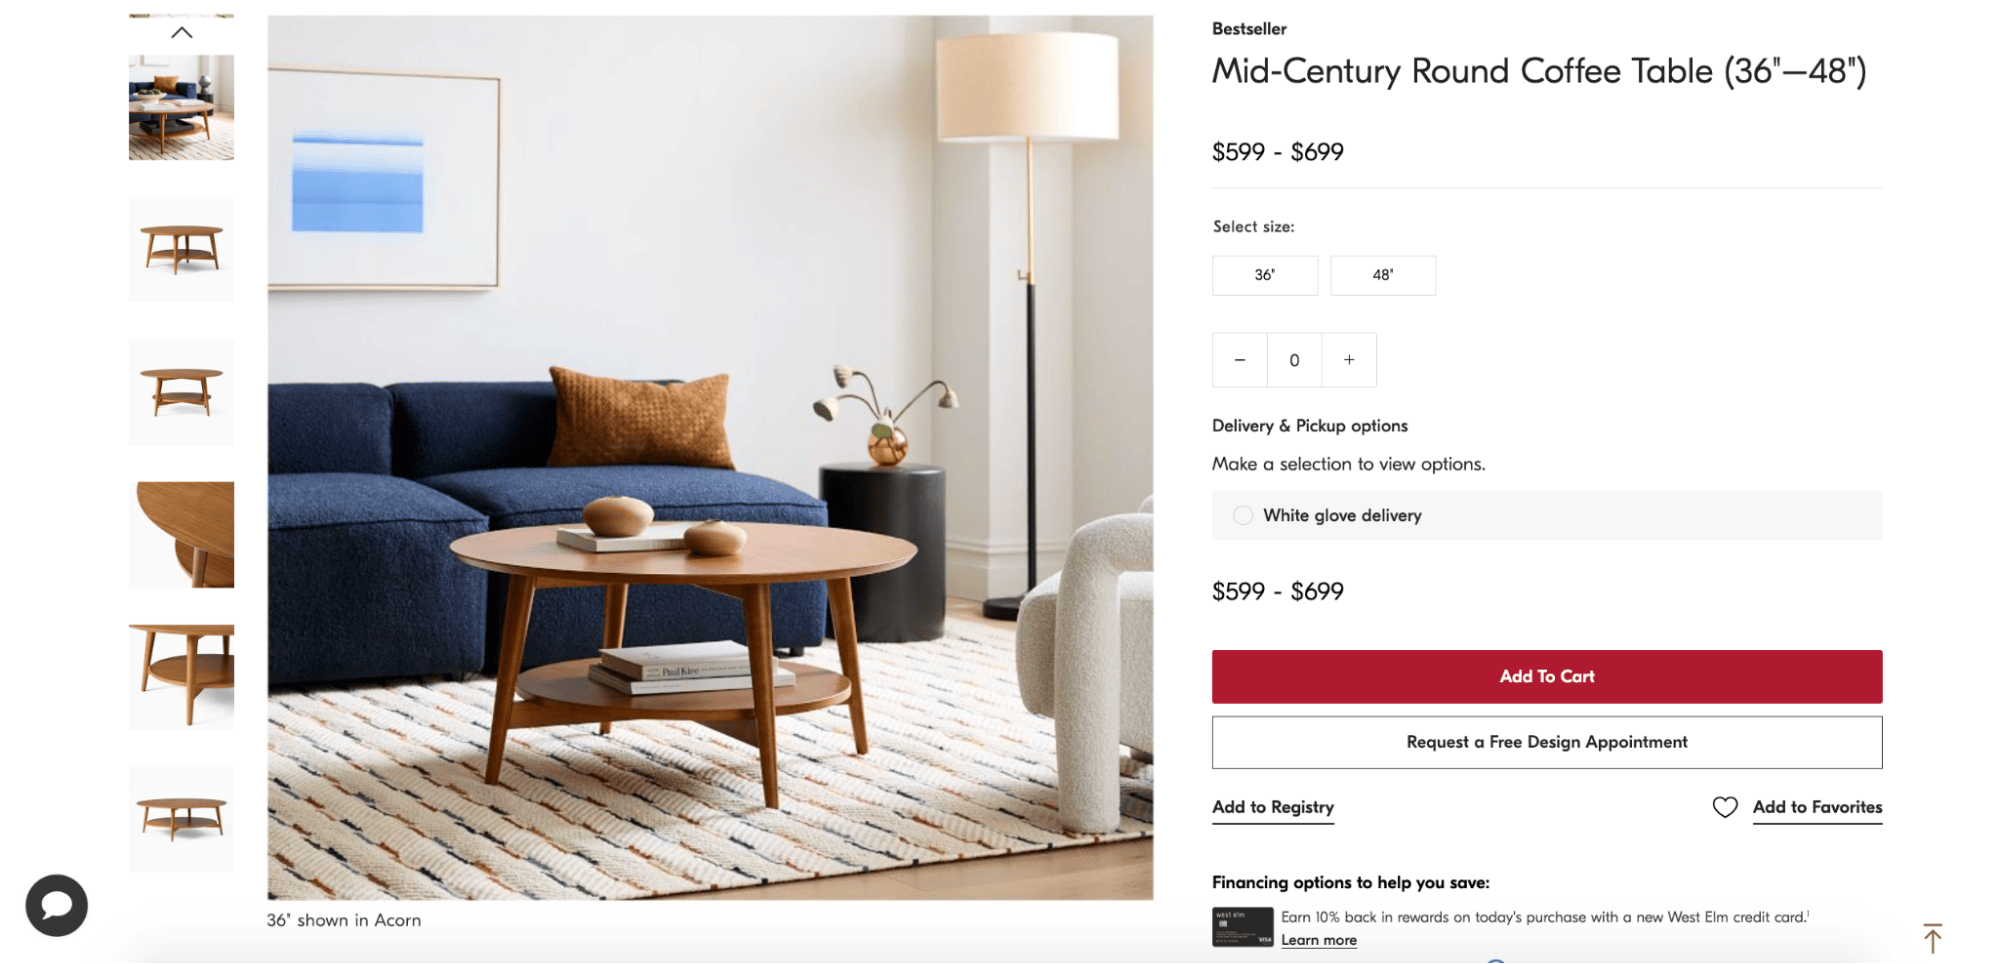
Finally, you might want to complement your product images with an in-context shot. This is where you can get creative and showcase your product in a perfect setting.
4. Remove the background and optimize your photos
The general rule in product photography is that the background should neither conflict with nor distract the viewer from the product, which is why removing the background works wonders!
There are a couple of ways to do this, but the most accurate way is to do it manually using the pen tool in Adobe Photoshop. Using the pen tool will take some time to get the hang of how it moves, but practice makes perfect! Put simply, you want to use the pen tool to create a ‘path’ around your product, which will be a lot easier to do if you shoot against a white backdrop. You can then select the product to isolate it from the background. We have a step-by-step tutorial on how to do this if you want to learn more.
If you’re on the busier side of the business, you probably won’t have time to manually remove the background from every product photo. In cases like that, the better option is to use an automated photo editor that quickly removes the background within seconds. If you haven’t yet, you can try Pixc’s automated service now to see if it’s a good fit for your image editing needs.
Once you’ve removed the background, you can place it in any color you like. By digitally adding a background later, you can ensure that your backgrounds are consistent down to the color swatch, giving your store a professional touch.
White (#ffffff) works best because it draws attention to the product and doesn’t clash with any other color.
If you don’t like the ‘floating’ look of the white background, try a very light grey. Though the product itself won’t stand out as much as it would against white, you’ll be able to have a noticeably consistent shape to your product images.
5. Create a template
To maintain consistency in your product images, creating a template that you can apply to all of them is helpful. Use Photoshop or any editing app that lets you paste images onto a blank canvas with your desired dimensions.
Begin by selecting the appropriate size for your images. A recommended size is around 1600px on the longest side. This size ensures optimal viewing on mobile devices and tablets.
Additionally, this size enables an effective zoom function, enhancing your customers’ online shopping experience.
Remember, the image you upload to your ecommerce store becomes your ‘base image’ and gets resized for different templates throughout your site, such as the hero images on the shop page and the large photo on the product listing page.
The secret behind a zoom function is that when you ‘zoom’ in, you’re viewing the base image. Zoom function requires a base image larger than the product listing template; we recommend anything over 1000px.
Once you’ve chosen your template size, you can paste your products in one by one and save them individually. Align them so that they’re centered and take up 80-90% of the canvas. If you’re using Photoshop, you can add guidelines to your template to ensure your products line up perfectly every time.
Keep in mind that product photography requires practice, and establishing a shooting and editing routine takes time. Don’t be discouraged if your results aren’t perfect the first time, and note what works and what doesn’t.
Have you ever thought about outsourcing image editing? Discover Pixc’s Image Editing App – perfect for streamlining image editing while you concentrate on business growth.
Share on social: