It may seem simple to photograph a t-shirt to sell online but sometimes it is the simple things that need more attention. The preparation of the garment, the way you shoot and your camera settings can play a key role in capturing great product photos.
You don’t have to have a pro setup or spend lots of money. Just consider these five things when you photograph your products.
1. Choose a mannequin, model, or hanger
When it comes to presenting your t-shirts online, you will need to choose between a mannequin, model or hanger. Not only will you need to choose how to photograph a t-shirt, but also think about how you would like the end product presented on your eCommerce store for your visitors and potential customers.
When you photograph a t-shirt you want to keep in mind some key points.
Using a model is the most natural looking and organic choice. This allows the customer to visualize it as if they were wearing it. I also suggest listing the model’s exact measurements in your clothing description. The same t-shirt can sit differently on someone who has wide shoulders over someone who is narrower but still takes the same size around the chest.
A mannequin is a great way to keep your photos consistent as the measurements will always stay the same no matter when you do a photoshoot. Mannequins, however, are not always the most realistic representation of real-life. Don’t we all want to be tall and slender?
A hanger is a very cheap way of presenting an item, however, it will only show the item as a flat lay. This method will give a consistent look to all of your t-shirts but it is not the best choice because your potential customer will not see how the item looks when worn.
To understand the difference between using a model vs a hanger when you photograph a t-shirt, look at these examples showing how the t-shirt lays in different forms.
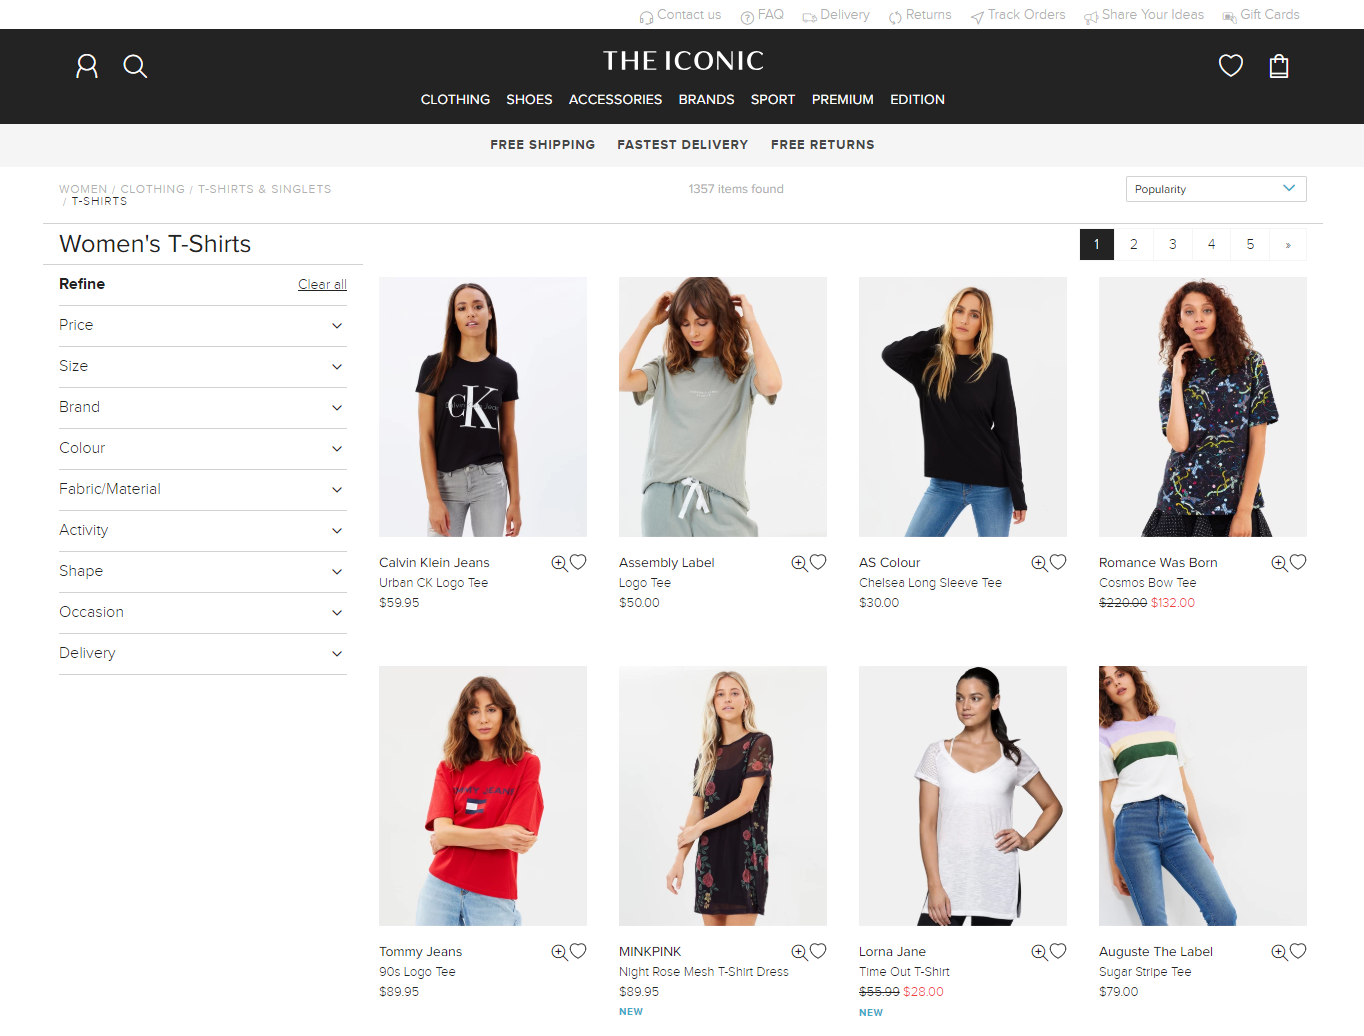
Source: The Iconic
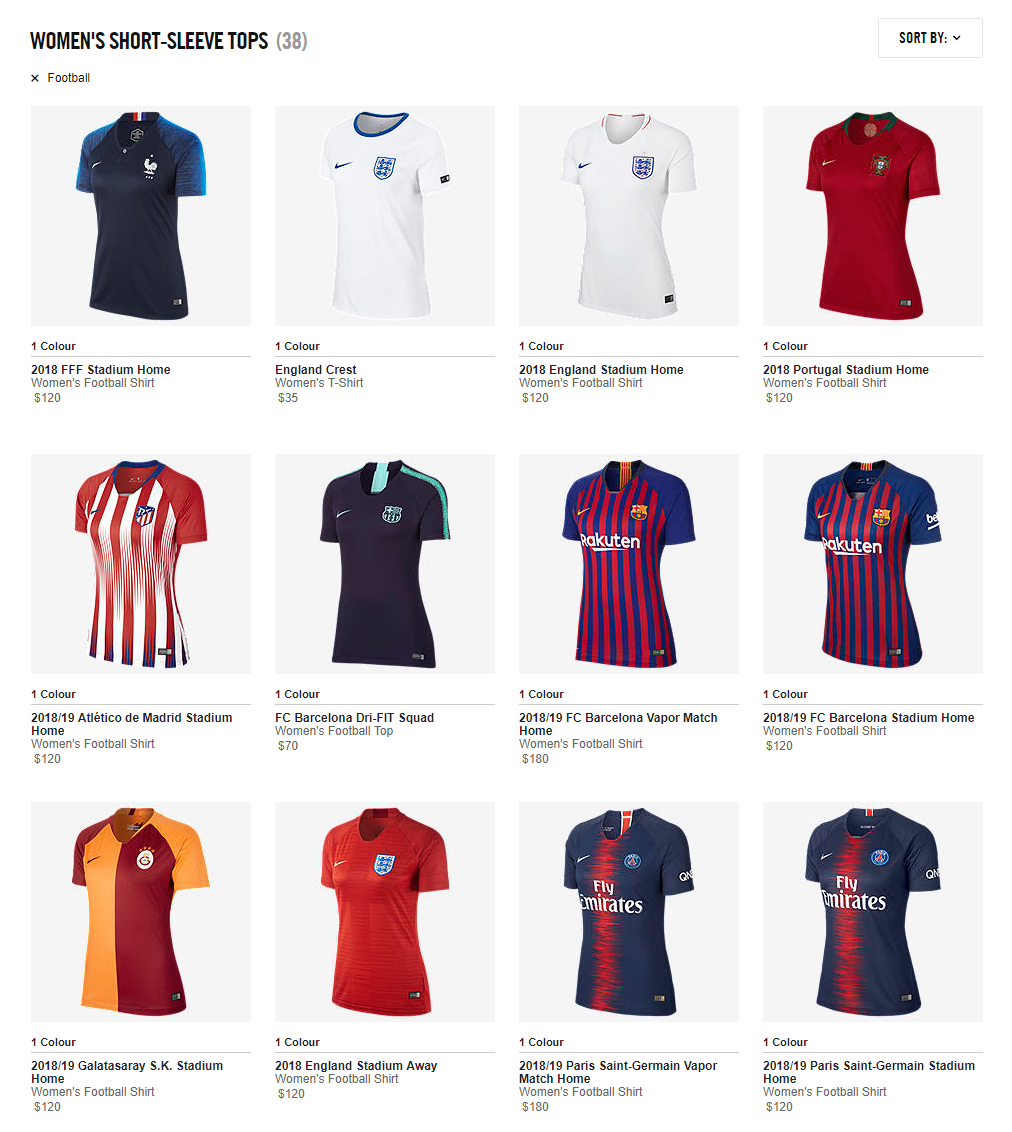
Source: Nike AU
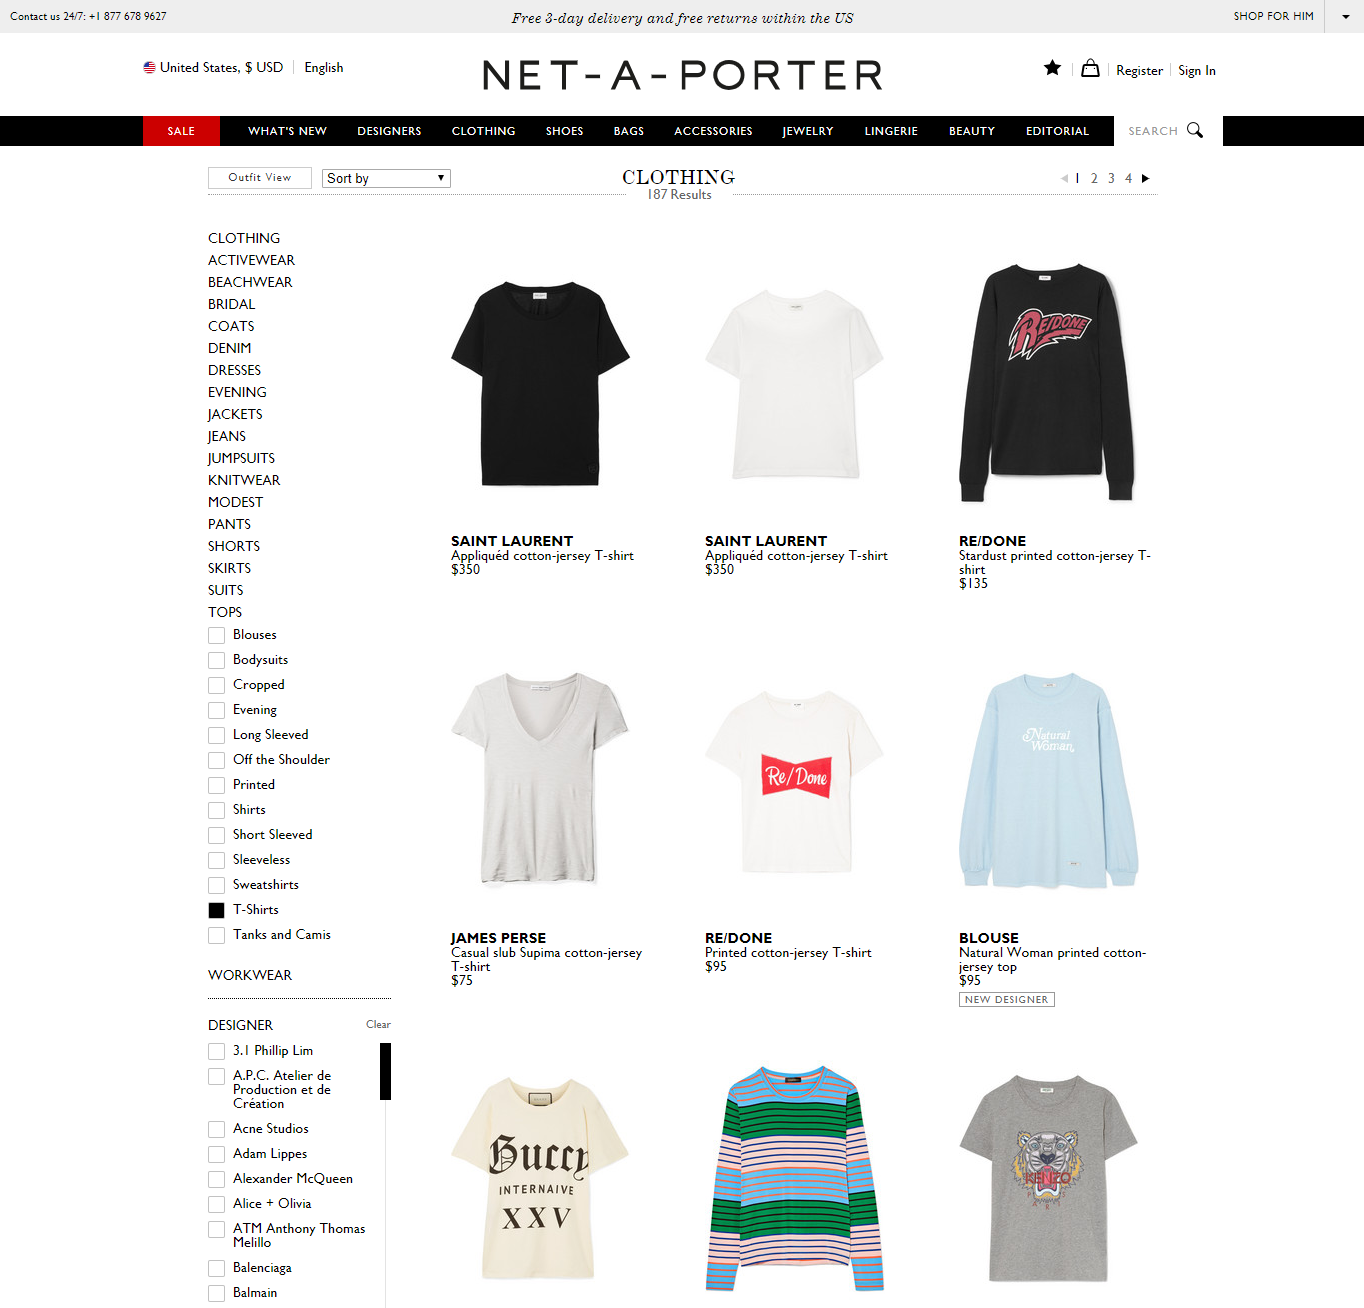
Source: Net-a-Porter
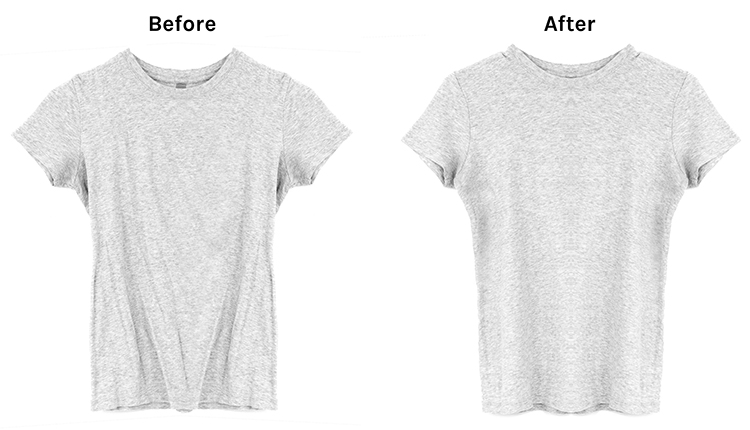
2. Iron out those wrinkles!
The next thing you want to consider is removing those wrinkles. Ironing or steaming your t-shirts before shooting is one of the most important steps to perform but is a step commonly forgotten.
This five-minute task will instantly take your photos from unprofessional and sloppy to professional and clean. Most importantly, make sure to iron out the sleeves of the t-shirt, neckline, the tag, and front to back to ensure there won’t be any wrinkles visible in your product photos.
It seems like it would be easier to edit them out later but trust me, it’s usually easier to prep the t-shirt properly before photographing it.
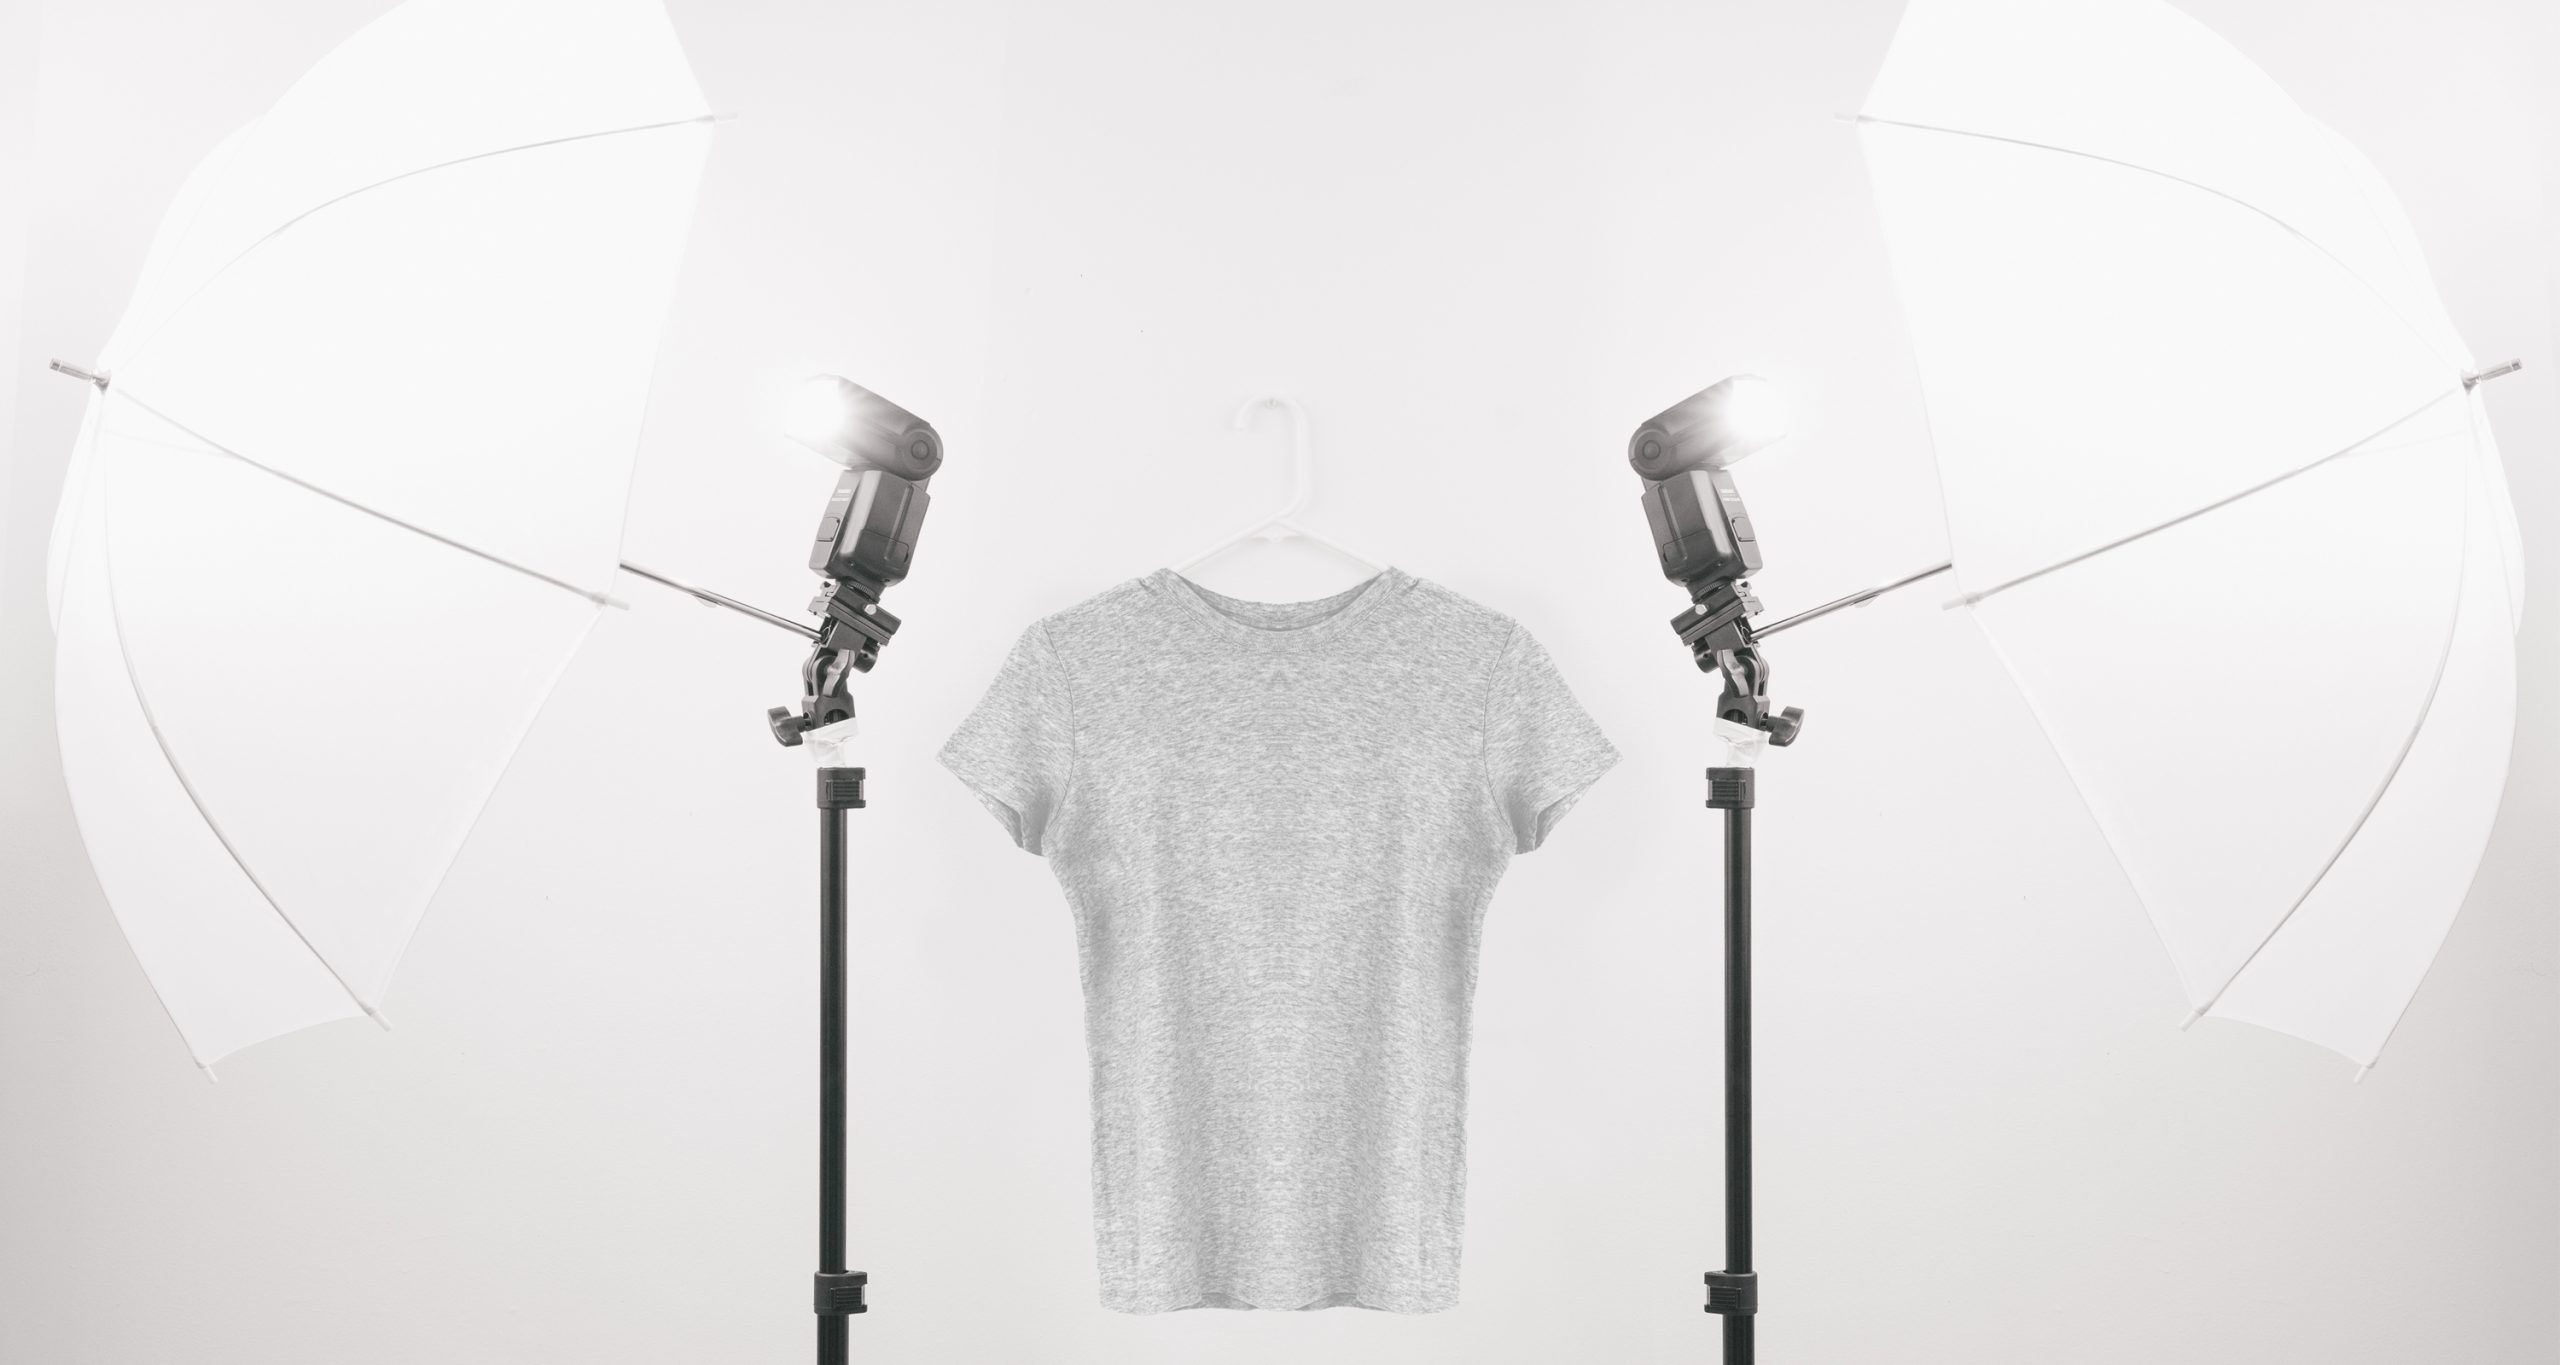
3. Achieving the perfect lighting
When you photograph a t-shirt, achieving the perfect lighting in a DIY studio can be simple with the correct lighting equipment or natural light from a window.
To achieve consistent lighting throughout your product photos, investing in professional studio lights is a must. To get started with a studio lighting kit you will need two strobe lights and a transmitter to set the lights off when you hit the shutter button. You will also need two white umbrellas to bounce the light back. Done correctly, this will avoid unnecessary shadows and help to accentuate the natural colors of your t-shirt.
A plain white wall as a background or a fabric/paper backdrop is needed as well to ensure all photos have a consistent background that is clean and even.
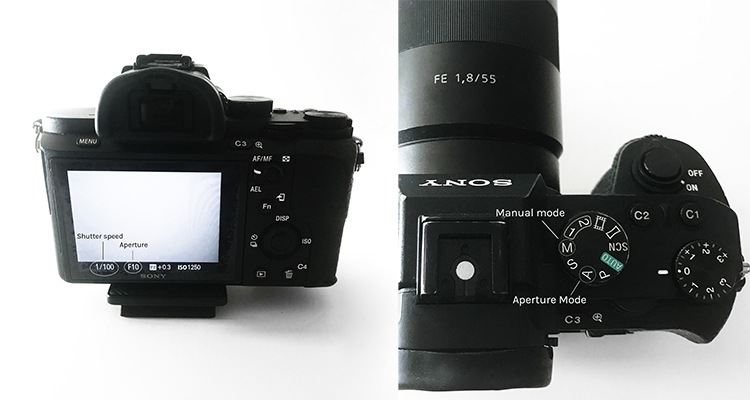
4. Get your camera settings right
There are some key steps to take your photos to the next level.
To get your camera settings right, I suggest to always shoot in manual mode. This will help you to control every aspect of your camera’s settings.
When choosing between shooting in jpeg or shooting in raw file format always go with raw if you have the option. Shooting your photos in raw format will help bring back highlights and reduce shadows easier than it would if you were to shoot your photos as a jpeg.
Shoot at a high f/stop. For clothing photography, stay between f/8 and f/11 to ensure every part of your t-shirt will be perfectly in focus.
For shutter speed (the amount of time your shutter is open) stay at around 1/125 when you photograph a t-shirt.
Keep your ISO between 400-800 depending on if you are using natural light or artificial light. When using artificial light I keep my ISO between 600-800. This will be best to reduce ‘noise’ for clothing photography.
If you would like to learn more details about camera settings, read our blog post specifically on aperture, ISO and shutter speed.
5. Close-up details of the t-shirt
Once you have prepped the garment and your camera is set up, you want to consider the photograph itself. Of course, you will take a photo of the front and the back of the t-shirt, but you will also want to capture all the details so your customer knows exactly what they are purchasing.
The photos on the product pages should give the potential customer a close-up feel of what the t-shirt looks like. Think about including photos of product and washing labels, any print designs, the stitching and the details of the fabric.
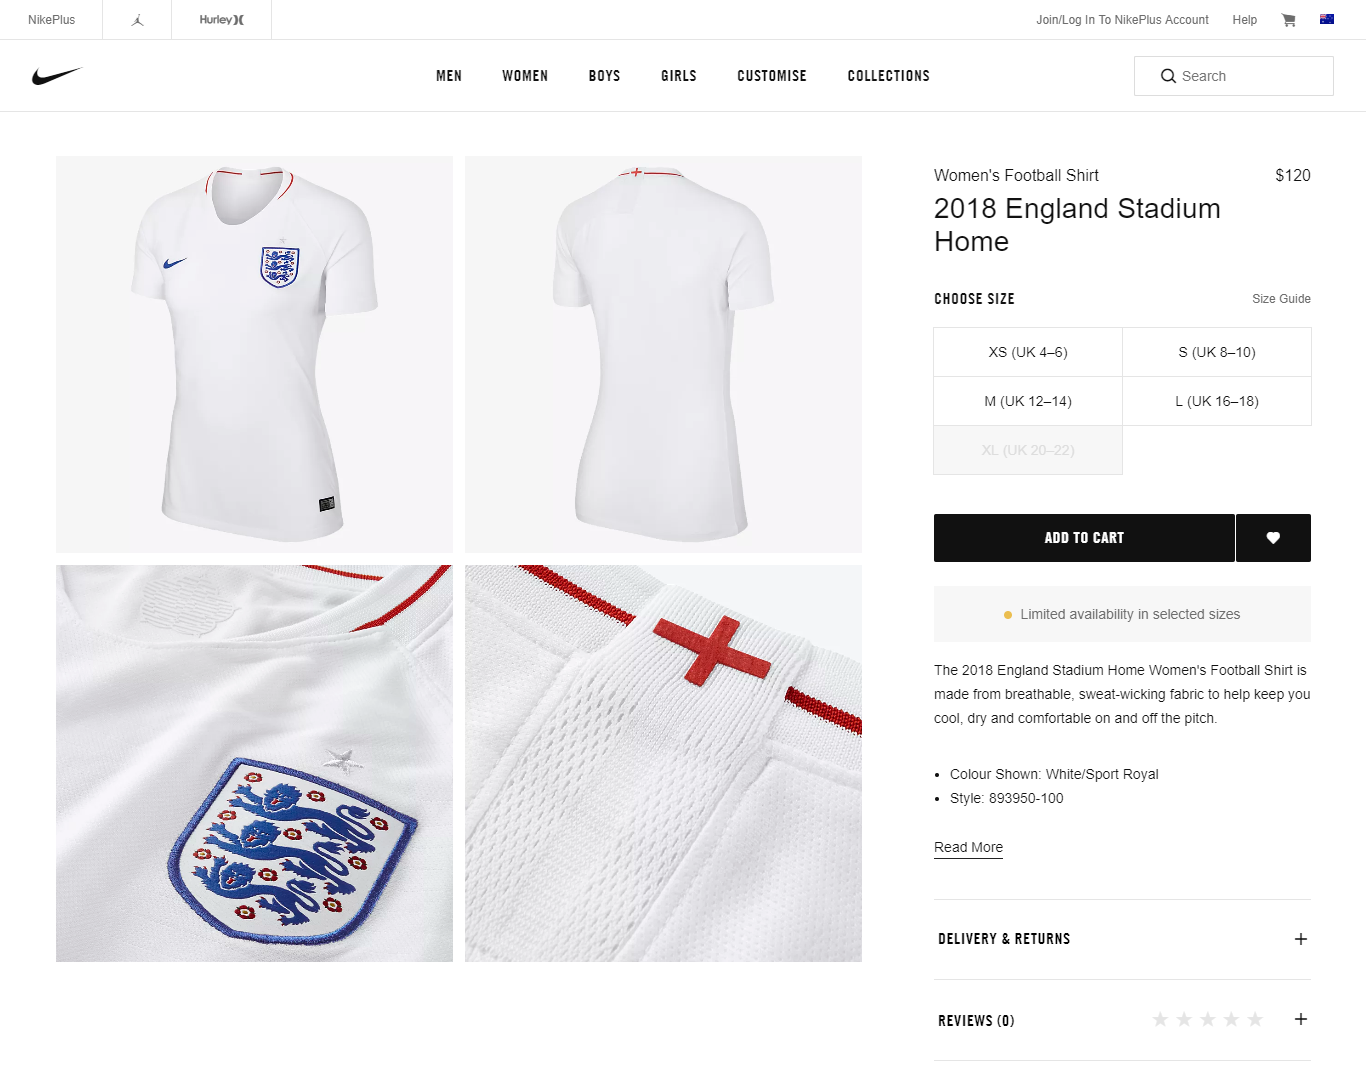
Source: Nike AU
Remember the more details the better. Why? Because it means less customer service questions for you and hopefully less returns because the photos will be a true representation of the product and what the customer expects.
Your camera must be perfectly in focus and the t-shirt wrinkle and lint free when shooting these types of photos because it’s all in the details!
Share on social: